 Winnipeg Grenadiers in Camp Shamshuipo HK Credits : http://stpaulslestweforget.wikispaces.com/
The IJA landed on Hong Kong island near North Point / Aldrich Bay on Dec 18 1941 and proceeded to move inland through the middle of the hilly island. The Winnipeg Grenadiers made a particularly heroic stand at the Wong Nai Chung Gap Police Station.
This is a rather interesting scenario in which part of the Canadian and part of the IJA forces started using simultaneous and hidden placement in an area in front of the Police Station. The scenario began with a round of Close Combat between forces that started in the same location, two of which the IJA could designate “hand to hand”. The IJA’s goal was to take the Police Station and to make sure that there were less than one squad equivalent of “good order” Canadians within a 4 hex area around the station, all within 5.5 turns.
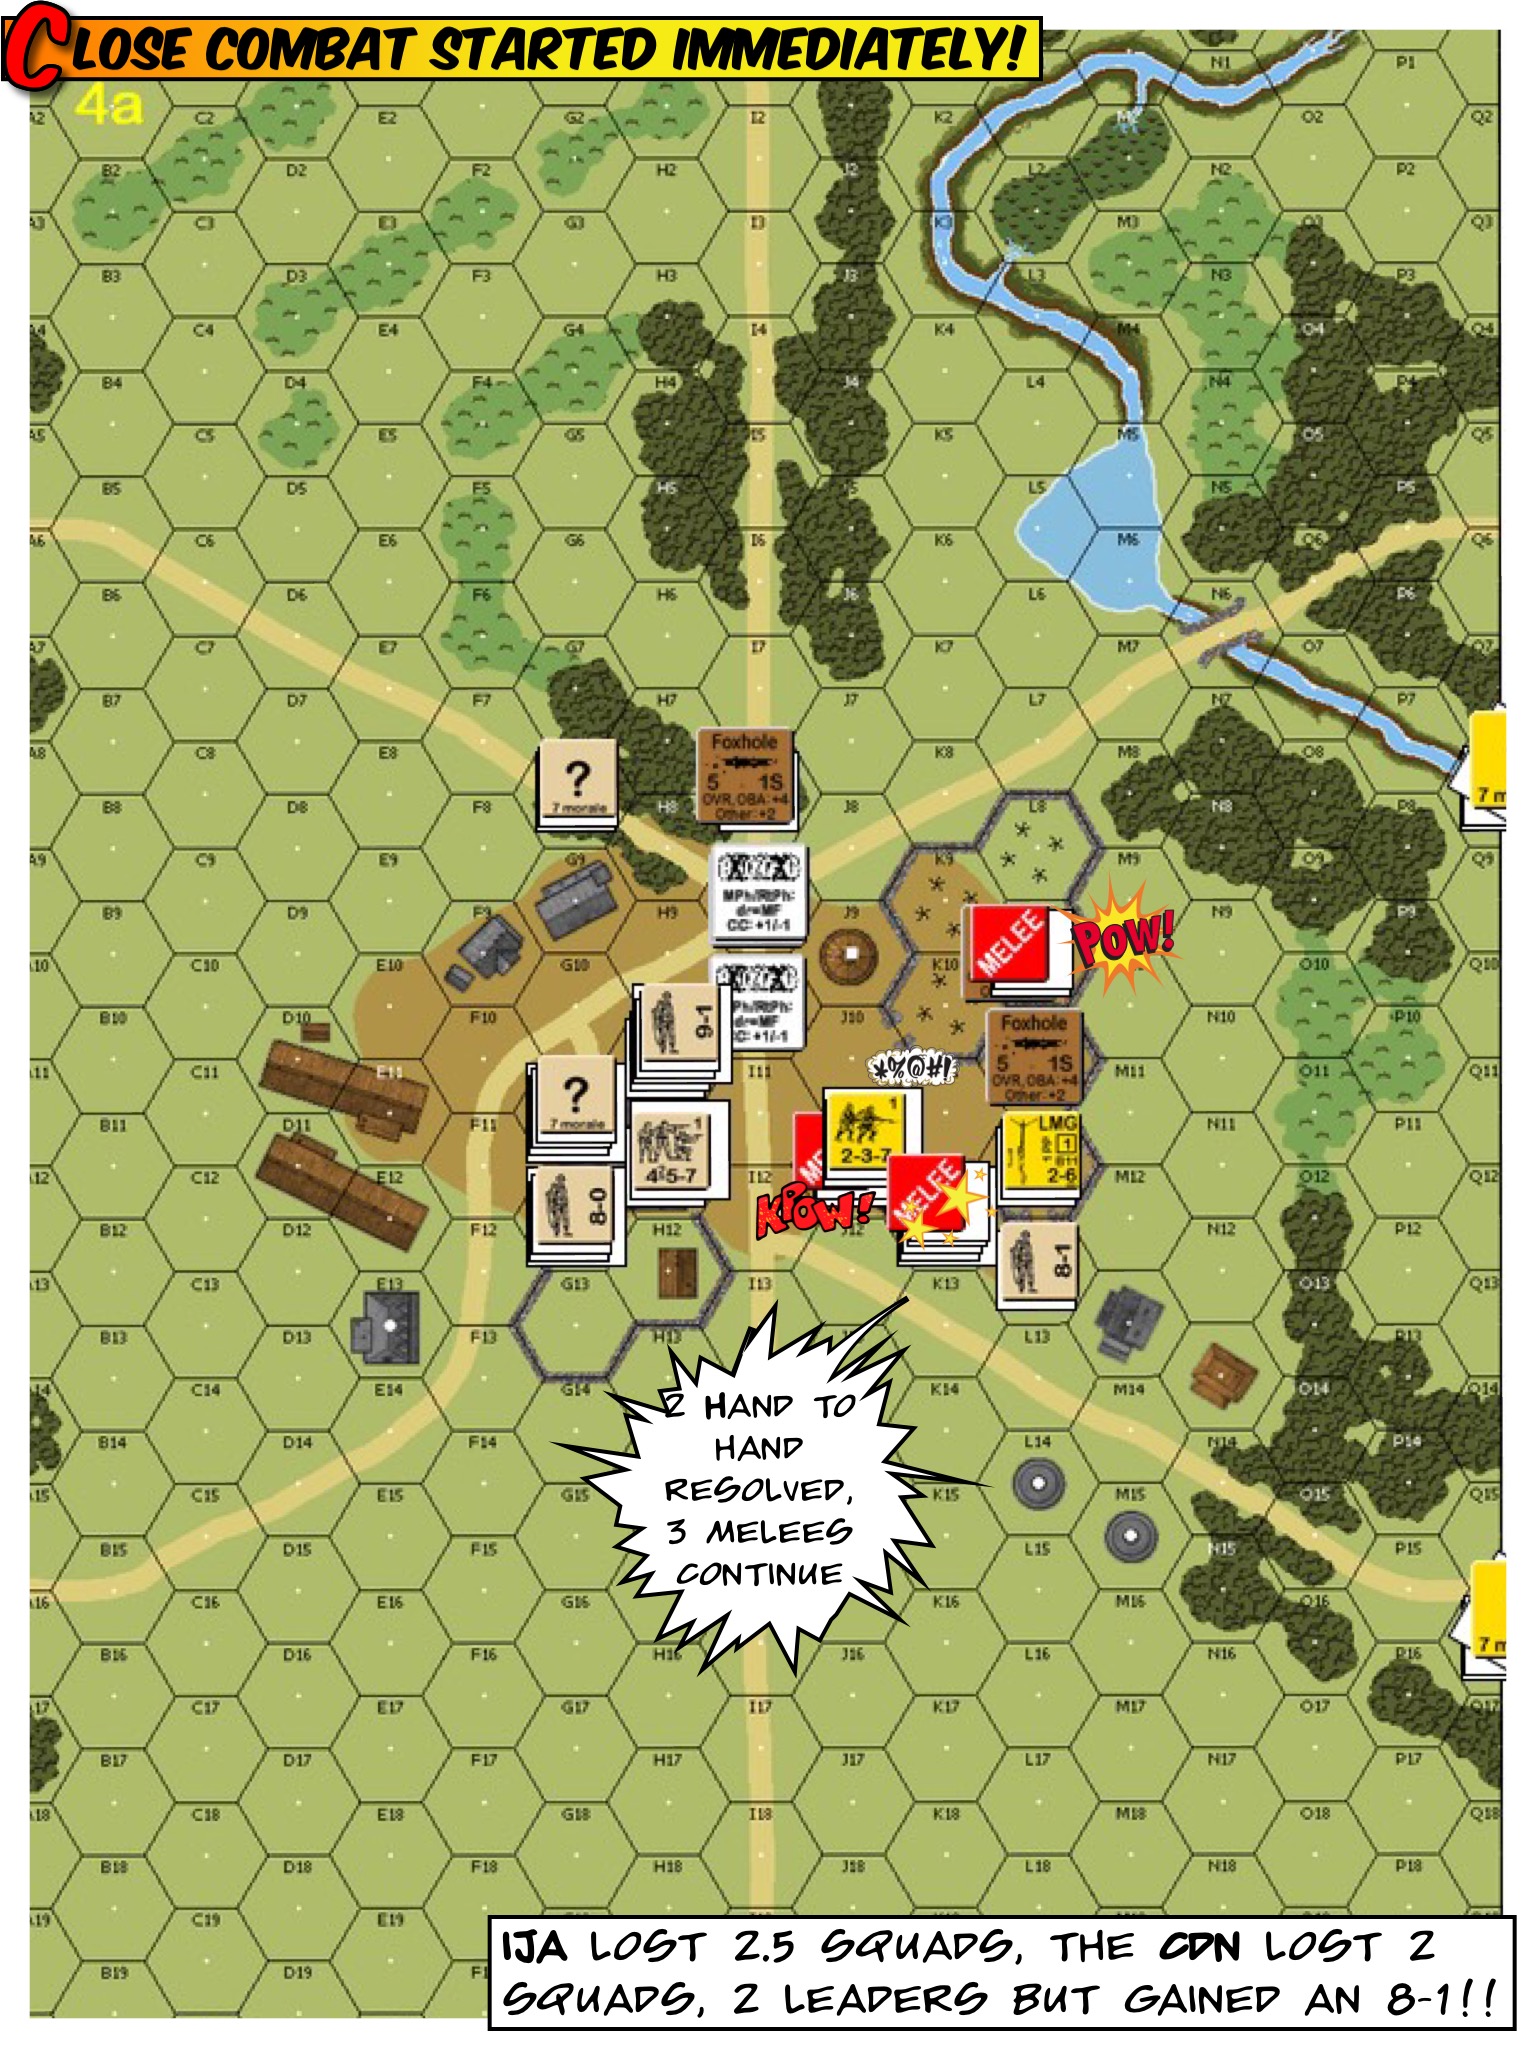
The game started off quite intriguingly as Carl Nogueira and I discovered where each other’s hidden forces were, where they “co-existed” and what the Close Combat odds were. I designated two of the melees as “hand to hand” and off we went. As expected, “HtH” battles both pretty much resulted in mutual annihilation. The Canadians lost 2 leaders in addition but an 8-1 rise to the fore in the heat of battle!
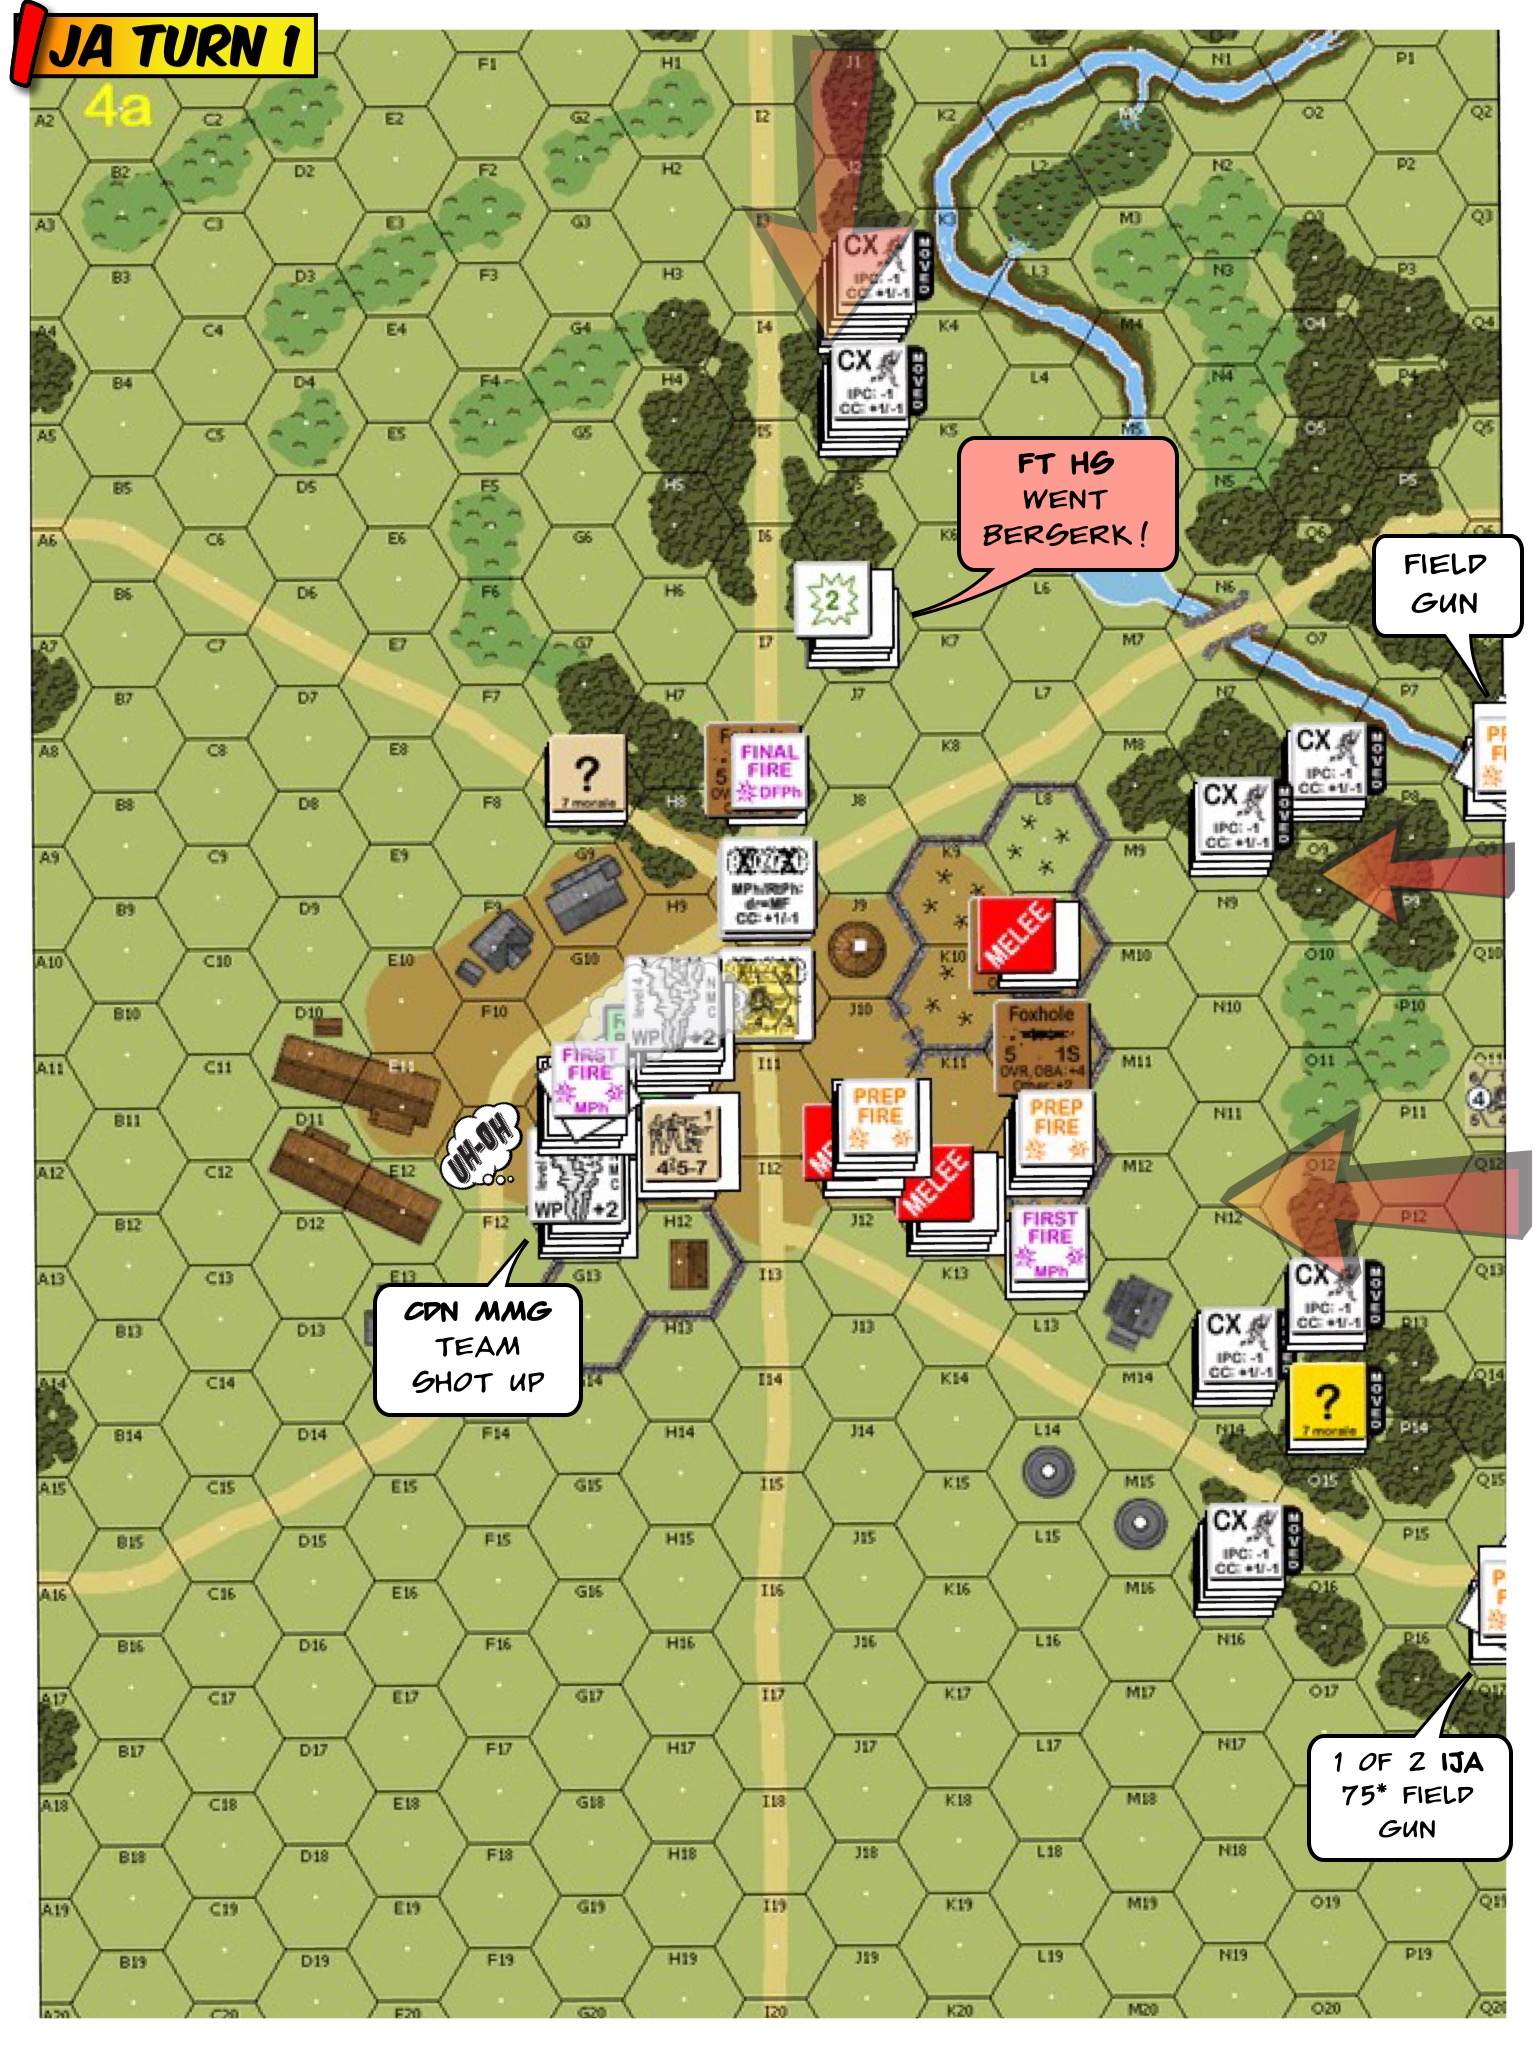
IJA Turn 1 : The IJA led off with their two offboard field guns putting Willie Pete on two corners of the rather well MG-equipped station. Unfortunately the flamethrower team got ID’d early and was shot at. Anxious that they’d never get to use their toy, they promptly went berserk.

IJA Turn 2 : The berserk FT team rigged up their toy and in their blind fury, must had bent a trigger or something. Flamethrower died without a shot. The IJAs discovered the Canadian pillbox cross the front of the Police Station. Fighting outside took quite a toll on both sides. The IJA hoped to hook around the back (left) of the police station as “Failure to Rout” seems to be the only way to clear the station of Canadians.

IJA Turn 3 : The IJA malf’d one of their two offboard guns and therefore proceeded to setup their mortars so as to provide smoke cover. To the top of the map, the IJA piled on top of the pillbox while trying to hook around the left. To the right, the IJA continued to navigate through the open field and hoped to advance though the pillbox laid fire lane.

IJA Turn 4 : The berserk HS charged across the street and into the station!! The maniacs survived fire that left 12 and 8 residuals, only to die later in Close Combat. Their buddies took advantage to the situation and walked around the left. The IJA on the right continued to hit the station in front. The newly established deathstar had a malf’d HMG, true to IJA weaponry of the period.

IJA Turn 5 : So the Berserker couldn’t stay in the station. The IJA opened with a DC HS that got shot out of existence when they advanced to the MG nest. On the other side of the station, poor Toshi was volunteered to be the “DC Hero of the Day”. They sent him to the front door, patted him on the back and stuffed a DC into his arms.
They couldn’t get the berserker either, they said.
Toshi popped out to the middle of the street and was promptly vaporised along with his DC.
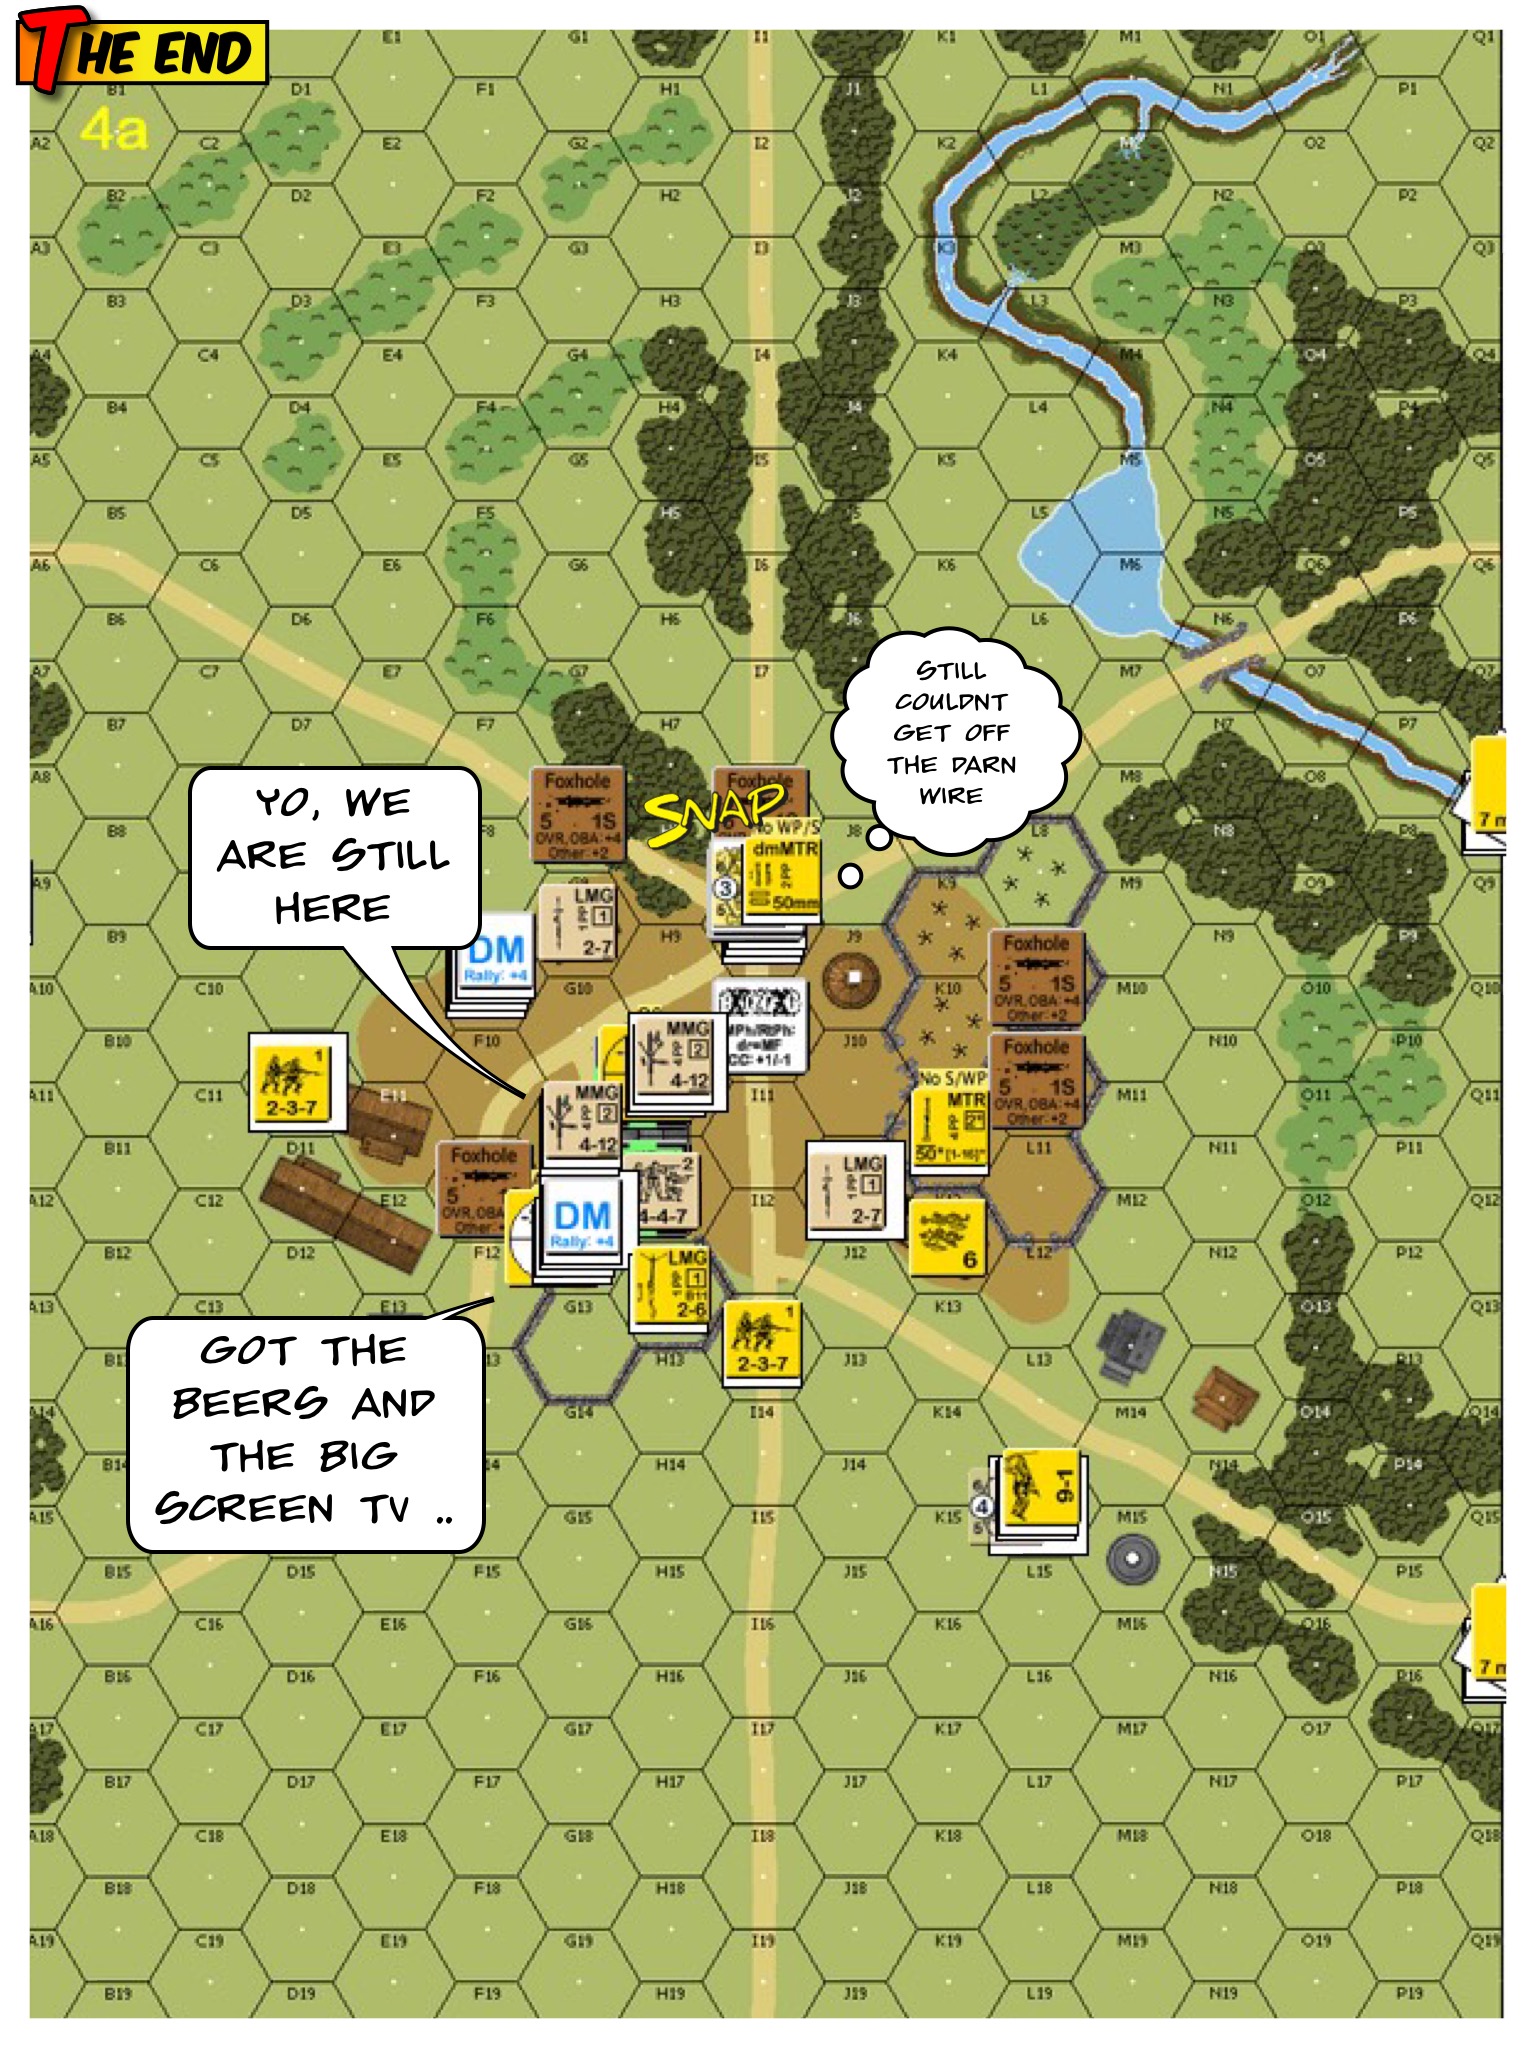
Canadian Turn 5 : With 1 Movement Phase left, there was not enough time for the IJA to clear the building (nor the 4 hex radius around it). The IJA conceded.
Thoughts :
- Forget about walking around the station. Turn 2 is probably when I should just walk STRAIGHT UP to the station and get part of the gang into the house.
- I used WP and smoke from the offboard guns. I should probably have used my knee more for additional cover.
- I should have protected my Flamethrower a lot better.
What else would you have done? Please comment.

Always been a bit concerned about these mutual hip zones ad I cant see how it can be well balanced..you seemed to have fun though which is the main thing.
I like the new font as well!!