FT SmR4 Passage of Lines After Action Report (AAR) Advanced Squad Leader scenario

FT SmR4 Passage of Lines After Action Report (AAR) Advanced Squad Leader scenario

Victory Conditions

The Marines started dispersed across the rice paddies and had to take at least 2 out of 3 HDP (“Hilltop Defensive Perimeters”) in 8.5 turns.  In retrospect I might have thought about HDP’s wrongly.  You don’t have to take all the HDP hexes to control a HDP.  You only have to take most of a HDP’s hexes to take the whole thing down.  

The Marines had a 81mm mortar and 2 HMGs (6-12) with a 9-2 posted on the hill on the top, giving 2 flat shots in most cases to the Korean positions.  They also had a 60mm OBA which would be useful later in the game.  The North Koreans had 2x82mm mortars, a 45L gun and a 76L gun.  They also had 2 HMGs, 1 MMG and 6 LMGs covering their digs.  The North Koreans win when they take 13 CVPs on KMC personnel or 40 CVP on UN personnel.  

After Action Report (AAR)

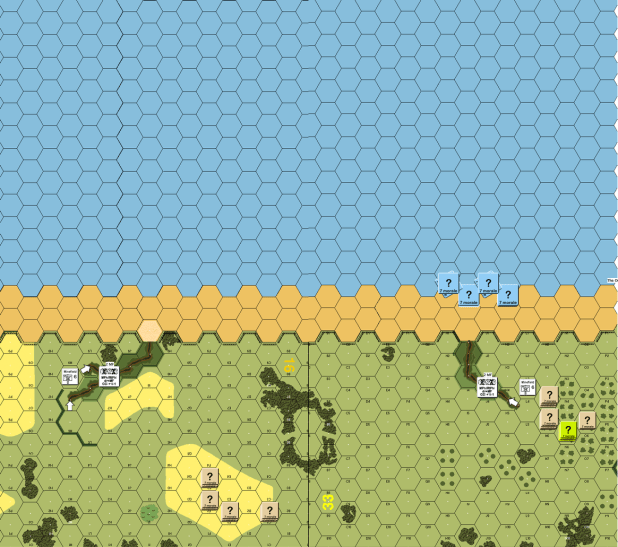
There was a group of South Korea Marines (1st Battalion, 1st Regiment) retreating at the start of the turn.  The Marines were all deployed into fireteams and started moving towards the North Koreans. The going was brutal.  Four fire teams and an 8-1 bought the farm early on.  I should have the South Koreans withdraw slower and put their firepower in use a bit more.  As it went, the North Koreans didn’t bother with the KMC at all.   

FT SmR4 Passage of Lines After Action Report (AAR) Advanced Squad Leader scenario

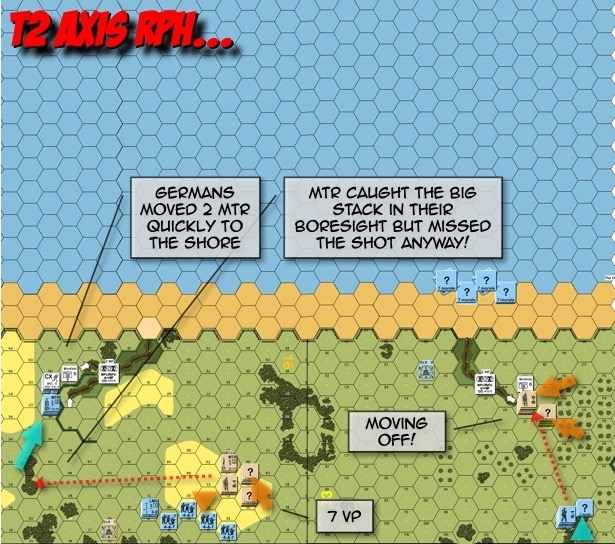
The North Koreans malfunctioned both of their 82 mm mortars!  The Marines kept their heads down and tried to move as quickly as possible through the rice paddies.  Regrettably, they drew a red chit on their first call to Artillery, and then they broke their radio!  Our 1-time OBA hit the 2nd HDF from the left but failed to do much.  

FT SmR4 Passage of Lines After Action Report (AAR) Advanced Squad Leader scenario

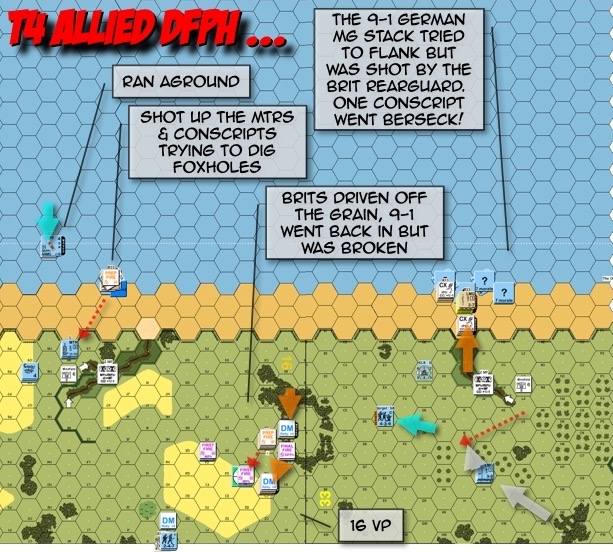
During US Turn 3, the Marines on the right were almost at the village.  You could almost hear a collective sigh of relief.  That was of course, if you could ignore the bloody curling scream from one of the fireteam that went berserk!  Folks on the left were in the open and running into 2 murderous HMGs.  Good thing both guns were down and one of the 82mm mortars went dead.  Not getting much cover from the HMGs, the fireteams spread out further to not be in the same CAs.  Anyone carrying an MMG was hit particularly hard.  Fireteams from both flanks were doing massive “amoeba” style Advance Fire groups as they move closer.  The big old US mortar on the hill first went out of WP and then out of action.  

FT SmR4 Passage of Lines After Action Report (AAR) Advanced Squad Leader scenario

US Turn 4 saw the pair of Pershings on.  There being 5 antitank mine factors, the Pershings decided to go down the same path.  The railroad takes 2 MP out of every hex, so the road got the vote.  Marines in the village were bringing their firepower to bear.  The Koreans tried to move forward to interdict them.  Some of the Korean units were moving right, so we hoped we could get the tank machine guns in place to hinder the use of that road.  The Marines on the left continued to get decimated in both our turn and the opponents.  The good news was that they were in fireteams, but the bad news was that they were getting taken out at an alarming speed.  

But hey, the 60mm OBA was back in play. 

FT SmR4 Passage of Lines After Action Report (AAR) Advanced Squad Leader scenario

The 60mm OBA failed to suppress 1 of the 2 HMGs in US Turn 5.  Fireteams on the left desperately tried to move to the houses on the far left corner, from which it might turn the Korean flank.  One of the Pershings malfunctioned its gun on the first shot and was now trying to move as close as it dared to so as the other Pershing could get a better shot.  The Marines on the right decided that it’s better to hit the HDP on the far right and shifted their people over.  The Koreans moved back up their hills.  The Korean mortar came to life and laid a smoke round on the path in front of the right most HDP to cover their retreat.  

FT SmR4 Passage of Lines After Action Report (AAR) Advanced Squad Leader scenario

When we reached North Korean Turn 7, one of the Pershings is already gone because of a broken main gun.  The remaining one popped off round after round and yet failed to make it’s 90L presence felt!  It did, however, cut off the 2 HDPs on the right from the left.  The 60mm OBA managed to bring down WP which helped a lot.  The wind picked up and made things even better!  The survivors on the left finally managed to get to the buildings on the far left and started to put up a more effective firefight.  At least now the Korean HMG fire was halved as one of them was blocked.  The Korean smoke round on the right that was now billowing down the road proved to be quite helpful.  Marines pushed towards the right most HDP, just in time to greet the Korean reinforcements.  

Two more US Movement phases to go.  We might well be out of time.

FT SmR4 Passage of Lines After Action Report (AAR) Advanced Squad Leader scenario

Last US turn!  The Koreans on the HDP on the left were broken but we didn’t have enough time to walk up.  The Koreans on the rightmost HDP were taking a beating but put up a “human wall” that’s going to take a couple more turns to kill.  The US conceded.  My opponent revealed all his mine placements in this last picture.  

FT SmR4 Passage of Lines After Action Report (AAR) Advanced Squad Leader scenario

The Marines needed more smoke rounds (than HE rounds) in order to be successful in this scenario.  I did the right thing by moving everyone in fireteams.  Some of the chaps on the right of course, recombined into squads when they reached the village.  I was hoping the Pershings with the malfunctioned gun could navigate through the road (trail break through the AT mines) and get on the hill where we would promptly turn left and get around the back between the 2 HDPs on the right.  That was not to be when the leading Pershing X’d out its repair.  My opponent is a very tough one but I feel I am finally getting a glimpse into the proper way to play the Marines in this LFT Fight for Seoul package (we already played through all the Fight for Seoul scenarios, and are now doing the Smith’s Ridge ones.) 

Why you should go to an ASL tournament

I notice there’s been quite a number of “new” players who are really “returnees” from Squad Leader or ASL decades ago. Invariably we talk about how they should join a tournament at least once, since tournaments are great places to learn and to meet the community that accelerates your learning and your enjoyment of the game exponentially. These folks do worry about their level of ASL knowledge and whether they will fit into an ASL community with characters who’s been around for decades. Before joining my first tournaments in 2014, I worried about putting up the expense only to suffer some form of hostility because I was (am) not up to par.

“The Malaya Madman” – Perry Cocke

This is Von Marwitz’s perspective, carried with his permission:

Whether new or coming back to the hobby, I would not be worried about not being good enough.

Back in the days, before I attended my first tournament, I had played exactly one single, very small 4.5 Turn scenario of ASL against an opponent. Besides that, all I had done was playing solitaire and teaching the game to myself – with all that entails.

I believe that even very fast players acknowledge, that under such circumstances nothing else than slow play can be expected. My personal experience regarding my treatment back then and by observation later is, that almost all experienced guys (fast or slow) are willing and open to treat such a game more as a tutorial than a competitive game. Needless to say, I did not win a single scenario during my first tournament but yet I had so much fun, that I am still sticking to ASL 25 years later.

So, this goes out to any newbies out here, to those returning to the hobby, and to those who have never attended a tournament:

Don’t worry about not being good enough or not fast enough. Take the dive and give attending a tournament a try. Altogether, the vast majority of players (of all playing styles) I have met, are a jolly bunch and welcoming.

von Marwitz

(von Marwitz is associated with Grenadier 2023, which is going to be held in Gelsenkirchen Germany, 2 Nov-5 Nov)

Related Article: “Journey to a Tourney, Part 1: Decisions”

DB172 Not Digging Potatos After Action Report (AAR) Advanced Squad Leader scenario

DB172 Not Digging Potatos After Action Report (AAR) Advanced Squad Leader scenario

Victory Conditions

I am not sure why but it feels like it’s been a while since I last played a tournament sized scenario.  This 4.5 turn scenario designed by Jeffrey D Myers is real nice one.  The Americans win if there are no Good Order German MMC left below the red line on the map, unless the Germans amassed 8 CVPs.  

After Action Report (AAR)


DB172 Not Digging Potatos After Action Report (AAR) Advanced Squad Leader scenario

The Germans setup in fox holes where they please along with 8 dummies. We started off in the middle of the field and decided to rush up to the hedge immediately.  The potato field was strangely quiet.  The plan was to hit the mass on the left, not let the Germans congregate and to not play house to house down the column of buildings on the right.  Nothing moved.  Surely there must be a real unit in the house in the middle, right?  If there was one, they would find it hard to leave.  

DB172 Not Digging Potatos After Action Report (AAR) Advanced Squad Leader scenario

Turn 2 – we rushed his positions on the left, guns or no guns.  The fact that most of his guys were at the dirt level behind hedges helped.  Our hero stepped forth looking to start a fight and was promptly vaporised.  Heros never get to grow old!  In the middle we cleared the hedges for us to mount a final assault from.  On the right, we came at the FH from its flank and sure enough, guys started shooting from it.  There’s a concealed stack that was advancing down the side, it’s probably not real, we would ignore it for now.

DB172 Not Digging Potatos After Action Report (AAR) Advanced Squad Leader scenario

On Turn 3 we were all over the left flank of the German position and were looking behind the group of FH’s on the right.  I failed to shoot at a broken German stack who then managed to rally!  A squad in the center popped over the hedge and got shot at by folks in FHs.  I was hoping the Germans on the right would unconceal and play as well but no.  The Baz team on the right fired off a lucky shot that vaporised a squad of Germans.  The other para squad broke off and headed towards the graveyard in front of the right-side FH’s.  

DB172 Not Digging Potatos After Action Report (AAR) Advanced Squad Leader scenario

It’s Turn 4, this was the turn to setup up for the last MPh.  Whichever squad could be deployed were deployed.  We forced the German brokies on the left into the woods.  In the middle, we put that MMG squad and the 9-1 to OpFire and bum rushed the FHs, forcing them to unconceal.  Some of my HS broke and two of them would be taken prisoners, pushing my CVP to 7 at the end of this turn.  On the far right, the Baz team took out the creeping concealed stack while the para squad ran off towards the FHs! DB172 Not Digging Potatos After Action Report (AAR) Advanced Squad Leader scenario

There were only 2 Good Order German HS’s in those FHs but yet I was 1 CVP away from losing!  We opened with some Prep Fire.  We hoped to break the HS at the back and tie the other one in CC.  That didn’t work unfortunately, the HS at the back was only pinned.  Hope’s not lost though since we planned to run two units out from the Woods on the left and jump into CC (grey dotted lines).  A HS advanced into the open to the other German HS.  The Germans fired and KIA’d that para HS.  The Germans got their 8 CVPs and the American paras lost!  

This is a very fast paced scenario that offers multiple venues to both sides.  I quite like the design (by Jeffrey D Meyers) and I suspect my opponent, someone’s who’s under 100 games enjoyed it too.  

Fumbling in the Night

Photo by Raul Tskrialashvili on UnsplashI have been playing a lot of Night scenarios (especially) lately.  Yet, I was thoroughly thrashed again in my last game, you wouldn’t bear to see the AAR.  Instead, I decided to write down my thoughts so as to do better next time!

  • You can generally expect Attackers to follow Gullies, Streams, Roads, the edges of Illuminated locations etc.  Until you let them see an unconcealed or a broken unit, either within NVR (Night Vision Range) or Illuminated.  The moving unit will otherwise likely need to roll for Straying.  
  • Whether to try for Star Shells is a tricky business.  The upsides are:
    • you can shoot Illuminated units and you might lose some of your “No Move” counters,
    • you can prevent them from moving Cloaked/ Concealed inside illuminated areas
    • you can “blind” KEU so they can’t see you (except your Gun Flashes)
    • and you can prevent KEU from gaining Concealment.  
  • The downside is that:
    • you might blind your own units,
    • allow enemy units to shoot you without losing Concealment,
    • you provide a nice edge around which they can move without straying,
    • you illuminate your own units for them to put more accurate Method 2 Star Shells on you (as opposed to Method 3).  
  • If you think since KEU’s are within NVR and you can do without Star Shells, think again.  Having no Illumination allows Cloaked/ Concealed units to come right up to you without losing cover.  They can Ambush you on a difference of 2 in the dark (along with the -2 Concealed modifier).    Method 1 Star Shell is generally a great thing.
  • You can target Gun Flashes for a Method 2 Star Shell.  That generally means you should keep some Leaders (hexes) from doing Star Shells at the start of your opponent’s Movement Phase.  Don’t forget you can target your own Gun Flash – ie your unit some distance away First Fired, your Leader can Method 2 on that Gun Flash so everyone else can fire at the same target as well.
  • PRC should be aware that because of NVR differences, an enemy unit can shoot a vehicle at 1.5 the NVR (or 2x vs tracked vehicles) without the PRC/vehicle being able to “see” it back.
  • Jungles & Bamboo are great: they can’t be Illuminated (until someone fish out a Trip Flare).  So they can do a Method 1 on themselves and shoot OUT of a Jungle/Bamboo hex without losing Concealment.   All good unless the KEU is within NVR and also in Jungle/Bamboo.  
  • As an attacker, stay with Cloaking for as long as possible.  You can break off Concealed units from Cloaked units but those with Cloaking gets 6 MPs and no penalties moving into Concealment Terrain (and in Korea, Steep Hills are Concealment Terrain).  

What are your thoughts? Practises? Tactics?

FT SmR2 Fenton’s Foe After Action Report (AAR) Advanced Squad Leader scenario

FT SmR2 Fenton’s Foe After Action Report (AAR) Advanced Squad Leader scenario

Victory Conditions

The USMC wins at game end if they control N28, which is right were the Hill 105-S outpost was, together with 2 of the 3 victory locations on the ridge all the way down at the bottom.  The Marines had to plough through a rice paddy and then move through open ground to even have a fight.  The NK sits on Level 5 hills that sees almost anywhere on the map.  The Marines needed to coordinate a few elements to help themselves out: 3 x Turn 1 Prep Fire 81mm attacks, a pre-registered 100mm OBA from Turn 3, a VMF-212 flight that comes either starting Turn 1 or Turn 3, and elements of C company that might show up on Turn 4, 5 or 6 (with each latter turn entering closer down the bottom of the map).  I decided on a WP barrage for my 100mm OBA and made the fatal mistake of pre-registering a Level 2 hex which I wouldn’t see.  So the intended cover for Companies A & B never materialised.  I decided on a VMF-212 starting from Turn 3 because I think at least some Marines would be within 16 hexes of the NK weapons on the ridge.  I picked Group 2 for Company C reinforcements because it had the most bodies.  I expected Company C to had to take the ridge in the 5 MPh’s they had.  Having them come up the flank on Turn 5 should also help Company A & B out as they crossed Level 1 open ground.  

After Action Report (AAR)

Advanced Squad Leader ASL AAR SmR02 Fenton's Foe

The 3x 81mm attacks did nothing apart from kicking up dust.  I deployed about half of the Company A & B into fire teams and relied on the other half for smoke and fire support against Hill 105-S.  I chose to start in the rice paddies behind the the Paddy Berm.  In retrospect, I should have started more towards the left.  The rice paddies ate up too much time here. There were two lines on the map.  The top line marked where, when the Marines crossed, the NK’s at Hill 105-S could withdraw.  The bottom (light blue) line marked where, when the Marines crossed, VMF-212 went home.  The quickest Marines waited a Turn before crossing the top line so the NK couldn’t withdraw until the Marines could cross in force.  The NK 82 MTR and their 45LL AT Gun started shooting right away.  The NK’s had apparently picked Group 1 and so there were one MMG out there aside from the .50 cal they were using.  Some of the NK’s from the ridge came forward to interdict us in the open.

FT SmR1 Fenton's Foe After Action Report (AAR) Advanced Squad Leader scenario

Turn 4 saw the .50 cal taken off Hill 105-S by a commissar and a crew.  We got on Hill 105-S and out heads shot off by the MTR and the AT Gun.  The MMG joined in as well, complete with a -1 leader.  Our radio guy was wounded.  He ended up sitting behind the berm and wouldn’t recover.  We decided to split off into more fire teams and spread our advances out into a wide front.  

FT SmR1 Fenton's Foe After Action Report (AAR) Advanced Squad Leader scenario

We broke out into Level 1 open ground!  We sent another leader to grab the radio from the wounded guy.  VMF-212 got on board but was woefully ineffective.  Here I made another fatal mistake.  I completely forgot to enter Company C during my MPh.  So they entered in the Advance Phase. We lost a turn on these people, that’s going to cost us.  

FT SmR1 Fenton's Foe After Action Report (AAR) Advanced Squad Leader scenario

Company C pushed up the ridge.  Everyone caught a lucky break when both the 82 MTR and the 45LL AT Gun malfunctioned!  A point attack from VMF-212 broke the .50 cal crew as well (but it also made the commissar heroic!).  We continued to spill into open ground after the retreating NK forces.  Hopefully we could keep these folks (esp the .50 cal) from helping out the ridge defenses!

FT SmR1 Fenton's Foe After Action Report (AAR) Advanced Squad Leader scenario

Our 2nd radio guy decided to forgo the pre-registered hex.  He was wounded as well but not before he got a spotting round off.  The AT Gun X’d out but the MTR was back in action, swung to the left and shooting at Company C.  There’s a party at the stone factory looking to interdict Company A & B over the last bit of open ground.  VMF-212 went home since Company C crossed the blue line.  NK’s were shifting over to the left.  

FT SmR1 Fenton's Foe After Action Report (AAR) Advanced Squad Leader scenario

Our gallant radio guy corrected our 100mm HE onto the MTR before he was killed by a sniper.  USMC fire teams were scrambling up the ridge in two directions.  We put 2 bazooka teams outside the stone factory to bug the interdictors a little.  It didn’t appear at this point that the NK HMG team would be able help their comrades on the ridge.  The fact that the NK never used Flak Alley told us there were minefields out there.  Well, I was out of time, there’s only so much you could be scared of.  

FT SmR1 Fenton's Foe After Action Report (AAR) Advanced Squad Leader scenario

After our final prep fire it appeared that whilst the USMC might be able to get 1 VC hex (left) in CC, we didn’t have the time to get the second (middle).  NK’s showed me afterwards that they had real units defending the approach as well.  Had we two more turns (one from entering Company C on time and one from not starting so many in the rice paddies), we would have a better chance.  We also failed to bring the 81mm MTR hits and the pre-registered 100mm OBA to bear as well.  Planes were great at discouraging movement but I never had much luck with them when I wanted to hit something.  This is an intricate scenario and I enjoyed the opportunity to coordinate different elements.  I am not sure it’s as fun playing the NK’s though.  

BoF8 Sting of the Italian Hornet – Advanced Squad Leader AAR

BoF8 Sting of the Italian Hornet – Advanced Squad Leader AAR

BoF8 Sting of the Italian Hornet Scenario Analysis & Setup

The Victory Conditions (“VC”) for the Canadians (Edmonton Regiment, 1st Canadian Infantry Division):

  • Control buildings 10Z6 & 10oDD3, which are the two big 4-hex and 5-hex buildings (factories) on the left half of the map
  • Control 7 or more other stone buildings on board 10 (left half of the map)

The Victory Conditions call for “Control”, hence Mop Up should come in useful and therefore I should avoid No Quarters and take prisoners where possible. Besides, Prisoner Interrogation is in effect, which would be useful considering the AP Minefields and the two Fortified Building Locations in play.

The Canadian right offers more VC buildings and is less open. It also offers more rally terrain for the attackers. The Canadian left is more open, has more ground to cover and has fewer VC buildings. However, it offers a route to the flank and the side of the VC buildings on the right. There’s really only one logical spot for the OBA Observer, which is on the Level 3 Steeple on the right half of the map. I would put a heavier force on the left to hook around the closest factory on the right, as I didn’t have an abundance of time to take the 7 other stone buildings. Besides, we had Italian reinforcements coming in on Turn 4.

Italian AFVs are all Open Tops, which make them fine OBA targets. The 90L Semovente M41M da 90/53 has a frightening TK 20 vs my best armour of 8. However, it’s an SPG with no turret and it’s a circled B⑨ unless the Italians swap one of their SMV L40 47/32 for an ammo vehicle. The Italians also get two 75 ART guns with TK 10 (IFT 12) and s8. I would need to sniff them out with the Stuart Recce’s. Otherwise, the Italian infantry doesn’t have a real numerical advantage, but has an atrocious ELR1.  (“Take them all prisoners!!!”).

The Canadians have three Shermans which are solid as long as they don’t get flank shots. Their infantry has a morale of 8 and plenty of Smoke to tackle the Open Ground. The Stuart Recce’s would mill about, interdict, cut rout paths, chuck vehicle Smoke Grenades, encircle & overrun (AAMG 8 = 16 OVR FP!).

(Above: Semovente da 90/53, graphic credits Tank Encyclopedia)

BoF8 Sting of the Italian Hornet After Action Report (AAR)

BoF8 Sting of the Italian Hornet - Advanced Squad Leader AAR

The game opened with our Canadians laying a bit of Smoke on the right and advancing amidst the diagonal set of Woods. An Italian 9-1 led “Death Star” opened up, stunned a Sherman and broke the HS passenger in a Stuart Recce! The force on the left fared better. A Sherman pushed down the left until a Cannone da 75/27 popped up and took a shot. The shot bounced off and the Sherman stopped to the side of the 75 ART. The Stuart Recce saw that, sped past and stopped on the left flank near the Woods. One lucky squad found a minefield. The rest moved without too much drama. Our sniper went to work and stunned a SMV L40 da 47/32 at the back. The 90L took potshots at the Steeple where my OBA Observer was. As a final touch, another of our Shermans was STUNNED when its commander lost his head when another Italian “Death Star” opened up! This one’s going home.

BoF8 Sting of the Italian Hornet - Advanced Squad Leader AAR

We dropped Harassing Fire behind the Italians front line. The 80mm OBA translates to 4FP, but that Shocked the 90L. It also started flames in one of the building hexes. On the right, the infantry routed the gun crew and got right in front of the right VC factory. The Sherman parked itself in bypass to cover the area behind the left VC factory. Canadians on the right walked into the other 75 ART and broke under fire, the Stuart Recce OVR the Gun and it malf’d in FPF. The Stuart on the right went over in support and now we got around to the back of the right VC building on the far side as well. The Italian inside resisted with fierce firepower and they sent their L40 in there for good measure.  The leading Canadian 9-1 was KIA’d and troops broken when they tried to break in!

BoF8 Sting of the Italian Hornet - Advanced Squad Leader AAR

We continued to push amidst strong Italian resistance on the left, but their brokies were stacking up as well. We made an end run around the left VC factory to the row house beyond. Unfortunately, there’s a stack of Concealed defenders in the stone building in the middle of the field that we simply couldn’t get at. On the right, we tried to push back into the VC factory. We slid a PIAT into the right VC factory next to the bogged L40 and toasted it in Advance Fire! Well, it’s good and bad ‘cause now it channelled our lines of attack to the defenders. We were running out of Good Order troops on the right, but we pushed a Stuart Recce deeper to keep the pressure on the retreating Italians in the buildings beyond.

That stunned 90L? It’s UK (‘Unknown’) and would be dead afterwards.

BoF8 Sting of the Italian Hornet - Advanced Squad Leader AAR

It’s Turn 4 (of 6.5) and we still hadn’t got either of the VC factories! The Italian pushed us out again (leaving our PIAT & MMG) of the right VC factory. We put the OBA down to keep the Italians at bay. We had folks pushing beyond into the buildings behind, but good order manpower was wearing thin. On the left, we made slow progress into the left VC factory. An intrepid HS drew the Ammo vehicle while a Sherman rounded the corner and appeared on its left.

BoF8 Sting of the Italian Hornet - Advanced Squad Leader AAR

A lucky WP CH from a hulldowned Sherman finally blew the top off the Concealed stack of defenders in the stone building in the middle of the field! The right VC factory caught fire from the burning L40 and the Italian defenders moved out of the factory. They now threaten the Canadian attackers on the left flank. A Stuart Recce went behind the defenders in the group of buildings on the right just to harass. In reality, the lone Canadian 8-0 leader needed to run back to rally the boys. On the left, the Italian reinforcements got onboard. The Canadians were about to dash across the street from the rowhouse to capture a stack of Italian brokies. An 8-1 leader advanced into the street and took the WP’d brokies prisoners as well (most of them anyway). A Sherman moved forth and killed the Ammo vehicle and popped to the back row to threatening the Italian Renault on its left.

BoF8 Sting of the Italian Hornet - Advanced Squad Leader AAR

It’s Italian Turn 5, and we killed or captured most of the Italian OB. The Hero-led stack of defenders from the right VC factory dashed across to come up behind the Canadians attacking the left VC factory. Unfortunately, the Sherman broke everyone and wounded the Hero. Seeing that their Renault was about to be blown up the lone squad in the left VC factory was about to be dealt with and the Canadians having two Movement Phases left, the Italians conceded.

FT SmR1 Mired – Advanced Squad Leader AAR

FT SmR1 Mired – Advanced Squad Leader AAR

ASL Scenario Setup

The KPA (North Koreans) wins immediately by amassing more than 30 CVP (56% of KMC CVPs / 46CVP ground forces + 8 CVP air support).

The KPA can also win at game end if they can stop the Korean Marine Corps (South Koreans) from

  • Controlling 1 or more of 3 Hilltop Defensive Perimeters (“HDP”), which are the hilltop areas outlined in color. You should see 4 outlined hilltops on the map but the 2 on the left are considered the same area.
  • Exiting over 18 Exit VPs down the bottom edge. The KMC carries 46 CVPs, which means we need to kill, break or delay 28 CVPs or 61% of the KMC OB.
  • Inflict over 30 CVP on the KPA. The KPA has 44 CVP, so 32% has to survive.

The KPA has more long-range weapons than the KMC. They have a small window (probably 3 turns) to inflict as much casualties as possible on the KMC from the start to when the KMC Air Support / OBA comes into play and when the infantry finally comes into range. The KMC has an OBA with an Offboard Observer (auto Radio Contact) at Level 5 and 4 planes with rockets, bombs & 12FP MGs for 4 turns out of 8.5. Any sort of KPA movement won’t be possible for half of the game. We expect to have to fight in place. All Fortifications would be on HDPs.

Given these factors, the KPA’s best bet seemed to be to amass all the range weapons onto the HDP Fortifications. Their goal would be to deplete the KMC numbers as quickly as possible before US Airpower and SW malfunctions wipe out their toys. They would also need to keep the KMC outside of 5 hexes for as long as possible by keeping them off Open Ground (and in Rice Paddies) where they would always be mindful of the Infiltration (HIP’d) units.

If the KMC gets to a position where it can exit 18 VPs down the bottom edge, chances are it will have captured at least one of the HDPs.

They can either hold till Game End or push ahead and exit VPs. Either way, they might continue to lose CVPs (especially if the KPA OBA remains operational). There might be KPA counterattacks, although the KMC will be in Fortifications this time. All considerations seem to point towards a HDP focused setup that puts all the KPA firepower upfront and in Fortifications since it won’t be a fighting withdrawal.

Advanced Squad Leader AAR

FT SmR1 Mired After Action Report (AAR) Advanced Squad Leader scenario

So the KPA put all the range weapons up on HDPs. The easiest HDP to take is the second (2 hex one) from the left. It has the best covered approach, and I didn’t cover that as well as I should. Our Infiltration teams were HIP’d very close to our positions. Given the lack of manpower, to use them as speed bumps would be a waste. At least this way, the KMC would look for HIP units around the rice paddies longer. Most of our Boresights were not on the elevated road/ rail, as we did not expect the KMC to use them. Our Observer was the leader from the Infiltration units so he’s HIP’d on the leftmost HDP with limited LOS to the village and to the “easy” HDP. We put our 45LL ROF 3 Gun on the right flank behind the Sparse Woods, expecting serious Pointblank shots. Unfortunately, I misunderstood Sparse Woods and thought I had LOS to the Open Ground beyond where I put its BS (illusions of ITT CH abound). That was not to be. An Infiltrating unit with an LMG held our left flank.

The KMC moved forward in a mass of HSs, putting most of its weight on the covered approach on my right. I immediately saw the errors in my ways, but there’s no second chance in ASL. Our range weapons started shooting almost immediately. It’s now or our peace would forever be held upon us.

FT SmR1 Mired After Action Report (AAR) Advanced Squad Leader scenario

Turn 3 and “The Death Rattlers” were in the air. Two of them immediately took out our HMG. We were resisting the KMC HSs on the left and in the center. The KMC on the right was unfortunately streaming into the village, mindful only of our HIP units and our pair of mutually supporting but retreating Dummies. Our Observer called in a Harassing Fire mission on the village, which was akin to telling my opponent that there were no HIP units in the area. Our OBA was the 70mm variety, so it’s just 2+2 on the Thatched Roof Wood Buildings.  It made the KMC go around though, the dice gods were not to be tempted.

FT SmR1 Mired After Action Report (AAR) Advanced Squad Leader scenario

The Death Rattlers were on us both in their Prep Fire and in our Movement/ Defensive Final Phase.  Our 9-1 who had a memorable time with the HMG died of lead poisoning from a sniper. The valiant fighters on the middle two hilltops were all broken or dead. An Infiltrator at the second from the left hilltop sprang up and offered some point blank shots after the Dummy units moved (and faded away). The KMC OBA was finishing what the Corsairs started there. Our unfailing Harassing Fire missions protected our (now almost deserted) second from the right HDP. A pair of KMC HS came around from the back, unfortunately. The rightmost HDP tried to keep the wolves off them as much as they could from across the road. Our AT sprung into action, but we weren’t the best against the KMC at close quarters. The lights got dimmer.

FT SmR1 Mired After Action Report (AAR) Advanced Squad Leader scenario

KMC Turn 6 and two of The Death Rattlers had one more attack (the Strafing was worse than the Bombing / Rockets). The hilltops on the flanks were barely holding. We even had a couple of rallies for the last hurrah. The Observer, who boasted that his momma gave him no Red chits, finally lost contact with the battery. The KMC was kicking down the two hilltops in the middle.

FT SmR1 Mired After Action Report (AAR) Advanced Squad Leader scenario

The KMC broke through to our two hilltops in the middle. They broke most of our chaps at this stage and we simply didn’t have the strength to put together a counterattack to take a HDP back. The KPA conceded and the door to Seoul got kicked in at a cost of 18 KMC CVP.

PS If you are playing this as well, note that Foxholes (of which we had 6) actually offer a -1 Rallying Bonus when on HDP’s (Sm2.4). Something we missed.

FT S10 Liberté Call – Advanced Squad Leader AAR

FT S10 Liberté Call – Advanced Squad Leader AAR

ASL Scenario Setup

The USMC/KMC wins at game end if they control the French Embassy (EE32) and can apply more FP/MG FP vs the City Wide Boulevard (that cuts diagonally across the top of the map ie “Uiju Boulevard”) than the KPA.  For both sides, only Good Order units that are on/adjacent to the CWB hexes count.  Double / Triple Pointblank doesn’t come into play. SMC’s count as 1 FP.

To Apply More FP than the KPA on the CWB

  • Kill/ Break/Capture enough KPA units
  • Get units to the CWB Good-Ordered in 6 Movement Phases
  • Stop KPA from reaching the CWB Good-Ordered

To Capture the French Embassy

  • Focus firepower on the French Embassy (stone building)
  • Encircle defenders

It appeared that we need to take control of the Sunken Railroad as fast as we could.  We would also need to capture GG30 which was the only 2 level (plus rooftop) building on the map, so as to interdict KPA troops crossing north.  The left flank would have to do that as well as capture the French Embassy so they would have the majority of the force.  The right side would try to push through to the Sunken Railroad if in case the KPA had less defenders deployed there because of its isolated position.  The right side was also closer to the CWB.  I would use the only range weapon I had (MMG) to isolate the right side.  The USMC/ KMC would be on the watch out for Dense Urban Terrain (“DUT”) buildings so as to position optimally for massive fire groups where possible.  We would also be using a lot of bypasses.  SS2 gave us a NY Time correspondent, Richard Johnston, who knew the back alleys.  The USMC would use him to navigate otherwise un-bypassable DUT hexsides, with the added bonus of a +1 TEM while breezing through.

Advanced Squad Leader AAR

FT S10 Liberté Call After Action Report (AAR) Advanced Squad Leader scenario

We massed up on the left and went straight after the 2 Level GG30 building.  The defenders routed towards the French Embassy and we stationed a squad up on Level 2 to cover a 6 hex perimeter. The team in the middle was thin but we would be fine as long as the KPA don’t call our bluff.  They had 10 dummies, so they might well be thin as well.  We didn’t want to move that MMG but we did because we didn’t want to be too far from the top of the map at game’s end.  Things did not go well with the Korean Marines on the right.  We kept getting jammed in by conscripts.  We needed to be able to reach behind the KPA lines.  No joy yet.

FT S10 Liberté Call After Action Report (AAR) Advanced Squad Leader scenario

We hit Turn 3 (of 5.5) and the KPA were already crossing the Sunken Railroad! The Level 2 USMC squad couldn’t shoot everyone.  Those walls to the north of the French Embassy gave the runners some cover as well.  We knocked defenders inside the French Embassy a bit but they were still holding on.  Meanwhile, our MMG’s going out of position allowed KPA troops on the right to slip out.  The Korean Marines were still stuck.  We couldn’t afford the time we were spending on the French Embassy!  Four Movement Phases left.

FT S10 Liberté Call After Action Report (AAR) Advanced Squad Leader scenario

Like mama always say: shooting don’t work no matter how high up you stand. The KPA reformed their lines to the North of the Sunken Rail Road.  We were now looking at the prospect of crossing that gully under fire.  We finally managed to put a USMC into the Sunken Railway to interdict the last of the stragglers.  With 2 Movement Phases to go, the USMC’s started to shift their forces to the right.  I wish I had the USMC in one big stack so that NY Times could take them through the back alleys like cash through my pockets.  That was not to be.  The (underperformed) overwatch would also need to get going soon.  Meanwhile the Korean Marines on the right made little progress.  However, they were at the Hedge, so the possibility of flanking the defenders loomed.

FT S10 Liberté Call After Action Report (AAR) Advanced Squad Leader scenario

This was towards the end of USMC Turn 5.  The overwatch team was out of the tower but were pinned before it could dive into the Sunken Rail Road.  The Assault Engineer squad crested on the north side to harass the KPA some but got their heads shot off.  The rest of the Marines gathered in one giant stack together with NY Times.  The KPA defence on the right crumbled as well.  The CWB was just within reach on the left.  That’s of course if the very nice KPA would us slide gingerly by on Open Ground.

FT S10 Liberté Call After Action Report (AAR) Advanced Squad Leader scenario

Fire teams after fire teams tried to run the gauntlet.  You can see where most of them broke in one big stack (aside from a couple KIA’d).  The KPA fired til their LMG barrel melted and a couple of them FPF broke in our slow motion awesomeness.  One intrepid fire team broke through and even succeeded in doing an Infantry Overrun on a 8-1 that was standing on the road!  The leader couldn’t be pushed into Open Ground so the 2 available choices were “straight ahead” where we would have to CC him or “to the side” with some brokies.  If we CC him, we would have to win the CC ‘cause we need to be Good Order.  The choice was even less attractive considering the KPA had two units adjacent to the CWB.  So we pushed him to the KPA brokies, which led to other issues.

In the Rout Phase, the slightly ruffled 8-1 was able to move to the CWB with the routing brokies!  Turned out one of the 2 KPA units already at the CWB were dummies, so the 7-0 yielded 1 VP.  The KPA 8-1 scored another 1 VP.  That came up 2:2 against our marauding fire team – which lost us the game (we had to have more VPs than the KPA).

Lost by One.

Link to the NY Times article from 1986 “Richard Johnston is Dead at Age 76″

FT S9 Cowboys and Indians – Advanced Squad Leader AAR

FT S9 Cowboys and Indians – Advanced Squad Leader AAR

Scenario Background

106518783 36b0109f8e w

It was 26 Sep 1950.  The Korean Marine Corps (South Koreans) were mopping up pockets of resistance at and around key thoroughfares.  Chesty Puller thought they were best suited “to tell the cowboys from the Indians”.  The North Korean occupation had not been well received by the city’s inhabitants.  So the locals proved to be excellent sources of intelligence amidst neighbourhoods where North Koreans dressed up as civilians.  (Crudely excerpted from the scenario card..)

(Photo Credit: Don O’Brien, View from atop the Hanto Hotel, Seoul Korea, Nov 1945)

Victory Conditions & Tactical Considerations

The North Koreans had 2 squads & 9 half squads of various quality plus 2 LMGs.  They had self rallying ability as per SSR and no leaders were present.  They were to setup, one squad or less per hex, HIP’d largely on the top half of the map pass the horizontal street and suffered Ammo Shortage (so Fire Lanes are out of the question).  The Korean Marines (‘KMC’) win if they could amass more VPs than the North Koreans (‘KPA’).  For both sides, VP = CVP + Exit VP, and the KPA gets 1 VP each for each Good Order concealed or HIP’d units that survives till game end.  Plus the KPA starts with 3 VP.  So unless it looked like a good kill, the KPA would stay put.  A ‘mole hunt’ then you say?  Yes – but this scenario is how a FUN mole hunt can be done.  Now the KMC could enter on the left or the bottom of the map apart from setting up below the horizontal road.  They started with 7 squads + 1 fire team and 3 leaders, 2 LMGs.  Note that “Steep Hills” were in play, so those brown hexes were concealment terrain as well.  All those Orchards were sparse, while they were concealment terrain, Partial Orchards were not.

My top priority was to prevent the KMC from cutting off my lines of retreat up through the top side of the map.  Secondarily it’s to have a screen so civilian/ prisoner interrogation wouldn’t uncover important KPA ghettos.  The KMC could enter from the left but while I didn’t want him sliding into the top behind us, I couldn’t see KMC’s entering onto the Citywide Boulevard (-1) hexes (‘CWB’) with no where to rout.  I think the KMC expected the KPA to stay as far away as possible, which means the top right of the map was likely to be searched first.  Places the KMC might overlook were rooftops and CWB hexes with Orchards, although my opponent is well known for being meticulous and detail oriented, I have never known him to miss things.

I put the 2 elite 248 HS’s over on the right.  Their mission was to ‘confirm’ my opponent’s suspicions, to draw attention and to survive longer than most.  I had a few units on the top left and at the Dense Urban Terrain (DUT) choke point on the top of the map.  Note that DUT worked like Dense Jungle, stacking limit was two and you couldn’t firegroup with units in other DUT hexes.  I had a HS on the first level of one of those stone rowhouses on the left (not that I really think my opponent would miss them) and another one slightly forward (down towards the horizontal road) to see if we could catch any impatient bypassing KMC units coming down the road.

(Photo credit: Time-Life, Street Fighting in Seoul by Hank Walker, 9 Sep 1950)

Advanced Squad Leader AAR

FT S9 Cowboys and Indians After Action Report (AAR) Advanced Squad Leader scenario

South Korean Turn 3: We had a rather big KMC force hitting the right of the map.  The 2 248’s put out some shots on the road, one was demolished by Turn 3.  The other had a choice of going up next to that massive 8-1 stack or down to the bottom side of the street to mess with the KMC further.  If a unit could survive til the end of the game concealed or HIP’d, they score 1 VP for the team, so they would have to come after it.  Unfortunately the remaining 248 didn’t last long after this but the duo did burn up some time.  The SK rolled civilian interrogation though and a HIP unit on the 1st floor on the left got ratted out (and killed).  So there goes my hope of the SK’s passing him by or it being able to ambush the Korean Marines somehow.  We wondered if the SK’s on the left will wheel counter clockwise and sweep up to the top of the map!  I also started to realize that having conscripts as screeners posed a liability.  They could be easily captured and interrogated!

FT S9 Cowboys and Indians After Action Report (AAR) Advanced Squad Leader scenario

South Korean Turn 4.  We had three Movement Phases left.  The main body of Korean Marines on the left started to wander past our HIP’d crowd apart from one squad with an LMG.  We took that shot at point blank with a HS (and a -1 CWB TEM) but bullets rolled off the Korea Marines.  We decided to back off into the DUT and get reconcealed instead of pressing on, hoping that the SK squad would come in pursuit instead of walking into the other HIP’d units.  Meanwhile on the right, the Korean Marines swept through the hexes in the area.  That single hex two story house on the far right did look tempting but I didn’t want to be (immediately) encircled in it.

FT S9 Cowboys and Indians After Action Report (AAR) Advanced Squad Leader scenario

Using conscripts as screeners was indeed a liability.  One of the captured HS gave into a copy of Doom Battalions v3 and ratted out another HIP’d unit! A HS and a 527 were surrounded.  The 527 was encircled and CC’d but it look out the KMC 8-1.  The other HS who got CC’d rolled infiltration and left off the map (I forgot whether it went with a new leader)!  Over on the left, our sniper took out the guards earlier and a KPA HS was freed for a sweet moment!!  It could try for the board edge but SK units would get to it first.  It decided to go upstairs and it drew some units off the encircled lot.

FT S9 Cowboys and Indians After Action Report (AAR) Advanced Squad Leader scenario

Prisoners were recaptured and the scores were even going into the last (NK) player turn.  The NK 527 had to die!  The Korean Marines stood around and discussed it a bit and decided to ride on the higher Marine morale level and shoot into the Melee.  All the fun triggered the NK sniper again who nailed another Marine unit but worse, the shooting laid an MC on the Melee stack.  The NK 527 pinned but all the Korean Marines in the melee broke.  The NK’s won, glory to the dice (the surviving but unconcealed NK 527 was not credited with VP’s but it’s incumbent on the SK to break the prevailing VP tie)!

(Photo credit: Time-Life, Street Fighting in Seoul, Hank Walker, 9 Sep 1950)

How’s this scenario interesting?

Normally you wouldn’t imagine bug hunt scenarios to be fun.  However, this one’s small and quick enough to not be tedious for the South Koreans and to be nail-bitingly exciting at some points for the North Koreans.  The North Korean player had to keep a pokerface while the Korean Marines swept through the streets.  However it’s not a huge challenge while on VASL as long as you can keep your voice level.  There are definitely multiple ways to play this.  I wonder if any NK players decided to not play possum but actively looked to kill SK units?  I wonder how that worked out.  The use of interrogation kept life interesting and it reflected the historical situation quite well.  The beauty of the Dense Urban Terrain (‘DUT’) rule came to the fore here.  I wondered if more designers will do the same in the PTO with a mix of Dense & Light Jungle?  This is an interesting scenario offering a good bit of fun in the evening, give it a try!

(Photo credit: Time-Life, Street Fighting in Seoul, Hank Walker, 9 Sep 1950)

BFP24 Death Ride of the Das Reich – Advanced Squad Leader AAR

BFP24 Death Ride of the Das Reich – Advanced Squad Leader AAR

Scenario Background

This scenario is set on 30 July 1944 southwest of Notre-Dame-de-Cenilly, France.  The SS Panzer Division 2 (“Das Reich”) started to realise it’s in danger of being encircled.  They therefore looked to withdraw remaining units southwards towards Brehal.  The stretched out 2nd Armoured Division (“Hell on Wheels”) caught wind of it and moved to foil the German plan as their vehicles appeared before dawn.

Victory Conditions & Tactical Considerations

This scenario has a real interesting setup.  The three boards represents three venues through which Germans tried to escape the American dragnet.  They operate separately from each other like three separate but concurrent games.  The Germans had to divvy his forces up into three groups.  Each group would enter their designated board using Convoy movement.  The Americans had to divide his forces into four groups, one being a reinforcement that enters on Turn 4.  Again, the three boards represents three separate venues that doesn’t affect or crossover to each other, so once forces were committed to a board, they were committed to that board.  The Germans can win via one of two ways: by exiting >= 44 VP (ex prisoners) off the east (right) edge of any one board or by exiting >=110 VP off the east (right) edge of all three boards.  Proper force allocation is very important for both players.  There are parameters to curb either player from heavily slanting his forces on one or more boards, but we also know he who defends everything defends nothing!  It’s also important to know that those bocages you see are Light Bocages.  Light Bocages, as defined by the BFP Beyond the Beachhead rules, are 1/2 level obstacles, don’t create any blind hex and allow LOS along hex spine.  It costs vehicles 1/4 of their MP allotment (instead of 1/2) to cross and Bogs with no additional DRM’s apart from the usual.

The top board has the second most restrictive terrain.  The German convoy enters via a restrictive channel for a third of the board and the terrain opens up before leading into bocage country again for the last half of the board.  The temptation is to start shooting at the Germans as they come out of the first third of the board but the openness will allow their guns to gang up against our tiny blocking force.  I decided to duck further into the bocage with a HIP’d baz team, a Sherman and an MMG.  Hopefully the choices for the Germans are either to come through to us one at a time down the channel or risk bogging and underbelly shots crossing the bocages to flank us.  Forces were deployed along the road and a HIP’d baz team is on the bottom of the map since I suspected the Germans would be tempted to flank us along there.

The middle board is the most open.  The Germans start by coming down a channel for a third of the board, then it’s the village for the second third before closing off into bocage country on the last third.  I put the roadblock where the bocage opens up into the second third.  That’s covered by a Sherman and the 9-2 HMG team in the church steeple.  The M1 57mm AT Gun (TK15, ROF3, HE4 & APDS4 w/ TK18) sits behind a ring of bocage on the left (map bottom) of the Germans’ axis of advance, closing off that half.  Once the fighting happen, I would bring a M2 mortar to the back to provide some defence depth.

The bottom board is the most restrictive.  On one hand, not breaking up the German convoy make it slow(er) going for them, on the other hand, I can’t cede too much ground.  I put the second roadblock shortly past the first half of the board, covered by a Sherman, an MMG behind it and a HIP’d baz team on the side of the road covering the small opening past the crossroads.

Oh, those Roadblocks are only “hasty” Roadblocks, they don’t allow Hull Down’s, can be crossed by a vehicle at half of it’s MP allotment and a Bog Check (+drm) but leaves a Trail Break behind for other AFV’s.  There’s also a +1 LV when you think about your covering your Roadblocks (this action’s at dawn).

Note also that there are no restrictions against Kindling in this scenario.  Some of those grain on the latter bits of the map might be good candidates, particularly in the top board if the Germans decide to do an end run on the right of the road.

Advanced Squad Leader AAR

BFP24 Death Ride of the Das Reich After Action Report (AAR) Advanced Squad Leader scenario

We opened with German Turn 3 (of 7.5).  All three convoys had now been broken up.  On the top board, an armoured car arrived at the bend in the road where the Sherman bore-sighted.  The Sherman open fired and missed!  It then tried popping Smoke and turned tail.  Halftracks started unloading people immediately.  A couple of tanks went to our left (bottom) down the Road to see if they could get at our Sherman.  I imagined they might be tempted to cross the bocage after I take my Sherman out further to the back.  An M2 mortar team hopped over a bocage on the back.

We shot 1 halftrack at the Roadblock on the middle board.  Again, Germans infantry started unloading from their halftracks.  An armoured car went to our left (bottom) to check out that side of the board (like they are paid to).  Our AT Gun torched it at the intersection.  German tanks jump the bocages and went to our right to get at Sherman parked in a stone building.  Our M2 mortar team sprinted backwards as planned.

In the bottom, our Sherman shot the leading armoured car and the HIP’d baz team popped up and shot an halftrack from the side.  What I should have done though was to wait for the German armour to jump the bocage in an attempt to flank the Sherman.  My intention was to increase the MP cost for German traffic as quickly as possible but that didn’t make a material impact on the game. 01 notre dame de cenilly 1944 1

BFP24 Death Ride of the Das Reich After Action Report (AAR) Advanced Squad Leader scenario

Download  1On the top board, our Sherman backed off into the sunken road, escaping the 2 German AFV’s sitting behind the bocage.  Unfortunately, they decided against coming over to chase after our lone Sherman!  The sheer weight of the incoming halftracks/ armoured cars got our infantry on the hill to start thinking about heading back.  They did have a few open top vehicles in the proximity so we tried to light up a few more.

In the middle board, we were still fighting in the first half of the board.  The 9-2 HMG team fired on and stunned another AFV (subsequently recalled) before moving off the church steeple!  The German infantry had yet to close in.  Our Sherman backed off into a bypass along a Stone Wall and sped backwards.  Our gun crew on the left (bottom) broke out a few MRE’s waiting for the next German to arrive.

On the bottom map three AFVs got busy trying to snuff out our baz team.  They survived the first barrage and took a second shot at one of them in hex!  Unfortunately they missed and were all sent to a better place.  On the far side, an M2 mortar team persuaded the Germans to not run any other halftracks down the road.  The Sherman drew back to the next firing position but the MMG team (erroneously) stayed on.  (Note to self: folks can’t outrun AFVs on foot.)

BFP24 Death Ride of the Das Reich After Action Report (AAR) Advanced Squad Leader scenario

Allied Turn 4, and this was where I had to decide on which board to reinforce with 2 Shermans (w/ hedgerow cutters) and infantry.  Normal practice dictates that we reinforce successes but here we need to plug holes.  In this case I sent my reinforcements to the top board since it had yet to claim any enemy kills.  I immediately regretted the decision when I pulled back my Sherman on the bottom board and immediately bogged on at the bocage!  BOGGED!  German AFV surfed up and down those bocages all game and my Sherman bogged on its second attempt!  Having said that, it would help if I pick the bocage crossing location with the awareness that I might bog there.

My infantry was broken and was on the run as well.  Repent!  The end’s near!

However on the top board, folks are backing off nicely to the right. The Germans decided to have their halftracks double back and mill about around my HIP’d baz team so as to not give me a cheap kill.  One even bypassed the Woods the baz team was hiding in but since the halftrack didn’t end its turn in its hex it didn’t have to reveal.
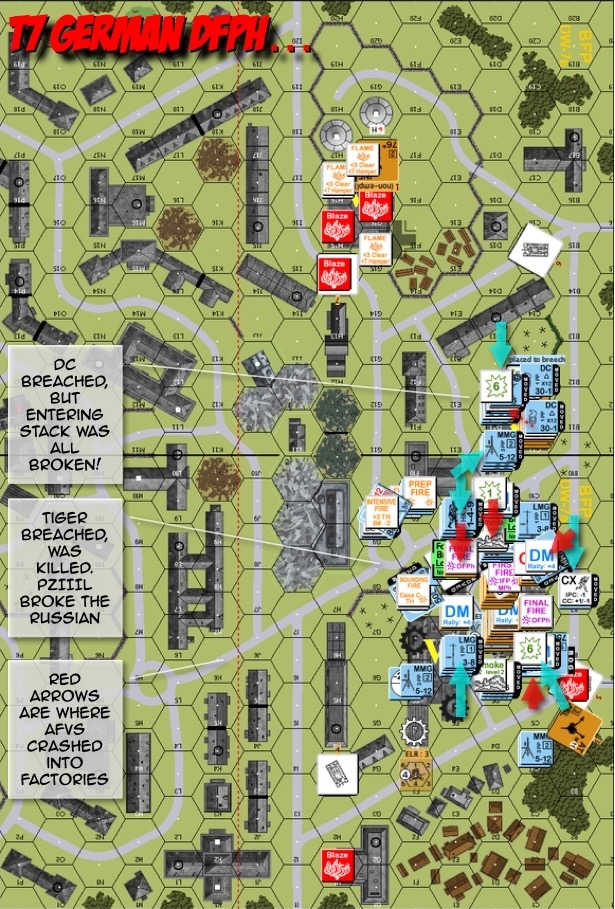
In the middle board, the Sherman worked well with the 9-2 HMG team in keeping the Germans on the right (top).  The 2 concealed squads (one’s a dummy) kept my HMG shielded off. I had to think that the “missing” baz team (in the top board) kept my opponent wary.

BFP24 Death Ride of the Das Reich After Action Report (AAR) Advanced Squad Leader scenario

On the top board, the long HIP’d baz team threw off their invisibility cloak (“taaaddaaaaaaaaaaaaaa”) in slow motion and fired pointblank at one of the halftracks so as to minimise the returning fire group!!  Unfortunately the shot went wide and the team was snuffed out in the return fire.  The 3 Shermans now on board open fired together with the M2 mortar.  None connected but we thought that might give them something to think about.

On the middle board, the Germans were determined to stick to the right (and away from the AT Gun).  Our Sherman backed off to its final firing position but our screen for the 9-2 HMG started to crack.

However on the bottom board, our bogged Sherman got burned and the Germans were in a position to exit >=44 VPs off.  This was game.

How’s this scenario interesting?

I lost this scenario badly.  Considering that I lost it after Axis Turn 5 (out of 7.5).  My Turn 4 reinforcement was definitely misplaced.  However, this should be an interesting read not because of my sub par tactics but because of the unique mechanism this design introduce and the interesting considerations extending from it.  I don’t tend to play scenarios over (except when playtesting) but this is definitely one that invites repeated attempts.  The mental sparing starts at force allocation and it definitely tests the defender’s ability to harmonise his assets with the terrain.  It tests the attacker’s ability to respond to ambushes and to turn the tables.  The multitudes of paths one could take to get off these boards exercise one’s risk management skills.

I imagine this scenario can be played as a 3×3 team game with asset allocation negotiated between teammates.  Has anyone tried that?