Why you should go to an ASL tournament

I notice there’s been quite a number of “new” players who are really “returnees” from Squad Leader or ASL decades ago. Invariably we talk about how they should join a tournament at least once, since tournaments are great places to learn and to meet the community that accelerates your learning and your enjoyment of the game exponentially. These folks do worry about their level of ASL knowledge and whether they will fit into an ASL community with characters who’s been around for decades. Before joining my first tournaments in 2014, I worried about putting up the expense only to suffer some form of hostility because I was (am) not up to par.

“The Malaya Madman” – Perry Cocke

This is Von Marwitz’s perspective, carried with his permission:

Whether new or coming back to the hobby, I would not be worried about not being good enough.

Back in the days, before I attended my first tournament, I had played exactly one single, very small 4.5 Turn scenario of ASL against an opponent. Besides that, all I had done was playing solitaire and teaching the game to myself – with all that entails.

I believe that even very fast players acknowledge, that under such circumstances nothing else than slow play can be expected. My personal experience regarding my treatment back then and by observation later is, that almost all experienced guys (fast or slow) are willing and open to treat such a game more as a tutorial than a competitive game. Needless to say, I did not win a single scenario during my first tournament but yet I had so much fun, that I am still sticking to ASL 25 years later.

So, this goes out to any newbies out here, to those returning to the hobby, and to those who have never attended a tournament:

Don’t worry about not being good enough or not fast enough. Take the dive and give attending a tournament a try. Altogether, the vast majority of players (of all playing styles) I have met, are a jolly bunch and welcoming.

von Marwitz

(von Marwitz is associated with Grenadier 2023, which is going to be held in Gelsenkirchen Germany, 2 Nov-5 Nov)

Related Article: “Journey to a Tourney, Part 1: Decisions”

DB172 Not Digging Potatos After Action Report (AAR) Advanced Squad Leader scenario

DB172 Not Digging Potatos After Action Report (AAR) Advanced Squad Leader scenario

Victory Conditions

I am not sure why but it feels like it’s been a while since I last played a tournament sized scenario.  This 4.5 turn scenario designed by Jeffrey D Myers is real nice one.  The Americans win if there are no Good Order German MMC left below the red line on the map, unless the Germans amassed 8 CVPs.  

After Action Report (AAR)


DB172 Not Digging Potatos After Action Report (AAR) Advanced Squad Leader scenario

The Germans setup in fox holes where they please along with 8 dummies. We started off in the middle of the field and decided to rush up to the hedge immediately.  The potato field was strangely quiet.  The plan was to hit the mass on the left, not let the Germans congregate and to not play house to house down the column of buildings on the right.  Nothing moved.  Surely there must be a real unit in the house in the middle, right?  If there was one, they would find it hard to leave.  

DB172 Not Digging Potatos After Action Report (AAR) Advanced Squad Leader scenario

Turn 2 – we rushed his positions on the left, guns or no guns.  The fact that most of his guys were at the dirt level behind hedges helped.  Our hero stepped forth looking to start a fight and was promptly vaporised.  Heros never get to grow old!  In the middle we cleared the hedges for us to mount a final assault from.  On the right, we came at the FH from its flank and sure enough, guys started shooting from it.  There’s a concealed stack that was advancing down the side, it’s probably not real, we would ignore it for now.

DB172 Not Digging Potatos After Action Report (AAR) Advanced Squad Leader scenario

On Turn 3 we were all over the left flank of the German position and were looking behind the group of FH’s on the right.  I failed to shoot at a broken German stack who then managed to rally!  A squad in the center popped over the hedge and got shot at by folks in FHs.  I was hoping the Germans on the right would unconceal and play as well but no.  The Baz team on the right fired off a lucky shot that vaporised a squad of Germans.  The other para squad broke off and headed towards the graveyard in front of the right-side FH’s.  

DB172 Not Digging Potatos After Action Report (AAR) Advanced Squad Leader scenario

It’s Turn 4, this was the turn to setup up for the last MPh.  Whichever squad could be deployed were deployed.  We forced the German brokies on the left into the woods.  In the middle, we put that MMG squad and the 9-1 to OpFire and bum rushed the FHs, forcing them to unconceal.  Some of my HS broke and two of them would be taken prisoners, pushing my CVP to 7 at the end of this turn.  On the far right, the Baz team took out the creeping concealed stack while the para squad ran off towards the FHs! DB172 Not Digging Potatos After Action Report (AAR) Advanced Squad Leader scenario

There were only 2 Good Order German HS’s in those FHs but yet I was 1 CVP away from losing!  We opened with some Prep Fire.  We hoped to break the HS at the back and tie the other one in CC.  That didn’t work unfortunately, the HS at the back was only pinned.  Hope’s not lost though since we planned to run two units out from the Woods on the left and jump into CC (grey dotted lines).  A HS advanced into the open to the other German HS.  The Germans fired and KIA’d that para HS.  The Germans got their 8 CVPs and the American paras lost!  

This is a very fast paced scenario that offers multiple venues to both sides.  I quite like the design (by Jeffrey D Meyers) and I suspect my opponent, someone’s who’s under 100 games enjoyed it too.  

BoF2 The Polish Requiem – Advanced Squad Leader AAR

BoF2 The Polish Requiem – Advanced Squad Leader AAR

Scenario Background

By Alex79 - Own work, CC BY-SA 3.0, https://commons.wikimedia.org/w/index.php?curid=10843864

(Drawn Map By Alex79 – Own work, CC BY-SA 3.0, https://commons.wikimedia.org/w/index.php?curid=10843864)

It’s 14 September 1939.  Guderian’s Panzers broke through the defensive lines at Wizna and Mlawa.  The Blitzkrieg headed towards Brzesc-Litewski, the lost of the latter would mean the encirclement of the Polish forces in Warsaw.  The Poles fielded some old FT-17’s to stop the tide.

Victory Conditions and Tactical Considerations

The Polish 82nd Regiment fielded 4 squads onboard with an MMG and a 8-1 (plus 5 Concealment counters).  They were supported by four FT17’s from the 113rd Light Tank Company, two with CMG’s, the other two with 37mm guns.  They would have to hold the line before they were joined by four other FT17’s, 7 squads & a 8-0, an MMG and a pair of DCs.

The Germans had to run 8 squads, 2 9-1s, a 7-0 down the length of the board in 6 turns.  They were supported by 7 tanks, two of which had to arrive in the magic (VC) circle with everything intact along with 3 squad equivalents .  Turned out that was a bit of a challenge.

Advanced Squad Leader AAR

Advanced Squad Leader scenario BoF2 The Polish Requiem After Action Report AAR

The German AFVs sped forth using their sD to lay smoke for the infantry where they could!  They also looked to provoke the 37* wielding FT17C’s to shoot so they could tell which was which.  The moving German AFVs made pretty bad targets in that the 1MT (1 man turret) Poles needed at least a +4 to score a hit.  The troops then flooded forth ‘cause it was either losing by the squad or losing by the clock.  An AFV shot a FT17M and ATR shot another.  A Bounding Fire shot from behind killed a FT17C.  The other one’s peeling off.  The German lucked out in the Polish turn when one of their 75*s PzIVC scored a hit on the unconcealed MMG in the Board 4 double hex wooden building and they eventually encircled and overwhelmed the tenants there.

Polish reinforcements arrived.  A stack got rather unlucky and was shot and broken by a low power shot (it’s always the low power shots that kill).  A pair of FT17C’s appeared ominously BEHIND us.

Plus you know what?  I already X’d one Gun and malf’d another one at this stage.  That’s five left and I needed two.

Advanced Squad Leader BoF2 Polish Requiem After Action Report (AAR)

The Poles blocked up my left flank!  The pair of reinforcing FT17C scored a critical hit on one of my AFVs while a second German tank got recalled – four left.  A PzIIA and the ATR HS went after a FT17C.  That thing failed its non-platoon movement roll and had to stop!  Down at the bottom of the map, a PzIB tried to speed away after FTR’ing the stack of broken Polish reinforcements.  The Polish 8-0 had a DC and looked to exact revenge but yet failed his PAATC and was pinned and separated from the rest of his troops.  (Note: I played this wrong because SMCs are exempted from PAATC’s.  This would have been interesting in that it might have taken me down to three functioning AFVs.  My apologies to my opponent.)

CrazyWearyAfricancivet size restricted

Advanced Squad Leader BoF2 Polish Requiem After Action Report (AAR)

It was Polish Turn 4 and the Germans only had 2 MPh’s left to make it to the magic circle!  From the looks of it we could BARELY make it especially with that bloody grain field there.  I needed to do something about the 3 MGs (two FT17Ms and an MMG) on the bottom left.  To that end, a PzIIA ran to the end zone to spook them a bit and the ATR team went up the hill.  That ATR’s also there to cover the pair of AFVs that went up the other side of the hill to face off the FT17C(37*) closing the range behind us.  The rest of the troops hurried across the board as fast as they could.

Advanced Squad Leader BoF2 Polish Requiem After Action Report (AAR)

The pair of FT17C burned another one of my PzIVs on the hill – three left.  The PzIIA in the end zone shot one of the FT17Ms and the ATR team shot the other, but wait, there’s more – the Polish MMG malf’d itself out.  You really can’t do anything wrong when the stars line up!  The other AFVs tried to laid down smoke but none of the sD’s worked.  Nonetheless, it’s time to rush it or lose it.  We made it to the other edge of the grain field, CX’d but otherwise intact.  The Poles conceded.

How’s this scenario interesting?

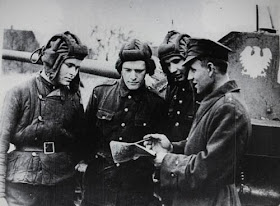
BoF2 A Polish Requiem has long been a classic.  It’s a whirling dervish of a battle!!  Polish AFVs were slow but those 37* kills on a 7, pretty respectable considering most German AF’s 1.  The German forces might seem overwhelming but these guys were tied to a timetable.  If the player on the Polish side keeps his PMC (read: Personal Morale Check) he might win this scenario yet.  The German AFVs might X themselves out or folks might get delayed just enough.  Had the Polish MMG at the end zone not X’d out it would have been harder for the Germans.  Scoring 37 (Poles) vs 27 on ROAR, I recommend this scenario unreservedly.

Bishop: Converting a Spotting Round to Fire For Effect

First World War: soldiers of the English infantry in France, running out of their trenches at the signal to assault, Somme 1916. CREDIT: Fototeca Storica Nazionale.

(Author: Jim Bishop)

In August 2021 I attended the ASL Scandinavian Open tournament in Copenhagen. The French have OBA in WO33 “One-Eyed Jacques.. Walking around the room twice I observed players incorrectly convert a Spotting Round to a Fire For Effect (FFE). The scenario is an ideal case study for this all-too common error.

For this article I have excerpted a section of the OBA flowchart I will be referring to throughout the article. Understanding this section of the flowchart is key to placing and converting a SR effectively. Conversely, knowing the nuances of this section will help you frustrate your opponent’s attempts to attack with OBA. To make our
discussion clearer I have labeled two of the bubbles, one called A and one called B. Also recall the errata posted in Journal 11 changing AR to SR in bubble B.

For our purposes, we will assume you have successfully navigated the flowchart to the point where you maintained Radio Contact, announced your intention to convert, rolled for accuracy, and corrected the SR if needed. You are now ready to convert it to a FFE.

It is not enough to simply announce your intention to convert a SR as some players presume. There are a couple of crucial conditions which must be met before a SR can be successfully converted to a FFE.

We will first consider bubble A. There are two possible conditions tested in this bubble to determine how we proceed:

  • The Observer has an LOS to the Base Level of the SR hex. Normal LOS rules apply (Blind hexes, LOS Obstacles, LOS Hindrances, etc).
  • The Observer has an LOS to the Blast Height of the SR (C1.32) AND a Known Enemy Unit in or adjacent to the SR’s hex. Because the blast of an SR is visible two levels above the Base Level of a hex, it is possible for an Observer to see a SR in an otherwise Blind Hex. If there are no KEU’s in or adjacent to the SR’s hex the SR remains in place unconverted (the “No” path from bubble A).
    • Per footnote d, Concealed Units in non-Concealment Terrain are considered known to the Observer for purposes of conducting OBA actions.

Next, let’s look at converting the SR to an FFE covered in bubble B. To convert we need two things: a LOS to at least the Blast Height of the SR and an enemy unit. There is a case where an enemy unit is not required and we will examine that shortly.

Observer only has LOS to the Blast Height: When an Observer cannot see the Base Level we already know what happens if there are no KEU in or adjacent to the Blast Height; the SR remains unconverted and we never make it to this bubble. Since there must be one or more KEU and at least one of them must be known to get to bubble B, the SR is converted to a FFE and resolved (the “No” path from bubble B).

Observer has LOS to the Base Level: It gets more interesting when an Observer has LOS to the Base Level of the SR’s hex. Here we will be following the paths from bubble B. Again, we have to ask if there are enemy units in or adjacent to the SR hex. If the answer is no, the SR is converted and resolved using the “No” path. If the answer is yes, we must ask a second question: are all of them Unknown to the Observer. Note footnote “d” telling us Concealed Units in non-Concealment terrain are considered KEU for the purposes of conducting OBA actions. If the answer is no (i.e. at least one of the units is known to the observer) then the SR converts to a FFE using the “No” path. If the answer is yes (i.e. all enemy units in or adjacent to the SR hex are unknown to the Observer) then an extra chit draw must be made from the existing OBA pile. This is the “Yes” path. If the xdraw is black, the card is shuffled back into the draw pile and we follow the “Black” path converting the SR into a FFE. If the draw is instead Red, the card is again shuffled back into the deck and follow the “Red” path resulting in Access Lost and removal of the SR.

Keep in mind the special case of Harassing Fire. While all of the rules about enemy units in or adjacent to the SR remain in play, any units located in the “outer ring” of a Harassing Fire FFE mission do not force extra chit draws. If an Observer has an LOS to the base-level and there are no unknown enemy units in or adjacent to the SR’s hex, the SR will convert to an FFE regardless of how many unknown units there are in the “outer ring” of the affected blast area.

From this brief note, there are some lessons to be learned here:

As the Defender:

  • Concealed Units are your friend. They make conversion more difficult.
  • Carefully watch placement of AR/SR and see if you can sort out where his Observer is. If
    you can stay out of his LOS, conversion is more difficult.
  • If you can force an extra chit draw it is possible you can negate the mission and make
    him start over again with a new card draw.
  • Knowing the flowchart is essential to effectively defending against OBA

As the Attacker:

  • Be careful where you place your SR. If it drifts to a hex where you have LOS to the Base
    Level of the SR’s hex and there are only unknown enemy units in or adjacent to the SR’s
    hex you could be forcing an extra chit draw.
  • An enemy skulking in a woods line can be mauled pretty badly with Harassing Fire even
    when out of LOS.
  • Knowing the flowchart is essential to effectively attacking with OBA.

Examples: For this section please refer to the illustration. The Observer is in 13aI5 on level 2. Three SRs are on the labeled SR — A, SR — B, and SR — C. We will discuss each of these in turn.

SR — A: The Observer has LOS to the Base Level of the SR. As such, we flow from bubble A to bubble B. There are enemy units in or adjacent to the SR’s hex. The unit is un-Concealed and in the LOS of the Observer. As such, it is a KEU meaning we flow from bubble B via the “No” path and convert the SR to an FFE and resolve it.

Were the 4-6-7 Concealed the situation would be entirely different. In that case, there are units in or adjacent to the SR’s hex and they are unknown to the Observer. We would flow from bubble B via the “Yes” path and make an extra chit draw. If the draw is a black chit we follow the “Black” path and convert the SR to an FFE and resolve the attack. If instead a red chit is drawn we would follow the “Red” path, Lose Access, and remove the SR.

SR — B: The Observer does not have LOS to the Base Level of the SR’s hex but he does have LOS to the Blast Height. Looking in bubble A, when the Observer has LOS to the Blast Height, we need to determine if the Observer has LOS to KEUs in or adjacent to the SR’s hex. In this case, there are two units Adjacent to the SR, but both are out of LOS of the Observer and do not meet the requirements of bubble A to leave via the “Yes” path. As such, we leave bubble A via the “No” path and the SR remains in place unconverted.

SR — C: For this one, the Observer is trying to convert the SR to an FFE Harassing Fire. In this case the Observer has LOS to the Base Level of the SR. We leave bubble A via the “Yes” path. In bubble B, we ask if there are enemy units in or adjacent to the SR. There are none so we exit bubble B via the “No” path and convert the SR to an FFE Harassing Fire. Even though the two 4-4-7s will be attacked by the FFE AND they are out of LOS of the Observer, the SR will still be converted. These units are not in or adjacent to the SR’s hex so they do not affect the conversion to FFE process.

Clearly, there is more to attacking with, and defending against, OBA than offered in this brief note. If you would like to see more about this or some other topic let me know what interests you and I may take that on. I hope this brief article is useful and if you find any errors please let me know and I will correct them. — jim

(Carried with Jim Bishop’s permission)

Original posted here : https://jekl.com/2021/09/10/converting-a-spotting-round-to-fire-for-effect/

FT S3 Last Stand on An-San – Advanced Squad Leader AAR

FT S3 Last Stand on An-San – Advanced Squad Leader AAR

Scenario Background

This is 26 September 1950.  Lt Col. Taplett’s (gent in the pic below) 3rd Battalion, 5th Marines fought southeastwards down the slopes of An-San/ Hill 296 towards the city (see the red circle on the map below, credit “Battle of the Barricades” by Col Alexander).  The North Korean 78th Independent Infantry Regiment and the 25th Infantry lead by Colonel Pak Han Lin put up a stout defence.

Battle of the Barricades Colonel Joseph H Alexander

Victory Conditions & Tactical Considerations

The KPA (North Koreans) started on Level 3 or above.  The Marines entered from the left of the map at or above Level 2.  In about 6 turns, the Marines should fight their way to Level 1, the KPA should fight to stay on Level 3 or above.  The KPA started with 2×447, 4×426 (conscripts), an LMG and a 8+1 Commissar.  The KPA counterattack force, comprising of 2.5×458, 2×527, 2×447, 3xLMG and 2 leaders enter from the right side of the map on Turn 3.  The Marines started strong with 4×768 3×248, 2xMMG, 1xBaz and 2 leaders.  They had a reserve platoon coming from the left on Level 5 on Turn 3 as well.  All units counted “Exit Point” style (“Good Order”) toward the Victory Condition, prisoners excluded. USMC wins on ties.

So the KPA had 31 VP vs USMC 22 VP in their OB’s.  The USMC would need to reduce the KPA force.  Soon it would mean tough decisions between putting your squads on your level to score vs going to your opponent’s level to prevent them from scoring.  The KPA had the last turn so we would have a chance to “Advance” back on Level 3.

Advanced Squad Leader AAR

BoF2 Polish Requiem After Action Report (AAR) Advanced Squad Leader scenario

The KPA was weak.  They were also forced to spread out in their setup.  The USMC could go anywhere and shoot anything.  The KPA had their Concealments easily blown, broke up by Assault Fire and Captured in CC.  Very quickly they pushed the KPA off Level 3 and took more than a few prisoners.  The area on the bottom of the map offered more cover for the counterattack, so naturally the USMC focused their forces there.

BoF2 Polish Requiem After Action Report (AAR) Advanced Squad Leader scenario

The original KPA defenders were no longer coherent as a force.  The way to Level 1 was wide open for the USMC on the top and the KPA  had only scattered remnants on the bottom.  However, the Marines weren’t on Level 1 on the bottom of the map yet.  I decided to send the stronger of my Turn 3 reinforcements to the top of the map and the weaker (and more short ranged) to the bottom of the map, just to keep the Marines off Level 1.  The boulevard’s gotta be where the Marines would make their stand with an additional -1, so we needed to cross before the Marines assemble in place.  So hopped along the river edge we did, to a point by the boulevard where there were orchard cover.  The KPA forces at the bottom of the map arrived in time to catch the defenders sent reeling by the USMC.  That (bottom, vertical) road’s where we would make our stand.

BoF2 Polish Requiem After Action Report (AAR) Advanced Squad Leader scenario

At the top of the map, we made it across the boulevard okay when the lone American squad cowered.  We decided to split into two groups and go around the USMC forces, to places where we could Advance up to Level 3.  We simply couldn’t do close range firefights with the Marines on Level 1.  The USMC would have to decide whether they would get off Level 1 where they needed to be to score in order to fight us.  At the bottom of the map we got in a few lucky shots that set some Marines back.  That probably got them more worried about the KPA making a rush for Level 3 rather than them trying to make Level 1.  Nonetheless, we would keep the line at the street.

BoF2 Polish Requiem After Action Report (AAR) Advanced Squad Leader scenario

At the top of the map, the USMC decided to keep their forces and hence their gains on Level 1.  No one’s coming after our eventual Advance onto Level 3.  We made a critical PREP at the middle of the map and broke one of the defending Fire Teams in the Woods.  That would allow at least 2 of our MMC’s to Advance up.  At the bottom of the map, our line of KPA conscripts held and so my opponent conceded.

How’s this scenario interesting?

This scenario represents an interesting problem for both sides and it really highlights the terrain in Seoul.  This is a multi-level fight amongst the Dense Urban Terrain.  If a unit’s CX’d, it won’t Advance up a level, so you have to time it right.  A KPA conscript unit has especially limited mobility in this terrain and you don’t want to be CX’d when you are Lax as a conscript (+2 Ambush).  I think USMC Fire Teams would be very useful here.  Fire Teams could block more venues up the hill and it’s not easy to break Morale 8 units in +2 TEM.  Plus each Squad, when broken into Fire Teams is worth 3 VP when it’s worth only 2 VP as a unit.  If every USMC squad’s deployed, the USMC OB is worth 28 VP (vs 22 VP undeployed) against the KPA’s 31.  Both players have to find the balance between pushing through and scoring points versus fighting the opponent on a different level to stop him from scoring.  While the KPA player has to fight uphill, there are more of them that can swamp up to Level 3.  This is a tight little puzzle of a scenario!

(Credits: Wikipedia)

FT S1 Sights on Seoul – Advanced Squad Leader AAR

FT S1 Sights on Seoul – Advanced Squad Leader AAR

Scenario Background

The time’s 25 September 1950.  The 1st Marines were to clear the massive barricade on the wide Ma Po Boulevard (left of map), the hill top (center of map) and clear the way to the rail yard on the top right of the map.

(photo credit : m1 pencil)

300px USMC 1st Battalion 1st Marines1st Marine 2nd Battalion440px USMC 3RD BN 1ST MAR 3

Victory Conditions and Tactical Considerations

This gets interesting.  There are two groups of 4 VC conditions each, you are to meet a total of 4 with at least 1 from each group.  On one hand you might feel it’s complex and it can use some good re-reads between turns, but on the otherhand, it keeps the North Koreans guessing as to what you might do next.

Group A involves taking some locations on the big hill top, controlling all 3 designated buildings on the right half of the map, exiting 10 VPs of Marines off 3 designated hexes on the top right or putting at least 28 FP on either/both of the Deep Embankment Streams (one top right and one bottom left).

Group B involves taking/eliminating the Ma Po Boulevard roadblock, some of the buildings inside the Normal School compound (left of map), capturing the Marine HQ on the hill on the bottom left and one of 2 other buildings and exiting 10 VPs of Marines off 5 designated hexes on the top left.

There’s an operational boundary down the middle of the map and left of the big hill through which the Marines can’t cross.  The Battalion Reserve shows up on Turn 4 and we have to decide which side to commit them to.  Once they enter, the Korean SAN goes up 1 level (and both sides have 2 snipers).

The Normal School sports High Walls that are 1 level high.  The North Korean’s got a secret breach in it that they could use.  The Ma Po Boulevard is a wide and dangerous place.  Units incur a -1 DRM to incoming fire on top of other modifiers.  The Deep Embankment Stream is a road + gully combo.  It’s not hard to get used to.  The Fanatic Roadblocks are massive affairs that makes North Korean units with Wall Advantage plus units in the Woods/Building on both sides Fanatic.  The brown hexes are all Steep Hills, ie they are Concealment Terrain.  Most of the little houses are Dense Urban Terrain.  They have effects on stacking & firegrouping (think Dense Jungle) and they prohibit bypass on some hex sides.  Lastly, take look at the road that on the right side of the big hill.  The back part’s (top) lower than the front part, which means it was difficult to interdict Korean units as they moved towards the Exit hexes.

The rules also introduce the use of Marine fireteams.  This became a critical element in this battle (apart from being able to swamp the defenders).

After Action Report

FT S1 Sights on Seoul After Action Report (AAR) Advanced Squad Leader scenario

The Special Rules allow 3 single hex 107mm mortar hits in the first Fire Phase.  I used them for White Phosphorus to cover the Marine’s entry onto the map.  On the left it was a quick push forward to the Ma Po Boulevard to see where the barricade was and to take the Marine HQ.  A platoon crossed the Deep Embankment Stream into the Korean Grave Yard and threatened to turn the flanks of the bridge defenders.  Unfortunately they were beaten back quickly.

On the right I planned to hit the big hill top once I get to the middle of the map where there’s much better cover.  There were a couple of squads (lower central) we bypassed and this would hurt us later.  We were already attacking one of the VC buildings.  We wanted to put some OBA on the hill top but our Spotting Rounds went very wide and in some cases out of our LOS.

FT S1 Sights on Seoul After Action Report (AAR) Advanced Squad Leader scenario

On the left, we got a spotter up on the first level (so 2 levels up including the hill) with a 60mm mortar behind.  We could see down Ma Po Boulevard and into Normal School’s compound.  We were shooting up the defenders across the stream and we spotted retreating Koreans entering the Normal School via a “secret” breach on the lower left of the High Wall perimeter.  The Marine in the graveyard on the right of the stream got shot up earlier.  I made the bonehead mistake of routing a broken guard and its prisoners together with another broken squad and broken leader.  The prisoners escaped, rearmed and CC’d the remaining brokies!  Good thing more Marines crossed the stream and bailed them out.  They started pushing up to the Korean lines in Turn 4 after much time wasted.

On the right, the North Koreans marvelled at our wandering Spotting Rounds, the boys finally kicked their radio down the hill in frustration.  The Reserves decided the right half was winning and therefore entered there to threaten the Korean’s flank.  Some of the units made it to the middle of the map but the Hill team was getting shot up and was harassed by the Koreans we bypassed earlier.

FT S1 Sights on Seoul After Action Report (AAR) Advanced Squad Leader scenario

We had 2 Movement Phases left.  On the left the team sweeping up the graveyard forced the defenders away from the stream, but it was slow going amongst the Dense Urban Terrain.  I started to have doubts as to whether we could get to the Fanatic Roadblock or exit any units in time.  A hero jumped into the Deep Embankment Stream with a DC and breached the High Wall.  Some Marines clambered into the Normal School compound and was surprised by a 45mm AT gun!  They got shot up and tumbled back out into the stream.  We were afraid that the North Koreans might counterattack back across!

On the right, the Hill team continued to get in trouble, although they did put up an amount of distraction.  The big Korean 82mm mortar blew up though!  We hit the last VC building we needed to fulfill 3 objectives.  Turned out it was a Commissar standing with a lot of mops and broomsticks behind the windows!  The man did accomplish his mission to waste our time though!  We closed in on the last Fanatic Roadblock and the 3 hex exit.

FT S1 Sights on Seoul After Action Report (AAR) Advanced Squad Leader scenario

Last turn!!  The Marines on the left return to the stream to secure 2 VCs out of 4. The Marines on the right ran towards the exit!  I got behind the Fanatic Roadblock which meant I had access to a Exit Hex.  The Korean MMG team took some casualties but when the Marines shot back, they KIA’d the stack.  There was one Korean conscript squad left from across the street and we thought we were home free.  Unfortunately these Conscripts decided it’s important to NOT cower and laid down enough residual to make the Marines 1 fireteam short of meeting it’s 4th objective!!

The North Koreans won!  Yes folks – we lost by 1 fireteam.

How’s this Scenario Interesting?

The 3rd Battalion on the left could take two VCs without crossing the stream. I decided to bypass the Normal School, leave the forces inside bottled up and make for the Ma Po Boulevard Fanatic Roadblock VC and together with it, the VC for exiting squads.  Hitting the Normal School might burn up my resources for the gain of 1 VC.  On the right, hitting the hill will no doubt give me an advantage over the whole battlefield but that’s only if I manage to take it quickly.  The “3 Building” VC required that the 1st & 2nd Battalions go all the way to the top right, which put me in reach of the Stream VC and the Exit VC.  So I decided to bypass the hill top as well especially after the big 82mm mortar blew up and we got the MMG’s smoked.  I could have done better in moving more of my troops forward, unfortunately the 2 Korean squads I bypassed earlier continued to threaten one of my VC building on the bottom right.

A thing to note is that each Marine Squad in LFT Fight for Seoul is worth 3 VPs (1 per fireteam) instead of the “standard” 2 VP per squad.  It certainly makes a difference on the exit.

This is an interesting introduction to the different terrain involved in the Fight for Seoul – Seoul map.   It’s also a good one to get your head wrapped around the use of Fire Teams.  My opponent and I are moving on to FT S2 Besting Basilone, which is a Night scenario around the Normal School, the Ma Po Boulevard and the Marine HQ on the left of the map.

FrF5 The Valley of Death After Action Report (AAR) Advanced Squad Leader scenario

FrF5 The Valley of Death After Action Report (AAR) Advanced Squad Leader scenario 

Scenario Background

The Soviets launched Little Saturn on Dec 16 1942, looked to destroy the Italian 8th Army and to cut off relieving forces to Stalingrad.  This scenario set in the Arbuzovka valley on December 23 1942 depicts Axis efforts to break out of the encirclement.  The Germans and the Italians did break the encirclement historically.  With 10,000 Axis dead, 5,000 wounded/ frostbitten and 10,000-15,000 taken prisoners, Italian soldiers called it the “Valley of Death”.  


Victory Conditions and Tactical Considerations

Elements of the Italian Blackshirt Brigade, Pasubio Division set up on the south (left of map) with 16 squads, 3 leaders, 1 HMG 1 MMG and 3 LMG plus 2 (little) mortars.  They were supported by 2 StuGIIIG’s.  The Axis suffered Ammunition Shortage but that didn’t factor much into our game.  The Russian 35th Guards Rifle Division set up to the north (right of map) with 5 458’s 3 447, 2 leaders, 1 LMG 1 mortar and 2 ATRs.  I took the balance in this game and so 3 527, a leader, a radio (70mm OBA) and a T-34 M41 showed up on Turn 2.  Both sides were to setup on non Hill hexes, so we both had to slog it up the Hills against Ground Snow.  

The Italians had 5.5 turns to get more unbroken (didn’t have to be in good order – could be in Melee/Berserk) non-crew infantry CVP north (right) of map than the Russians, provided that the Russians hadn’t destroy both StuGs.  I marked the “victory” line beyond which the Italians had to move on the first AAR map below with a blue dotted line.

The Italians outnumber us 2:1, plus they had more long range toys and 2 StuGs.  Our Russians had better quality troops but that’s a lot of map to cover, good thing the Hills were quite barren.  The Russians would have to rely on their higher morale of their infantry and the higher mobility of their T34 m41.  That T34 wouldn’t win any long range shootouts against StuGs.  We would try to fend off an amoeba attack and to not get caught in Close Combat.  


After Action Report

The StuG’s split off and went to both hills, threatening a pincer action, supported by a platoon each.  The platoon to the east (bottom) was of particular interest since it carried an HMG & an MMG.  I really couldn’t split off my troops since they were thin as it was.  I diverted 2 squads, a leader and an ATR to the west (top) and my T-34 to the left (bottom).  The rest of the Russians on the valley floor dutifully withdrew as their flanks were threatened.  Heck, the Italians on the hills were already shooting at my skulking Russians!  My T-34 got a lucky shot at the “heavy weapons” team.  Italians aren’t easy to rally.  I expect that to put them out of action for a little while.  (The blue dotted line is the goal line.)

Advanced Squad Leader scenario FrF5 The Valley of Death After Action Report (AAR)

I parked my T-34 on the highest point, went Hull Down and congratulated myself for how smart I was.  That didn’t last because a StuG went into a position to engage from the west Hills (top) while another StuG went to my left.  My TH was 6 (+1 BU +1 small) to the west Hill StuG but his TH was 8 coming back, and my HD wasn’t going to hold because of the StuG to my left.  Urgh!  I always thought “lone tanks die” and I was on track to prove this out again with my T34.  Hopefully the Russian squads rushing up the east Hill would save those treads! 

Good thing an ATR shot broke the platoon on the west Hill (perhaps we could meet the StuG alone then) and the heavy weapons guys on the east Hill went for R&R.  The Russians in the valley were slowing the Italians down some but they were moving forward still.  Our first Spotting Round went wildly off which didn’t help things.  I needed a nice Harassing Fire to shut that party down.  

Advanced Squad Leader scenario FrF5 The Valley of Death After Action Report (AAR)

The ATR team on the west (top) Hill went straight for the StuG, if it wanted to deal with us it would have to change VCA.  An ATR hit would immo on a 5, and if they pass their PAATC, immo the STuG on a 7!  But all that talk didn’t distract the west Hill StuG from our T-34.  

It’s time.  I knew my T34 couldn’t fire while being CE but we threw open the hatch and tried for a vehicular smoke grenade anyway.  Nada.  Well, there goes nothing.  We gunned the engines and sure enough the first shot whizzed by!  We pushed forward off the hill and the StuG intensive fired!  The shot came real close but that missed as well.  We couldn’t believe it!  Everyone in the tank screamed “GO GO GO GO!!”.  We thought about rounding to the back of the east (bottom) Hill StuG, DM’ing the Italian heavy weapons team and going HD behind the stone wall.  Unfortunately we wouldn’t get a first shot off anyway being CE and that StuG would have a chance to spin around and we would need a 5 to kill (they needed a 6 and they had a spare AFV).  We decided to make for the area behind Italian lines.  If the StuGs wanted to come for us they would have to go the “wrong” direction and abandon their infantry.  We stayed in motion behind some buildings, hidden from the west Hill StuG.  

Well, our ATR shot went wide, even when our guys were practically bracing the ATR against the side of the StuG!  “We can still go in and kill the thing!” someone yelled.  The 7-0 thought about it for a second and remembered how his momma always told him to not be a hero.  

Next turn came around and as you expect, the StuG started up. POW!!  The ATR team fired again and watched the round arc’d gracefully off to the distance.  The StuG overran the Russian team.  They survived somehow and rolled around for their CC Reaction Fire.  This one’s tough ‘cause the StuG’s moving but they managed to immo the StuG with its gun pointing in a not so useful direction.  

The radio guy got Harassing Fire down properly in the valley as well, catching the Italians in the open.  The Italians conceded.  

Advanced Squad Leader scenario FrF5 The Valley of Death After Action Report (AAR)

How’s this Scenario Interesting?

Classic quality versus quantity?  The pair of StuG’s could be tough to deal with.  I thought I’d just run that T34 around (and not stopping) and lean on my superior mobility, cut rout paths and stuff.  I wouldn’t win shooting matches with either of them.  Putting Italians on the hills made it challenging for the Russians as they didn’t have the bodies to spare.  StuGs were there to lay smoke I think, without which the Italians couldn’t move safely. The Italians also shouldn’t mass up because of the OBA and so spreading them out might well be the way to go.  Some Italians might break but the Russians couldn’t shoot them all.   The StuG should do what assault guns were meant to do: shoot smoke rounds from the back and keep the T34 from getting cute.  They shoot way better at a distance anyway.  I took the balance because it’s largely an Italian win on ROAR but I can see how tough it was for my opponent.  

References

Winners : Great Games Giveaway 2021

Photo by Vlad Cheu021ban on Pexels.com

Worldwide Prize #1Bear Flag Republic and ALEA 35 Magazine (with Italia 44 & The Masters of Horizons).  Quarterdeck gives a Shipping Allowance of $30, the winner will pay the difference to Quarterdeck before shipping.
Prize #1 Winner : Cole Mills (USA)

Worldwide Prize #2: From Salerno to Rome (ziplock).  Quarterdeck gives a Shipping Allowance of $30, the winner will pay the difference to Quarterdeck before shipping.
Prize #2 Winner : Ray Newbert (USA)

Hong Kong Prize: Bear Flag Republic, shipped FREE
HK Prize Winner : Michael Chan (HK)

A huge thanks to everyone for the overwhelming response! Thanks also to Jack Greene at Quarterdeck International for his generosity. Congratulations to the prize winners. Here’s to a happy and healthy 2021 to everyone, all the very best to you and yours.

@Prize Winners: I will be in touch today by email and will hook you up with Jack Greene for the prizes. If you don’t see an email from me within 6 hours of this post, please let me know.

RbF I-3 South Park After Action Report (AAR) Advanced Squad Leader scenario

RbF I-3 South Park After Action Report (AAR) Advanced Squad Leader scenario 

Scenario Background

It’s December 22 1944 in Senonchamps (Belgium), not too far from Bastogne.  According to the scenario’s “Historical Perspective”, this was a lightly defended American artillery park.  


(Photo : ASLScenarioArchive.com)

(“The Ardennes, 1944-1945: Hitler’s Winter Offensive”)

Victory Conditions and Tactical Considerations

The Americans started the game with 3 HS and 2 crews but a lot of hardware : an MMG, a baz, 2 x M55 (quad .50-cal carriage with 24FP), 2 Stuarts, 1 Sherman and 2 jeeps (with MMGs).  They have 1x M1A1 “Long Tom (155L) and 2 x M1 (155) howitzers.  Getting tagged by a “One-Five-Five” means 30FP.  The good thing is that they start unmanned.  They would remain so until they got LOS to known German units.  7 US squad would show up on Turn 4 as reinforcements along with 2 leaders and more toys.  

“Kampfgruppe Kunkle” showed up with 6×548, 6×447 with 3 leaders.  They got a STuG and a STuH42 (105) backing them up as well.  

EC’s Wet with Heavy Falling Snow.  So the Americans could try torching some of the buildings but it wouldn’t be the easiest with the lack of personnel and the Wet EC.  Heavy Falling Snow means a +1 LV that would get worse with an additional +1 LV from Turn 5.  There’s however, no Ground Snow, so Smoke is in play.  The Stuarts can’t do much to a STuG front but I would have the STuH or a panzerschreck covering the flanks at all times.  The Quad .50-cal with its ROF3 is probably great for DI shots. We need to be careful about the Sherman with its fast turret and TK14.  Bazookas have TK16, we should stay away from those as well.  We would use assault guns as assault guns as much as we could.  I wondered what he planned to do with those jeeps, ie for mobility or (scrounged) firepower?  They wouldn’t be able to cross those bocages though.  

The Germans have two ways to win: 

* Win immediately if they capture/destroy all 3 of the guns
* Win at Game End if they hold onto the 4 VC buildings

StuH 42 from 242 StuG Abt

After Action Report

Advanced Squad Leader scenario RbF I-3 South Park

I decided to NOT engage the Artillery pieces until we absolutely had to.  The alternative was to “race” down the hill and across the open field with bocages in the way and in the face of heavy US firepower.  The first problem was one of the Quads.  It ripped squads off our OB through +1 Heavy Falling Snow and smoke we laid down.  We finally got to rush it and kill it in CC.  The STuG got out on the flank to keep the 17MP Stuart from squirrelling around our left.  I made sure it’s covered by the STuH from behind.  The Americans decided to abandon their jeeps and ripped off the MMGs.  I wanted to kill one of the Jeeps but the Stuart was a priority.  The other Stuart went around the back into my axis of attack.  The Sherman moved into.  My right’s got panzerschrecks lined up but they didn’t have to know that, did they?  

Advanced Squad Leader scenario RbF I-3 South Park

I had one more turn before proper Americans show up so I was racing those units down the street.  Their Stuart got a little too close and so I stopped the STuH in front of it and shot it with a HEAT round.  The Sherman decided to back off and got immobilised by an ESB roll.  However it’s right next to the last VC building so it was a good place to be!  I fought the urge to make my STuG “more useful” but kept to the discipline of covering the STuH.  Oh, my 9-1 went heroic.  Not sure if it’s a good thing ‘cause hero’s don’t break, they wound and they die.  The units with the US “Baz 44” and the “MMG” right of center were in fact, German.  The other Quad realised it’s going to be out of the game and the gun crew tried desperately to drag it along.  I got to keep this Quad out of play.

Contrary to what you see in the picture, the guns hadn’t yet seen us, and were not crewed yet.  

Advanced Squad Leader scenario RbF I-3 South Park

We sneaked up on the immobilised Sherman with a shreck but it took us 2 phases to shoot it pointblank.  Some pretty ominous ginormous American stack moved up to our last VC building though.  The mods were +5 but we took no comfort in light of the 36FP.  The STuH pumped rounds into the stack but was ineffective.  The big US stack broke our occupant of the last VC building and put us into a position of having to win it back.  Meanwhile squads rushed the middle One Five Five.  Miraculously, it broke the 2 squads but left an 8-0, the heroic 9-1 and a captured bazooka in front of the howitzer.  The STuG went wide, decided that shooting in the +2 LV environment was no longer ideal, prepped itself for a final Overrun of the leftmost (top of the map) gun.  

Advanced Squad Leader scenario RbF I-3 South Park

The heroic 9-1 led the final attack with a +6 shot that connected with the One Five Five.  The IFT effects shot vaporised the crew and the random destruction roll vaporised the gun as well.  Two more to go!  The STuH opt’d for a HEAT shot against the Americans inside the last VC building.  That shot connected as well but it only succeed in breaking the leader and pinning the squad!  We would have to do it the bloody way.  The Americans couldn’t crew the leftmost gun (top of map)!  Feeling luck on its side, the STuG proceeded to overrun the left gun not once but twice!  Unfortunately It only succeeded in breaking its main gun.  Folks did managed to rush up to the 2 remaining guns without a scratch.  Things looked as if they might work out in close combat.  

But it was not to be.  We had a 2:1 attack on one of the Guns but boxcar’d the roll.  All eyes then turned to the last VC building.  3 squads and a concealed leader ambushed the pinned US squad.  Unfortunately we rolled a 5,6 which couldn’t evict the occupants.  The Germans lost.

How’s this Scenario Interesting?

This is a very tight scenario that offers a number of tactical choices.  If I play it again, I might well try a run down the left and go for the 3 guns through the bocage.  The other Quad will be just as tough to content with and I can’t leave it on my flank.  The Germans had a tight schedule to meet.  The two sides had very different forces to play with, which makes it very interesting also.  I really have to give it to my opponent though for hanging tough through it all.  Once reason why the Germans lost is that it couldn’t push past the last VC building before the American reinforcements entered on Turn 4.  

I really like this scenario.  
Advanced Squad Leader scenario RbF I-3 South Park After Action Report (AAR)