Bishop: Converting a Spotting Round to Fire For Effect

First World War: soldiers of the English infantry in France, running out of their trenches at the signal to assault, Somme 1916. CREDIT: Fototeca Storica Nazionale.

(Author: Jim Bishop)

In August 2021 I attended the ASL Scandinavian Open tournament in Copenhagen. The French have OBA in WO33 “One-Eyed Jacques.. Walking around the room twice I observed players incorrectly convert a Spotting Round to a Fire For Effect (FFE). The scenario is an ideal case study for this all-too common error.

For this article I have excerpted a section of the OBA flowchart I will be referring to throughout the article. Understanding this section of the flowchart is key to placing and converting a SR effectively. Conversely, knowing the nuances of this section will help you frustrate your opponent’s attempts to attack with OBA. To make our
discussion clearer I have labeled two of the bubbles, one called A and one called B. Also recall the errata posted in Journal 11 changing AR to SR in bubble B.

For our purposes, we will assume you have successfully navigated the flowchart to the point where you maintained Radio Contact, announced your intention to convert, rolled for accuracy, and corrected the SR if needed. You are now ready to convert it to a FFE.

It is not enough to simply announce your intention to convert a SR as some players presume. There are a couple of crucial conditions which must be met before a SR can be successfully converted to a FFE.

We will first consider bubble A. There are two possible conditions tested in this bubble to determine how we proceed:

  • The Observer has an LOS to the Base Level of the SR hex. Normal LOS rules apply (Blind hexes, LOS Obstacles, LOS Hindrances, etc).
  • The Observer has an LOS to the Blast Height of the SR (C1.32) AND a Known Enemy Unit in or adjacent to the SR’s hex. Because the blast of an SR is visible two levels above the Base Level of a hex, it is possible for an Observer to see a SR in an otherwise Blind Hex. If there are no KEU’s in or adjacent to the SR’s hex the SR remains in place unconverted (the “No” path from bubble A).
    • Per footnote d, Concealed Units in non-Concealment Terrain are considered known to the Observer for purposes of conducting OBA actions.

Next, let’s look at converting the SR to an FFE covered in bubble B. To convert we need two things: a LOS to at least the Blast Height of the SR and an enemy unit. There is a case where an enemy unit is not required and we will examine that shortly.

Observer only has LOS to the Blast Height: When an Observer cannot see the Base Level we already know what happens if there are no KEU in or adjacent to the Blast Height; the SR remains unconverted and we never make it to this bubble. Since there must be one or more KEU and at least one of them must be known to get to bubble B, the SR is converted to a FFE and resolved (the “No” path from bubble B).

Observer has LOS to the Base Level: It gets more interesting when an Observer has LOS to the Base Level of the SR’s hex. Here we will be following the paths from bubble B. Again, we have to ask if there are enemy units in or adjacent to the SR hex. If the answer is no, the SR is converted and resolved using the “No” path. If the answer is yes, we must ask a second question: are all of them Unknown to the Observer. Note footnote “d” telling us Concealed Units in non-Concealment terrain are considered KEU for the purposes of conducting OBA actions. If the answer is no (i.e. at least one of the units is known to the observer) then the SR converts to a FFE using the “No” path. If the answer is yes (i.e. all enemy units in or adjacent to the SR hex are unknown to the Observer) then an extra chit draw must be made from the existing OBA pile. This is the “Yes” path. If the xdraw is black, the card is shuffled back into the draw pile and we follow the “Black” path converting the SR into a FFE. If the draw is instead Red, the card is again shuffled back into the deck and follow the “Red” path resulting in Access Lost and removal of the SR.

Keep in mind the special case of Harassing Fire. While all of the rules about enemy units in or adjacent to the SR remain in play, any units located in the “outer ring” of a Harassing Fire FFE mission do not force extra chit draws. If an Observer has an LOS to the base-level and there are no unknown enemy units in or adjacent to the SR’s hex, the SR will convert to an FFE regardless of how many unknown units there are in the “outer ring” of the affected blast area.

From this brief note, there are some lessons to be learned here:

As the Defender:

  • Concealed Units are your friend. They make conversion more difficult.
  • Carefully watch placement of AR/SR and see if you can sort out where his Observer is. If
    you can stay out of his LOS, conversion is more difficult.
  • If you can force an extra chit draw it is possible you can negate the mission and make
    him start over again with a new card draw.
  • Knowing the flowchart is essential to effectively defending against OBA

As the Attacker:

  • Be careful where you place your SR. If it drifts to a hex where you have LOS to the Base
    Level of the SR’s hex and there are only unknown enemy units in or adjacent to the SR’s
    hex you could be forcing an extra chit draw.
  • An enemy skulking in a woods line can be mauled pretty badly with Harassing Fire even
    when out of LOS.
  • Knowing the flowchart is essential to effectively attacking with OBA.

Examples: For this section please refer to the illustration. The Observer is in 13aI5 on level 2. Three SRs are on the labeled SR — A, SR — B, and SR — C. We will discuss each of these in turn.

SR — A: The Observer has LOS to the Base Level of the SR. As such, we flow from bubble A to bubble B. There are enemy units in or adjacent to the SR’s hex. The unit is un-Concealed and in the LOS of the Observer. As such, it is a KEU meaning we flow from bubble B via the “No” path and convert the SR to an FFE and resolve it.

Were the 4-6-7 Concealed the situation would be entirely different. In that case, there are units in or adjacent to the SR’s hex and they are unknown to the Observer. We would flow from bubble B via the “Yes” path and make an extra chit draw. If the draw is a black chit we follow the “Black” path and convert the SR to an FFE and resolve the attack. If instead a red chit is drawn we would follow the “Red” path, Lose Access, and remove the SR.

SR — B: The Observer does not have LOS to the Base Level of the SR’s hex but he does have LOS to the Blast Height. Looking in bubble A, when the Observer has LOS to the Blast Height, we need to determine if the Observer has LOS to KEUs in or adjacent to the SR’s hex. In this case, there are two units Adjacent to the SR, but both are out of LOS of the Observer and do not meet the requirements of bubble A to leave via the “Yes” path. As such, we leave bubble A via the “No” path and the SR remains in place unconverted.

SR — C: For this one, the Observer is trying to convert the SR to an FFE Harassing Fire. In this case the Observer has LOS to the Base Level of the SR. We leave bubble A via the “Yes” path. In bubble B, we ask if there are enemy units in or adjacent to the SR. There are none so we exit bubble B via the “No” path and convert the SR to an FFE Harassing Fire. Even though the two 4-4-7s will be attacked by the FFE AND they are out of LOS of the Observer, the SR will still be converted. These units are not in or adjacent to the SR’s hex so they do not affect the conversion to FFE process.

Clearly, there is more to attacking with, and defending against, OBA than offered in this brief note. If you would like to see more about this or some other topic let me know what interests you and I may take that on. I hope this brief article is useful and if you find any errors please let me know and I will correct them. — jim

(Carried with Jim Bishop’s permission)

Original posted here : https://jekl.com/2021/09/10/converting-a-spotting-round-to-fire-for-effect/

Bishop: Stop and Go Traffic: A Synopsis


Royalty free HD Battle of the Bulge photos | Pikrepo

Author: Jim Bishop

Recently, players have posted questions surrounding Moving, Motion, Starting, Stopping and how these interact with C6 Target-Based To Hit DRM. These questions appear cyclically and I can recall answering them for as long as I have played ASL. Much of the information in this article appeared in Ole Boe’s Stop and Go Traffic article which originally appeared in the ‘96 ASL Annual. These old Annuals are available as PDF files or can be picked up used, through all the usual outlets. I highly recommend you read the original as it is still informative but for those who can’t, I offer this summary of that article here.

Moving and Vehicular Target:

To properly apply all the DRM it is important to first understand the difference between Moving and Moving Vehicular Target. Moving Vehicular Target, sometimes referred to as Moving Target, is defined in C.8. Any vehicle currently in Motion is a Moving Vehicular Target. In addition, any vehicle which starts ITS MPh in Motion, has entered a new hex, or bypassed a new hexside in its current hex during ITS MPh is a Moving Vehicular Target during Defensive First Fire or Final Fire. The key here is the vehicle either started in Motion or has moved to some new position on the board.

Moving is slightly harder. Not only is it not defined in the Index, it is never well defined in the ASLRB. In ASL, Moving means the unit is currently conducting ITS MPh. There can only ever be ONE moving thing. That thing can be a single unit, multiple units moving as a stack, a Human Wave or some other Impulse-based movement, etc. The unit or units actively spending MFs/MPs are Moving regardless of how many units are doing it or if they successfully use the MF/MP(e.g., failed Smoke Attempt DR/dr). Even though Moving, a unit which doesn’t spend MP/MF’s cannot be fired upon unless they actually spend the MP/MF. The closest the ASLRB comes to stating this is in A8.1: “… The portion occurring during the enemy MPh is called Defensive First Fire and can be used only vs a moving unit(s)…” It would eliminate a lot of player confusion if such a key concept was in the Index.

Stopped and Non-Stopped:

The Index defines a Non-Stopped vehicle as one which has not expended a Stop Movement Point (MP) since its last Start MP expenditure during ITS MPh. This should sound a lot like the earlier definition of Moving. That’s because it is. A vehicle can only ever be Stopped or Non-Stopped while it is conducting ITS MPh, i.e., Moving as defined earlier. Knowing what Non-Stopped is, we can surmise a Stopped vehicle is one which has spent a Stop MP or somehow become Immobilized/Bogged while Moving. This is covered in C.8.

Motion Status:

A Moving vehicle, i.e., one conducting ITS MPh, cannot be in Motion status. It is either Stopped or Non-Stopped. A vehicle which ends ITS MPh without spending a Stop MP is covered with a Motion counter to reflect its Motion status and is treated as a Moving Vehicular Target. A vehicle which begins ITS MPh covered with a Motion counter has the counter removed and the begins ITS MPh as a Non-Stopped, Moving Vehicular Target. A vehicle not covered with a Motion counter begins ITS MPh as a Stopped, non-Moving Vehicular Target.

From all of this, it should be clear a vehicle can be Stopped but still qualify as a Moving Vehicular Target. Conversely, it is possible a vehicle can be Non-Stopped and not qualify as a Moving Vehicular Target. A vehicle under a Motion counter is ALWAYS a Moving Vehicular Target. In all cases, Moving, Moving Vehicular Target, Motion, and Stopped/Non-Stopped represent different states. Understanding those states along with a careful perusal of the various charts will make it easier to correctly apply DRM when the time comes.

With this as background, we are ready to explore how all these rules interact and how they are properly applied. Knowing the correct application of these DRM is among the first steps to better combined arms and AFV play. Onward.

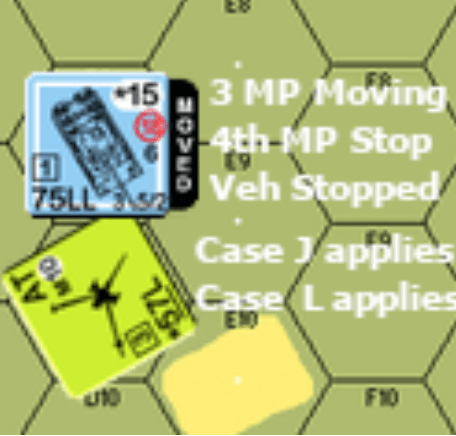
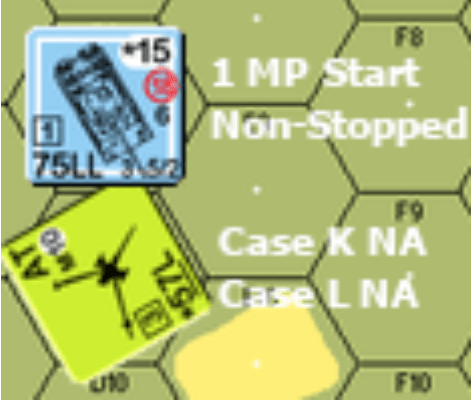
EX 1: An AFV begins ITS MPh NOT in Motion and spends 1 MP to Start. This AFV is now conducting ITS MPh (i.e., it is Moving). Since it spent a Start MP it is now Non-Stopped but not yet a Moving Vehicular Target. Looking at the C6 Target-Based TH DRM Table, we see Case L would be NA (the AFV is a Non-Stopped target). Additionally, Case J would be NA (the AFV does not qualify as a Moving Vehicular Target). For the purposes of CC Reaction Fire or CC, the AFV is Non-Stopped so a +2 DRM would apply (A11.51). If the AFV survives all in-coming fire on the Start MP, it may enter a new hex or bypass a new hexside. Once it has done this, it qualifies as a Moving Vehicular Target, but not before. This has some serious implications. If you start for 1 MP and change the VCA 2 hexspines before entering a new hex or hexside, that would be three potential shots before Case J DRM applied.

EX 2: An AFV begins ITS MPh in Motion. As it is conducting ITS MPh, the Motion counter would come off and the AFV is considered Non-Stopped and Moving (i.e., conducting \ITS MPh). All fire against it during Defensive First Fire and Final Fire suffer Case J DRM. If it spends 1 MP to Stop, it becomes a Stopped vehicle but would still be considered a Moving Vehicular Target. As such, Case J DRMs would still apply but Case L could now also apply making it possible for an AFV to be both Point Blank and a Moving Vehicular Target. Also, once the AFV becomes Stopped, there is no +2 DRM in CC/CC Reaction Fire against that AFV even though it is still considered a Moving Vehicular Target.

EX 3: An AFV is covered by a Motion Counter outside ITS MPh. Case J would apply to all shots as the AFV is a Moving Vehicular Target. Case L would be NA as the AFV is In Motion. All CC would suffer a +2 DRM for attacking an AFV in Motion. The AFV is Non-Stopped.

EX 4: This is an extension of EX 2. The AFV survives all fire on the Start MP and moves 3 MP to a hex adjacent to an enemy AFV. Surviving all incoming fire, the AFV Stops for 1 MP. The enemy AFV could shoot at the Moving AFV. If it does so, it would pay +2 Case J but also qualify for a -2 Case L since the Moving AFV is now Stopped having spent a Stop MP.

EX 5: An AFV starts adjacent to an enemy AFV. The Moving AFV spends 1 MP to Start. The enemy AFV elects to shoot. It would not qualify for Case L (the target is Non-Stopped) but it would also not be hampered by Case J as the target does not qualify as a Moving Vehicular Target yet.

I have not covered Motion attempts in this briefing but from the last few examples you should be able to extrapolate how powerful it can be to save your AFV. If an AFV is being attacked by an enemy, making a successful Motion attempt instantly qualifies your AFV for Case J and negates any potential for Case L, a +4 DRM in favor of survival. Combine this with a free CA change as part of the Motion Attempt and you can point your thickest armor to the threat. In your friendly fire phase, freely change your VCA to point in a direction where cover is hopefully available, saving the AFV from destruction.

I hope this brief article is useful and if you find any errors, please let me know and I will correct them. Thanks and go read Stop and Go Traffic. It’s worth your time. — jim

(Carried with Jim Bishop’s permission)

Original posted here : https://jekl.com/2021/09/09/stop-and-go-traffic-a-synopsis/

Journey to a Tourney, Part 3 : The Aftermath

M36 JacksonI never expected this, but there IS an “aftermath” to having done a tourney for the first time :

  • Having prepared for all 25 tourney scenarios, I read a lot more of the rulebook and the scope of scenarios I can play expanded.
  • I met some great folks around the region as well.  I have a few more regular “Live” games now on VASL apart from my usual stable of PBeM (“Play By eMail”).
  • I play a little faster.
  • I play differently too, having seen different styles of play.  For example :
    • I know I should be more aggressive with my movements.  Moving and encircling is way more effective (and time efficient “turn wise”) than sitting and shooting.
    • I know what establishing a tempo as an attacker feels like.
    • I don’t care about the die rolls anymore.  “Reversion to Mean” dictates that it will all even out at the end.  Good decisions win the game not die rolls.
    • I overheard Ian Percy and George Bates said (and this is far from an exact quote) : “it’s not so much about what you do, it’s more about presenting your opponent with a serious of tough decisions and one way or the other, he’s going to mess a few up.  Make him do all the work.”
    • It’s important to plan out where you should be on the map and also when you should be where on the map especially as the attacker so you don’t run out of time.
    • There was an earlier poll on GameSquad asking whether folks are more comfortable attacking or defending in a scenario.  I can’t find it now but someone said “Is there a defence?”.  This thought rang in my head during my last round as the IJA (Imperial Japanese Army) defender in J116 Brigade Hill.  The IJA were infiltrating and cutting the attacker’s rout paths.  My understanding of Book VI (“Defence”) in Clausewitz’s “On War” echoes the thought : defence is just a different form of offensive action – counterattack!
  • Now I am getting ready to support the Hong Kong Society of WargamersAdvanced Squad Leader Tournament this year!!

Lastly I want to share something from the tourney with everyone.  John Charles Knowles, who’s teaching me jungle warfare through Operation Watchtower at the moment, wrote a cheat sheet for the PTO for our benefit.  Here we are :

Malaya Madness Chapter G Cheat Sheet

Cpl Kwan 7-0

Journey to a Tourney, Part 1: Decisions

I did it.

I registered for my first Advanced Squad Leader tournament, the Malaya Madness (Feb 21 to 23 2014) in Singapore. I bought my plane ticket. I booked my hotel.

Two months ago I never would have even thought about it. (Flying to Singapore for a weekend to do what?!!) A year and a half ago, Advanced Squad Leader (“ASL”) wasn’t even a blip on my radar.

Before I go on, I want to make one thing crystal clear:

  1. If you are a relatively new player,
  2. If you are a “dormant” ASL player who’s quietly learning and playing ASL by yourself,

I am writing to you.

I know there are a lot of you out there and I care to guess that doing ASL by yourself is not the easiest hobby to do. I am writing to you. I would like to share my rationale for some of the decisions I made along the way.

I hope this helps you with your choices.

So there I was, working through the Infantry rules in my room, flipping through the massive 2nd edition Advanced Squad Leader Rulebook. I was highlighting important texts and I was noting important ideas in the margin. I was studying hard. When I got tired, I played a few rounds of ASL solo, planning to play through each scenario in turn.

Even playing was slow going, I found myself re-reading the rulebook more than I was playing.

Question 1: Do I keep on studying the rulebook or do I dive straight into a game?

I looked for live games. I found the folks at the Hong Kong Society of Wargamers who have face-to-face (“FtF”) games very weekend. Getting experienced players to take you through ASL games shows you the rules in action. It gives you context. The rulebook becomes much easier to read.

Oh yes , in case no one told you :

  1. Don’t wait to read and study the rulebook and “be ready” before you play your first game. Just go look for live games and attend. I have never met an ASL’r who’s not willing to teach.
  2. No, you don’t have the read the whole rulebook. You can start playing infantry only scenarios after Chapter A.

Question 2: Do I keep on dabbling solo or do I get on a regular play schedule?

I attended live games with the Hong Kong ASL’rs, but I couldn’t have joined them every weekend. ASL was still a solo affair for me. Had it continued in this fashion ASL might have become another of my passing fancies.

It never did.

Out of the blue Don Lazov wrote and asked me if I want to learn ASL from him. I was going to keep my “ASL hobby” on a personal level. but here I was, there’s an experienced player offering to teach. Do I keep it a private & low pressure affair or do I get serious about this?

Anything worth doing is worth doing seriously.

I stopped thinking and said “yes”. That decision changed my ASL life. ASL went from a private study to a social affair. Playing intelligent and thoughtful human beings makes ASL come alive from that moment on. ASL becomes the complex and rich experience that it’s designed to be.  Having a regular play schedule helps me internalize the rules.

Question 3: Do I stick with PBeM or do I play live?

I play ASL via PBeM using VASL. What I mean is that I play ASL via exchanging logs generated from Rodney Kinney’s “Virtual ASL” platform. I was up to 9 concurrent games at one stage. PBeM saves me from having to be at appointed places at appointed times. With my work travel schedule that was simply beyond the realm of possibilities. I step through my opponent’s moves from the logs they send me.  I interject my responses and I send my logs back.

What I lost was the social interaction. What I have was perhaps too much time to consider and to reconsider my moves. PBeM games allow for methodical and well thought out games, perhaps too well thought out.

So I started having more live VASL games where I see my opponent’s moves real time and we interact via Skype. Often times another friend(s) drop by and it becomes a virtual club night! I still travel as much but I keep a regular live VASL schedule now.

My other mentor, Witchbottles, a man who’s a lot busier than I am said it’s a matter of time management.

I am learning to play faster. I also learn to give up the notion of playing a “perfect game”. I am learning to square up a situation, structure a solution on the fly and execute!

Play, laugh and have a great time.

Question 4: Do I stay “in the shadows” or do I go signed up for a tournament?

I heard there will be an ASL tournament in Singapore for a little while before it was announced. I have to admit I didn’t give it any thought. The idea of paying for flight and hotel to Singapore by myself just to play boardgames was crazy. I didn’t even join the one in Hong Kong last year (I haven’t turn Fanatic then)!

Both of my mentors said I MUST go. One of them had even said in the past that he doesn’t go to tourneys anymore. He said I should go and decide for myself.

I gingerly broached the topic with my family. I have to admit, it feels like telling them that I am joining a motorcycle gang. My beautiful family was incredulous at first but quickly came around and gave me the support I need.

I signed up for my first ASL tournament.

Do I have a chance in hell of winning anything? No, but that’s not the point, although they do have a prize for the one who lose the most games.

To me the points are :

  • This is my gesture to myself that I want to do ASL well. Anything that’s worth doing is worth doing well. I might not become a world class player but I want to be wicked good and a lot of fun to play.
  • This is me reaching out and be part of the Asia Pacific ASL community. These are the core group of guys I’ll be playing countless hours of ASL with for years to come.
  • This is me supporting efforts to foster and to grow the Asia Pacific ASL community. Today I already count among my regular opponents, a player from Singapore and a player from Japan. I look forward to a lot more!
“Journey to a Tourney” is a multipart series that details my personal journey to what’s hopefully the first in a long line of regular ASL Tournaments in Asia Pac. I hope this will encourage any new or experienced players to come join us as well!

References :

AP54 800 Heroes AAR

AP54 800 Heroes is the second scenario I played that is designed around the Battle for the Sihang Warehouse in Shanghai.  The first one I played was A110/ASL13 Shanghai in Flames.  I believe there’s at least one more : BFP31 Chinese Alamo that covers the same battle.  The subject matter’s the same but the scenario designer’s treatment is very different.

The date was 29 October 1937.  The Imperial Japanese Army (“IJA”) had made successful incursions into Shanghai.  Most Chinese units had retreated and the western powers were uninvolved at this stage.  Chiang Kei Shek (the Generalissimo) was determined to keep the battle in world’s view and hence decided to keep the fighting in Shanghai which was already an international city at that time.  Sihang Warehouse had the distinction of being right across a stretch of water from Shanghai’s International Concessions.

It was  the place where Chiang wanted to bring China’s struggle to the world’s attention.  A battalion from the 88th Division, a German trained élite unit was hence given the task and so the name “the lost battalion” as they were the last to leave.

AP 54 Setup

Witchbottles played the Chinese defenders and I the IJA.  This was a training game and the great tactics on both sides were his and the bad ones mine.

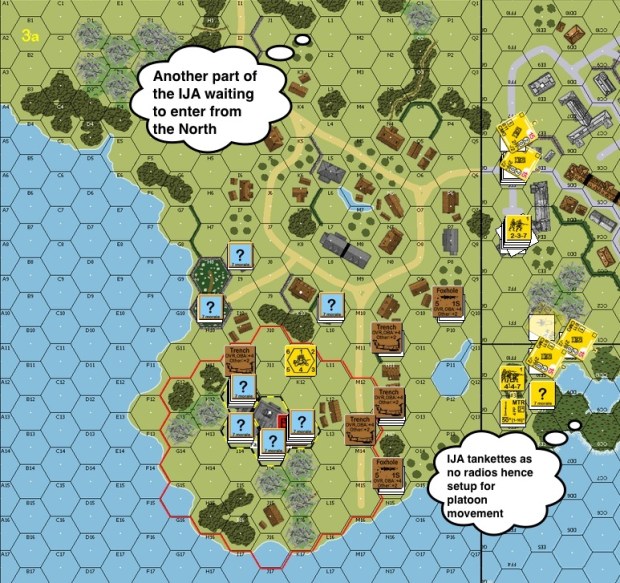
This was the setup.  The IJA were free to setup certain units to the right of the map or enter via the North (top) or the East(right).  IJA tankettes didn’t have radios and were therefore setup in platoon formations.  The building to the lower left of the map was the warehouse (factory) and was fortified.  The red ring denotes the area where Chinese units were fanatic.

This is a 5.5 turn game.  The victory conditions for the IJA were either to control the warehouse or to control 3 or more hexes of the warehouse plus all other buildings in the Chinese setup area.

AP54-JT1a

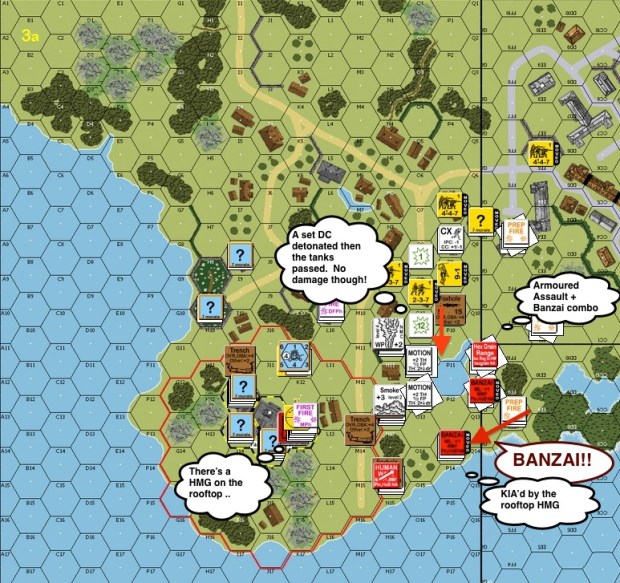
IJA Turn 1, the first thing the IJA needed to deal with was the heavy machine gun (“HMG“) sitting on the top of the warehouse.  After laying down white phosphorus and smoke, two tankettes started coming in from the north.  After bypassing some buildings, the world exploded around one of the tankettes.  It was a set demolition charge!  What both sides didn’t realize at the time was that set DCs don’t affect AFVs (armored fighting vehicle).

Suddenly, an IJA soldier in the woods to the right yelled :

BANZAAAAAAI!!!

The IJA worked out an Armour Assault together with a Banzai charge out of the woods.  The IJA thought if they could cut off the line of trenches from the base they might get a chance to stop the Chinese squads from retreating back into the warehouse.  An 8-0 IJA leader and his squad wandered out of the smoke cover and were the first to be met with a hail of bullets from HMG on the roof.  The group disintegrated on open ground.  The rest of the charge hug closer to the tankettes and kept on.

AP54-JT1b

A tankette overran a Chinese trench, and a IJA squad piled in.  The tankette bogged but the Chinese squad was pinned from the shock.  Pinned as they were, they survived the overrun attack and shot at the rear of the attacking tankette.  The LMG broke and so did the men, the Chinese squad broke and ran towards the warehouse.

AP54-CT2a

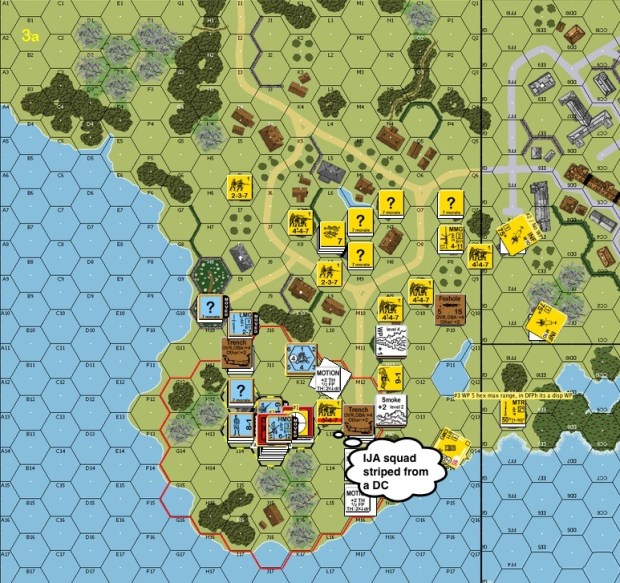
This was the end of the Chinese Turn 2.  The defenders took advantage of the IJA smoke.  A Chinese squad ran across the warehouse floor and threw out a demolition charge.  “CANDYGRAM!!” they yelled.  The explosion striped the approaching IJA squad who caught a DC on their laps a moment ago.

AP54-JT3a tanks went in on both sides-proc

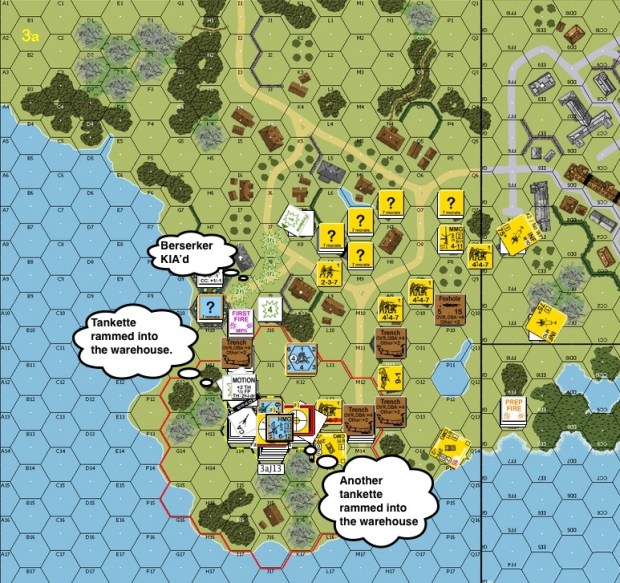
Turn 3 IJA saw a half squad going berserk on the top left of the warehouse perimeter.  It drew fire well but got blown promptly out of existence.  An IJA tankette then smashed into the fortified warehouse on the left flank.  It was greeted by a squad on the warehouse floor.  An 8-1 leader stood a little way off.  He waved at the IJA tank and smiled, pointed at the squad and said …

“Meet my Dare Death squad.”

The Dare Death squad went berserk (PAATC free), slammed a DC charge onto the IJA tankette and set it off with maniacal grins.  BOOOMMM!!  The Dare Death squad survived but so did the tank.  The dust settled and the 8-1 leader was still there.  He said

“I am happy you survived, because I also prepared this for you entertainment pleasure.”

A little way behind him was a medium machine gun squad, and they blazed away.  On the third shot the IJA tankette exploded.  Another IJA tankette slammed into the right of the warehouse as well, one tankette in the face of 3 machine guns.  Please do not for a second mistook my blissful ignorance of tank rules for bravery though.

Nonetheless, two breaches were made in the fortified warehouse and close combat ensured on the right of the warehouse after the defenders immobilised the tankette.

The Chinese piled a hero and a berserker into the melee.  Another squad tried to creep up on the IJA tankette sitting outside so that they can blow it up before it too slams into the building.  Unfortunately the squad was shot in the rubble outside.

AP54-JT4a

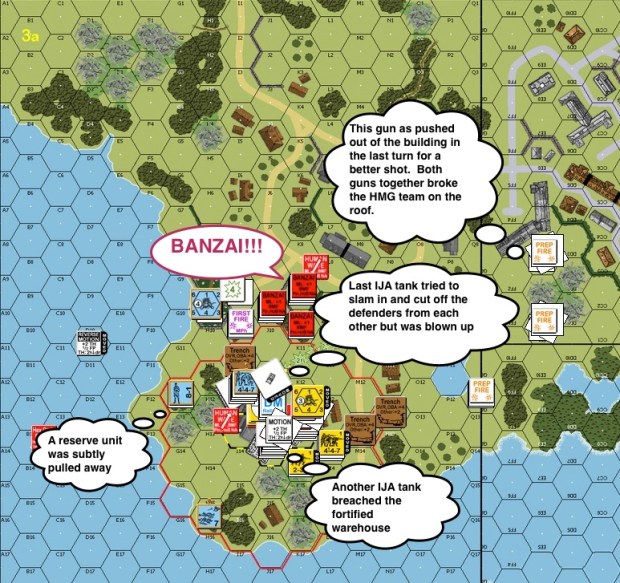
IJA Turn 4 got even more intense.  The tankette on the right make another breach in the warehouse.  The tankette to the north was shot and killed by an MMG before it could hit the warehouse walls.

IJA troops from the north finally made it to the perimeter.  At Witchbottles’ suggestion, they decided that a Banzai charge was in order!!

AP54-JT4b

This was the situation after the Close Combat phase.  The IJA killed all defenders in 2 out of 3 hand to hand combats inside the warehouse.

AP54-CT4a

Chinese Turn 4!  The reserve unit that slipped outside earlier tried to make its way back into the warehouse.  Unfortunately it broke under a hail of IJA gun fire and was pinned outside.

This is where the story ends as the Chinese didn’t have enough bodies to take the warehouse back.

In reality, the 423 Chinese defenders held out for another two days.  They succeeded in winning international attention to the Sino Japanese war.  The British allowed them to retreat across the New Lese Bridge into the International Concessions.

The Sihang Warehouse still stands today.

What thoughts do you have?  What would you have done?  What are your experiences playing this scenario?

Please comment!

Sihang Warehouse looking from the other side o...

Sihang Warehouse looking from the other side of the Suzhou River. October 2006 (Photo credit: Wikipedia)

S1 (Part 1) Retaking Vierville

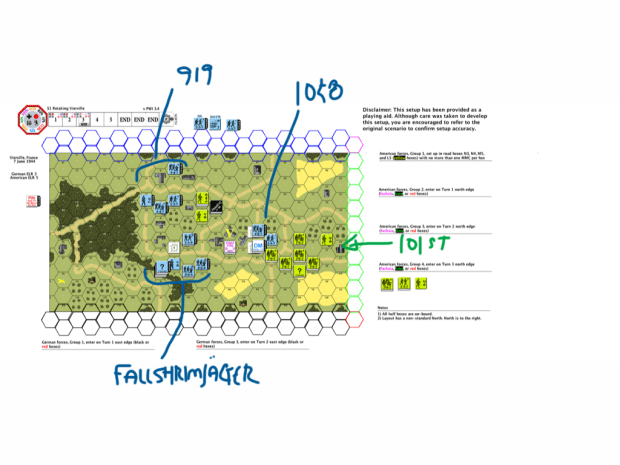
On June 7 1944, one day after the Normandy landings. the 101st Airborne (“Screaming Eagles”) was sorting themselves out from all over the Cotentin Peninsula and was tasked with securing the eastern approach to the American landing at Utah beach. Vierville-sur-Mer was a major traffic thoroughfare. Although the Americans secured it earlier they had to moved westwards towards the German strongpoint of St. Come du Mont (see Mission Albany).

There are three groups of symbols in this map of Normandy.  The one on the top left is Utah Beach, the one on the bottom left is St. Come du Mont which was a German stronghold.  The group to the right is Omaha beach and a bit inland from Omaha Beach is Vierville-Sur-Mer.

An assortment of German units took the opportunity to deliver a counterattack and among them, the elite 6th Fallschirmjäger Regiment. This day would see an all out brawl at Vierville-sur-Mer, paratroopers to paratroopers.

Erwin plays the Germans and I the Americans. We decided to play this Advanced Squad Leader Starter Kit Scenario with full Advanced Squad Leader rules. The Americans win if there are no “good order” German units in the four buildings marked with “V”s on the map. By the same token, the Germans need to keep a “good order” unit in at least one of the four buildings at game end (notice the Americans have the last move).

Turn 1 German - MPh

Turn 1 German Movement Phase

Some elements of the 1st Battalion, 506th Regiment of the Screaming Eagles were making their way through the center of town when German units (1058th & 919th Grenadier Regiments) appeared from different directions.   (Right edge of the map is North.)

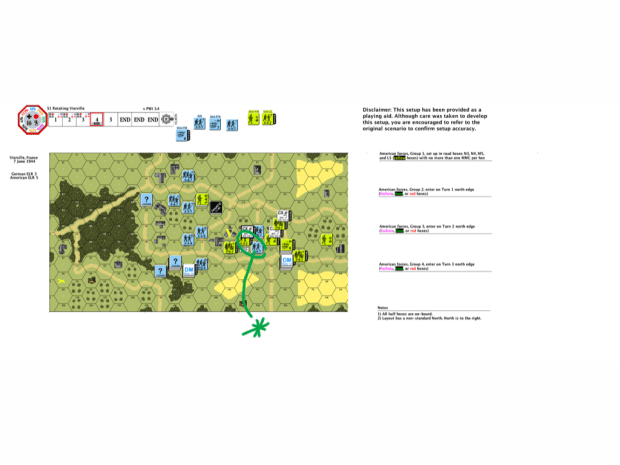
The Americans went straight to work.  Two full squads and the  8-1 leader went to the key buildings in the southwest, the other elements went to the northeast to meet up immediately with the 1058th Grenadiers.  The southwest element could potentially be isolated and might find itself fighting a much tougher battle until  reinforcements arrive.  Their mission was to play for time.  The northeast element was to clear the way for the reinforcements and were free to play to their strength in the attack.

Turn 1 American - Close Combat Phase

Turn 1 American Close Combat Phase

Other American elements started to arrive.  They used the grain field (which is in season) to make it across the open ground, using a building for cover.  A potential danger was that new German elements might appear behind them and cut them off from their rout paths.  So one squad stayed behind in the woods as the rear guard (circled in orange on the map above).

Sketch 2013-06-22 18_27_32

Turn 2 American Movement Phase

A broken American squad on the south west decided to step it up, rallied and went fanatic (battle hardened, marked by the asterick). In their desperation, a hero arose in their midst!  The reinforcing Screaming Eagles lost no time in closing with the 1058th Grenadiers on the northeast.  Hellbent on blasting their way through, they also drew fire away from their brothers who followed.  The German paratroopers arrived from the south east as well.  They carefully made their way through the woods towards the sounds of battle.  (Right edge of the map is North.)

Sketch 2013-06-22 18_40_09

Turn 3 German Advance Fire Phase

The 919th Grenadiers crossed the street in the south-west and pressured the squads on that corner of the intersection.  At the same time the 6th Fallshirmjäger moved to slice the battlefield in half, isolating the 8-1 and his little group.  To the north (right edge of the map), the Screaming Eagles couldn’t break through the 1058th Grenadiers.  They needed to clear a way to town fast ‘cause the key buildings are falling to the Fallshirmjäger soon, which also means they and their arriving brothers would all be standing outside the grain field with no protection if they couldn’t get into town.

Sketch 2013-06-22 18_45_21-1

Turn 4 German Rally Phase

The Screaming Eagles managed to get into close combat in the north.  A half squad was killed when they went in for hand to hand with a German squad and their 8-1 leader.  On the other side of the block an American half squad ambushed their German counterpart when they broke into their building.  The Americans slipped through to the other side and met up with the American paratroopers that were holding the Fallshirmjägers at bay.  However the American’s hold on the key junction was strained as they endured volleys after volleys of German fire.

So here we are at the start of Turn 4 in a 5 turn scenario.  Will the Germans succeed in capture at least one of the buildings at the intersection and hold off American attacks?

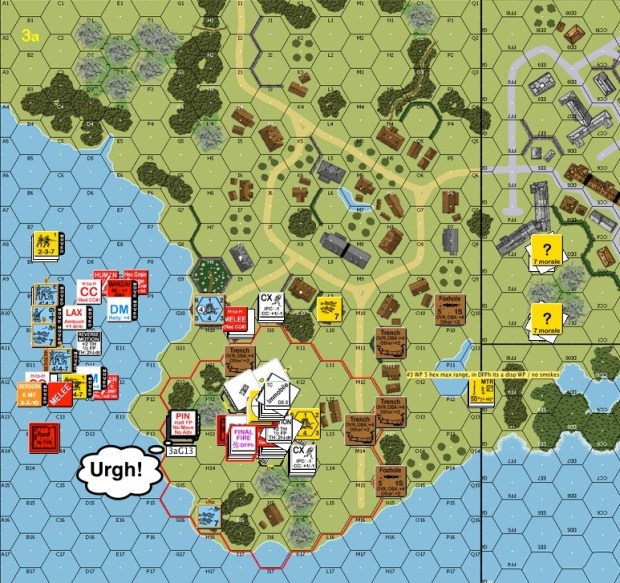
am747Sge548S

How about coming home everyday to 30 mins of PBeM game over VASL?

Whether you are a fellow newbie who would like to learn together or an experienced ASLer who don’t mind helping me up the curve. I play to enjoy and to learn. Please message me at jackson-dot-kwan-at-gmail-dot-com!!

Google

Protecting Your New Advanced Squad Leader Rulebook

IMG_6108The Advanced Squad Leader Rulebook 2nd edition (“ASLRB”) is finally in print again!

I got mine from a tiny store in Mongkok two months ago.  The Advanced Squad Leader Rulebook is massive: it’s a big box-file full of instructions to the best simulation in the history of board wargaming.

I have been working hard at learning it.  The punch holes in some of the pages are already showing tear.

To protect my ASL bible, I have two options:

  • Plastic punch hole ring reinforcement stickers
  • Plastic page protectors

Plastic punch hole ring reinforcement stickers

Unfortunately, the punch holes on the pages are too big.  I can’t find ring stickers that are the proper size.

Plastic page protectors

This is the pricier option but this is what I ended up doing.  Not only are the holes protected from frequent reference, entire pages are now protected from food stains and beer spills!

Since each page is thicker with the plastic page protectors, I split the rulebook into two box-files.  (I found a problem: I couldn’t get the holes in the plastic page protectors to work with the 3 rings in the original Advanced Squad Leader Rulebook binder.)

There are less than 250 pages in the rulebook – the standard set of rulebook sections plus sections F, G, Solitaire and a couple of Zs from ASL Journals.  I bought 5 packs of A4-s size Kokuyo”Clear Book” refills that has 50 plastic page protectors each and I got two double ring box files.  I put sections A to E in one box file and the rest in the second one.

Now I feel a lot more comfortable flipping through the protected pages in the less congested box-files!

To make the box-files look more authoritative,  I scanned the Rulebook cover and spine.  I want to get the images printed on A4 size stickers and put them on the front and spine of my box-files.  They will look pretty nice when I’m done.

What do you do to protect your Advanced Squad Leader Rulebook?

Recommended Links:

Google

The Advanced Squad Leader Starter Kits Are A Great Way To Start!

Advanced Squad Leader Starter Kit #1

If you have seen the Advanced Squad Leader Rulebook, it looks pretty daunting.  It is housed in a box file – yes, it is big and it is heavy (Shipping weight : 6 lb according to Amazon).  However, a lot of wargamers also think it’s the best simulation/game of all time!  Knowing, learning and seeing the rules manifesting themselves during gameplay is part of what the grognards enjoy as well.

Personally I don’t know of another game system whose rulebook is sold separately from the rest of the game.  So if you are looking for some assurance before plunging in, I can understand.  I had the same thoughts not too long ago.

Advanced Squad Leader Starter Kits offer a rulebook that is much more palatable and a self-contained game set that is much more economical so you can make an informed decision.  Unlike the full Advanced Squad Leader modules, the Advanced Squad Leader Starter Kits (ASLSK) stand alone, even from each other.

You do not need to buy all four.  

The rulebook for each builds on each other.  For example: the rulebook for ASLSK#3 is the rulebook for ASLSK#2 with more rules for tanks and armoured cars, with the additions highlighted in a different color.  So even though you probably won’t find ASLSK#1 and realise ASLSK#2 in short supply (although I just saw a copy selling at a bookstore in Kuala Lumpur last week), all you need is to get ASLSK#3.

Aids That Helped Me Get Started with ASLSK

There are of course a lot of tutorials on the internet as well, I rather enjoyed Eddy M. del Rio‘s (aka edelrio) ASLSK Tutorial Examples of Play which be found here.  There’s also Daniel F. Savarese’s ASL Starter Kit Explained.

There are actually a lot more top quality resources on the internet prepared by top notched wargamers.  I will tell you about more of them in my other posts.  The one thing you will find out about ASL wargamers is that they are a very sociable and helpful lot!

If you are an experienced ASL wargamer, please comment and let us know: what helped YOU?  Thanks!

Related articles

Google