ITR9 Asia’s Stalingrad After Action Report (AAR) Advanced Squad Leader scenario
Victory Conditions
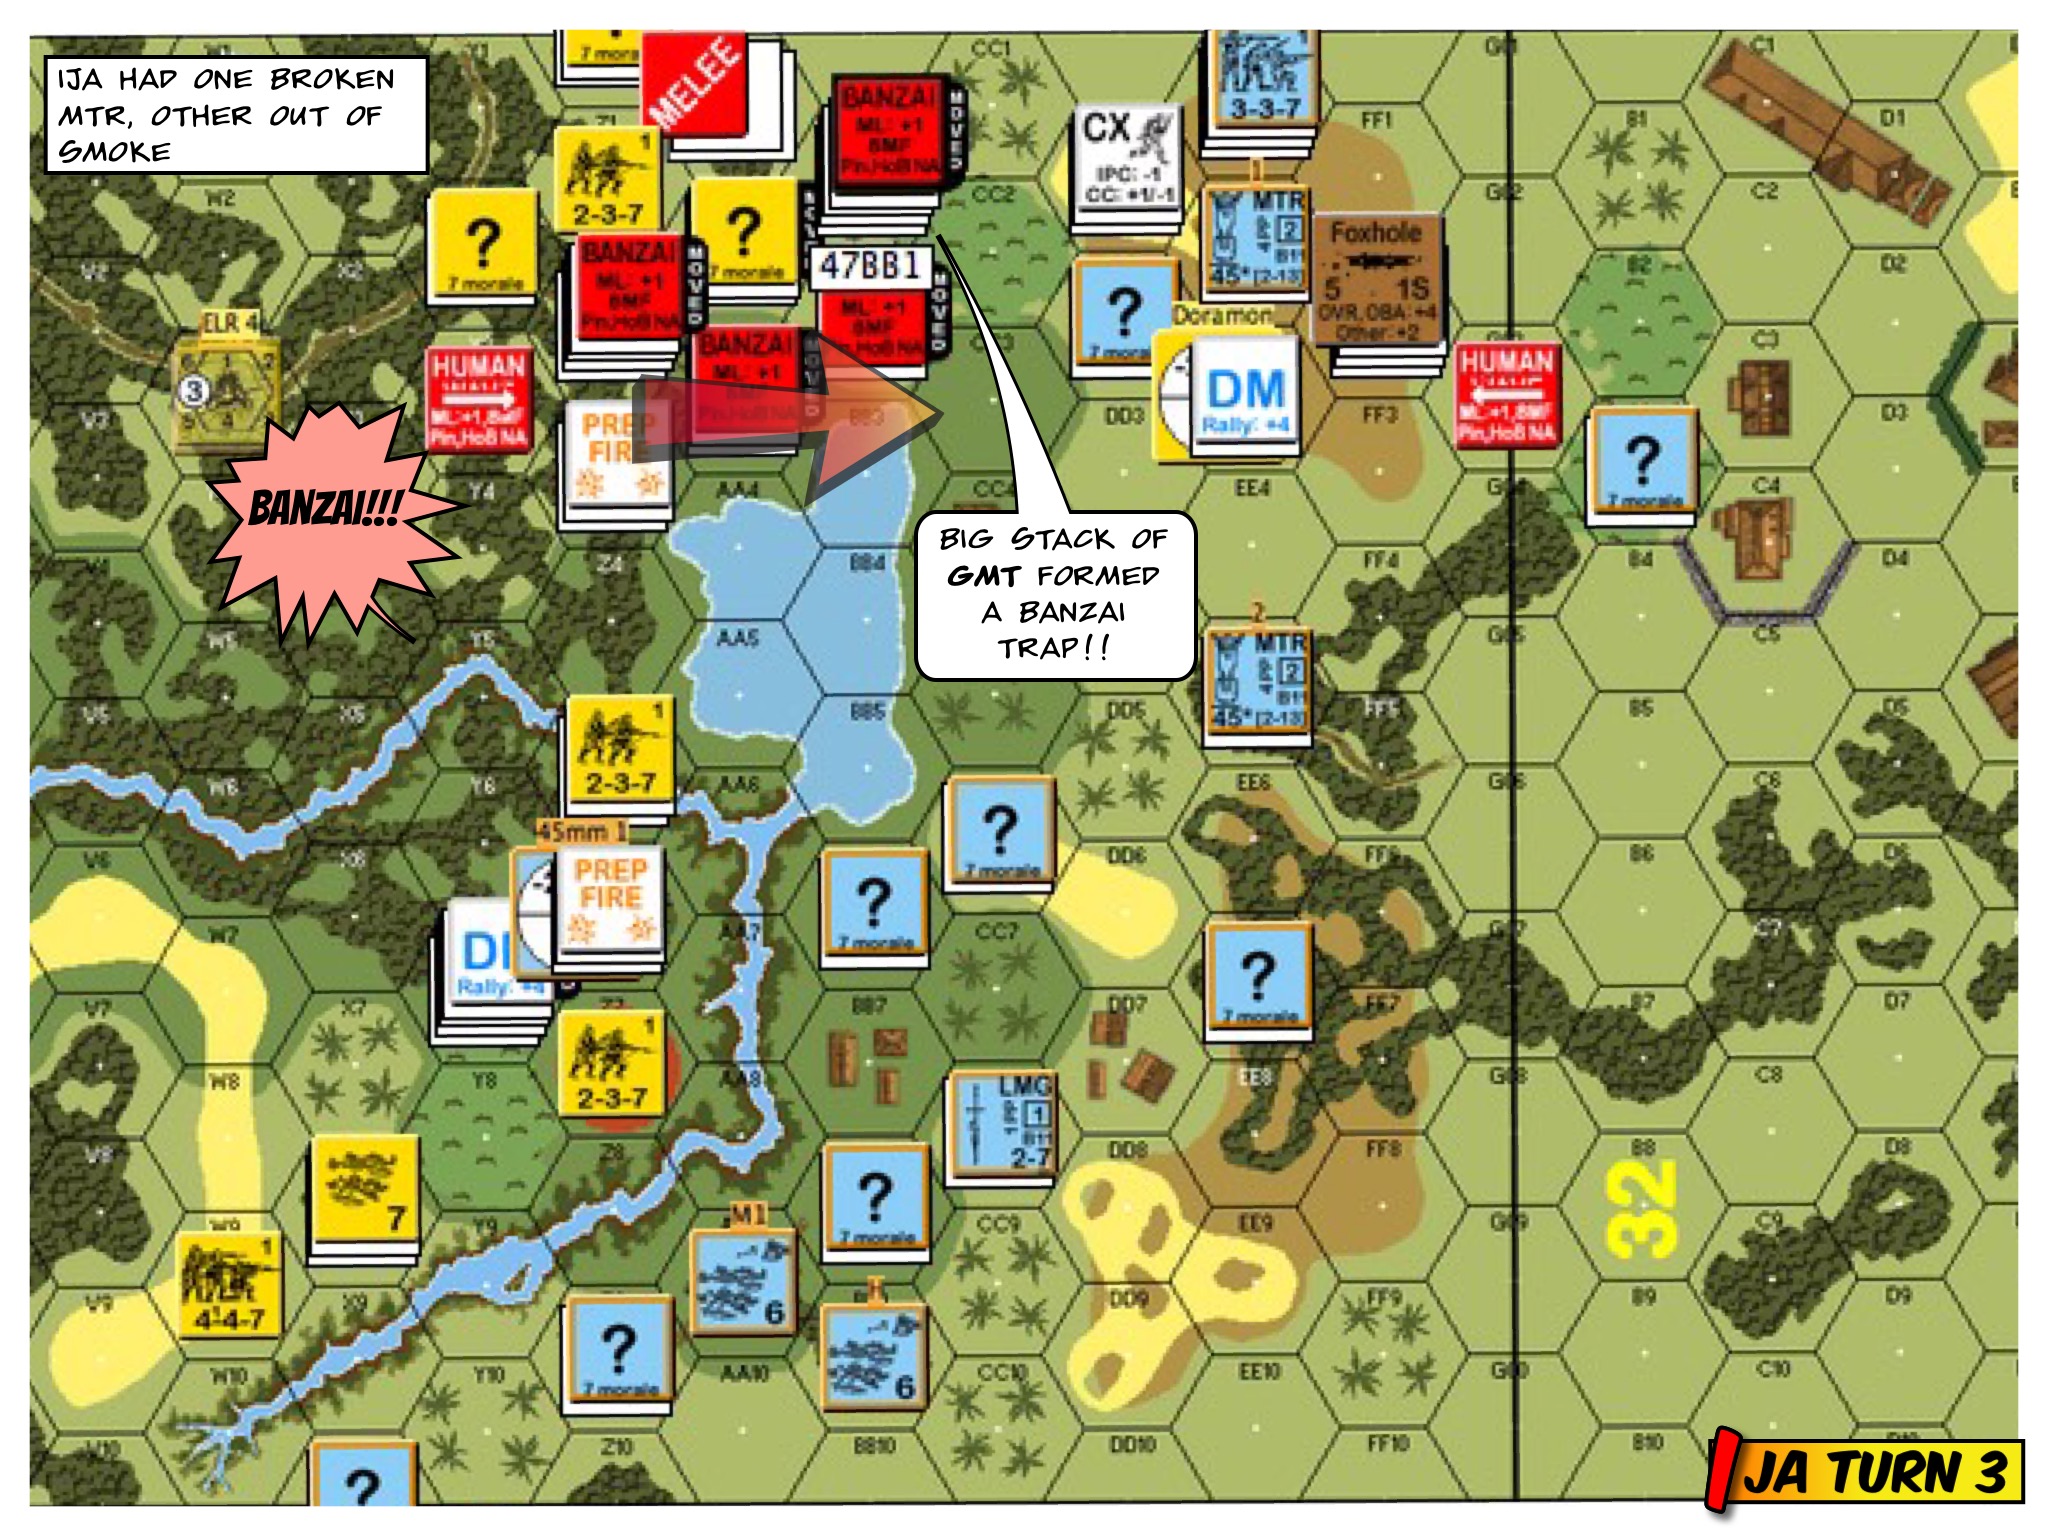
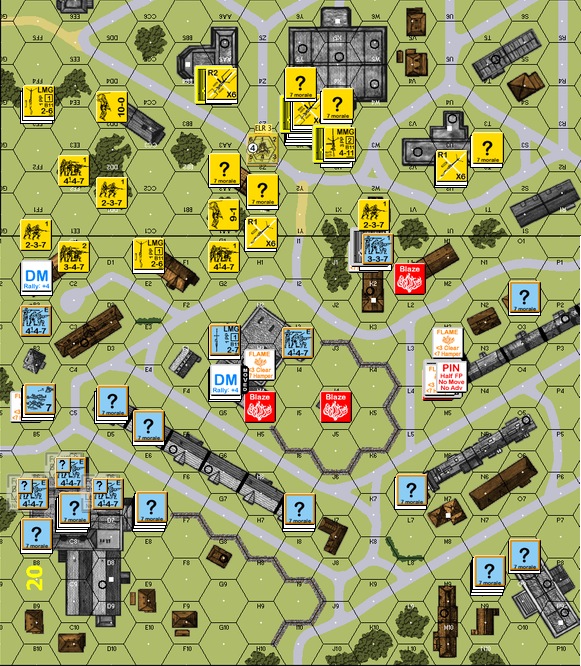
Thirty two squads of Imperial Japanese Army soldiers needed to pick their way through debris & rubble and clear three buildings of thirty squads of good ordered Chinese folks in eight turns. The Chinese had six fortified locations plus a 10-2 jedi knight. You can see the four target buildings marked off with a “V” in the maps.
To be honest, I had just finished reading Col Joseph H Alexander’s “Edson’s Raiders”. I hadn’t played PTO in a while and was determined to play the IJA like the IJA : bypass & flow behind your enemies: infiltrate, infiltrate, infiltrate!
After Action Report
 Advanced Squad Leader scenario.jpg")
I thought the Chinese were going to setup as close as possible to the IJA lines and hence lessen the possibility of them being hit by the initial IJA bombardment. Turns out the Chinese set themselves up very smartly in rubble so as to not get caught in a building collapse. My PreReg caught them quite well, but the Chinese survived the hit with only 1 broken unit. Our MMG & HMG teams climbed up two Level 2 buildings to provide overwatch. The IJA troop rushed on board where possible, with a focus on passing by Chinese flanks. The idea was to be audacious enough to compel Chinese units to unconceal and to fire (and for dummy units to look suspect). The IJA deployed where possible. It’s a HS rush with the backing of their “commissar” leaders!
 Advanced Squad Leader scenario.jpg")
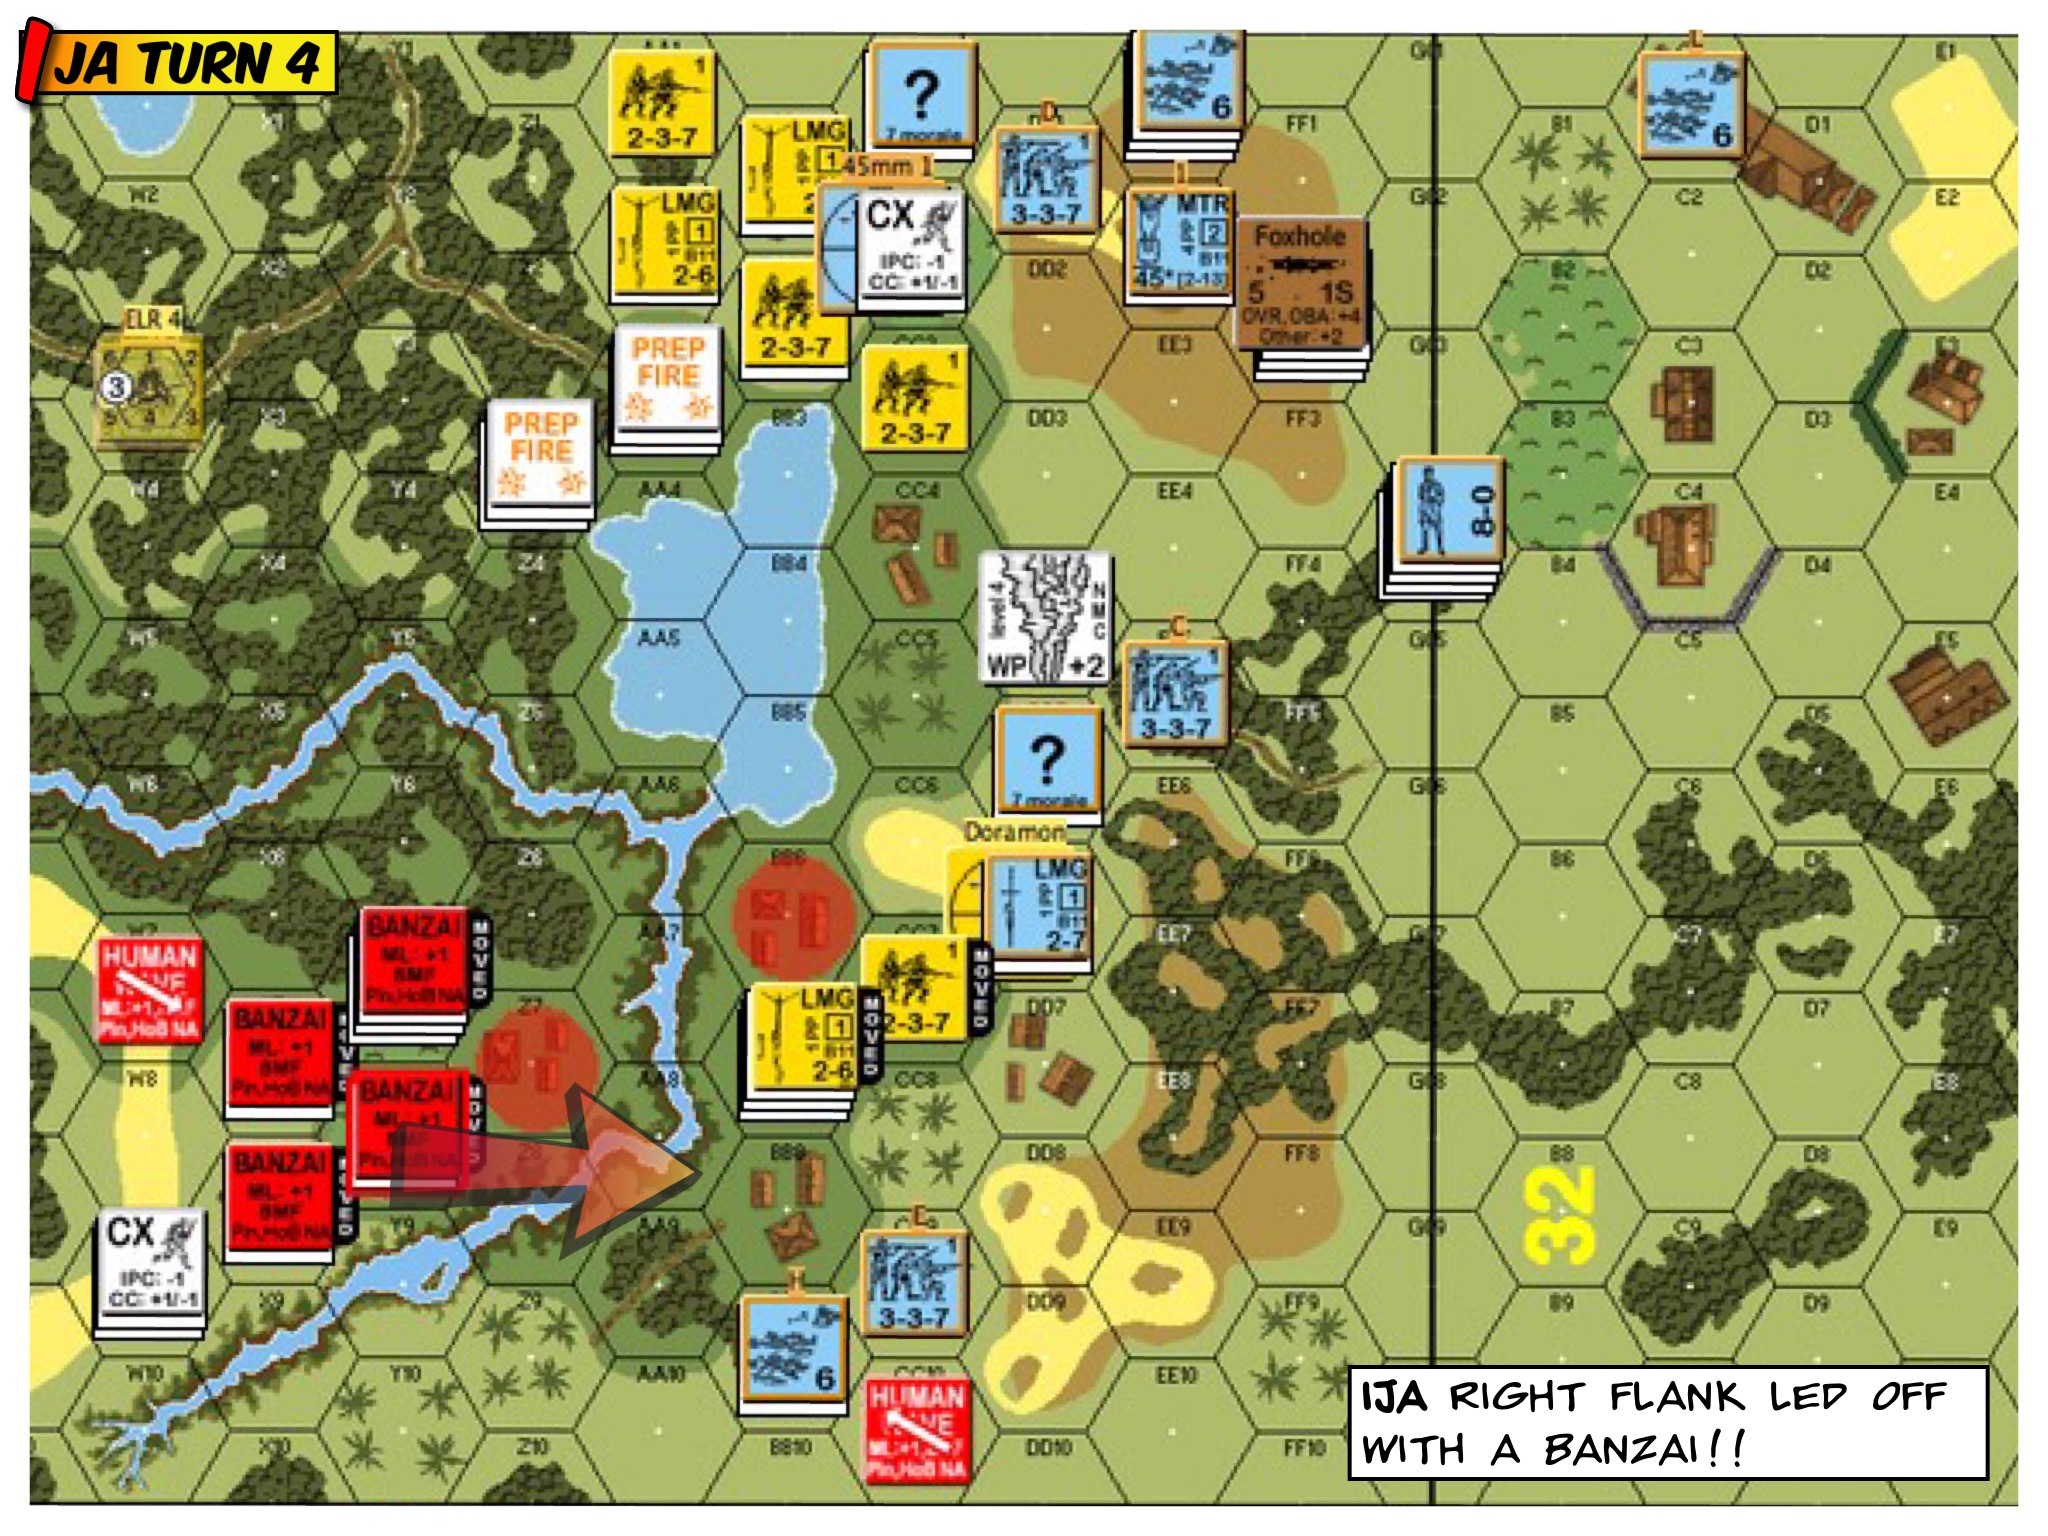
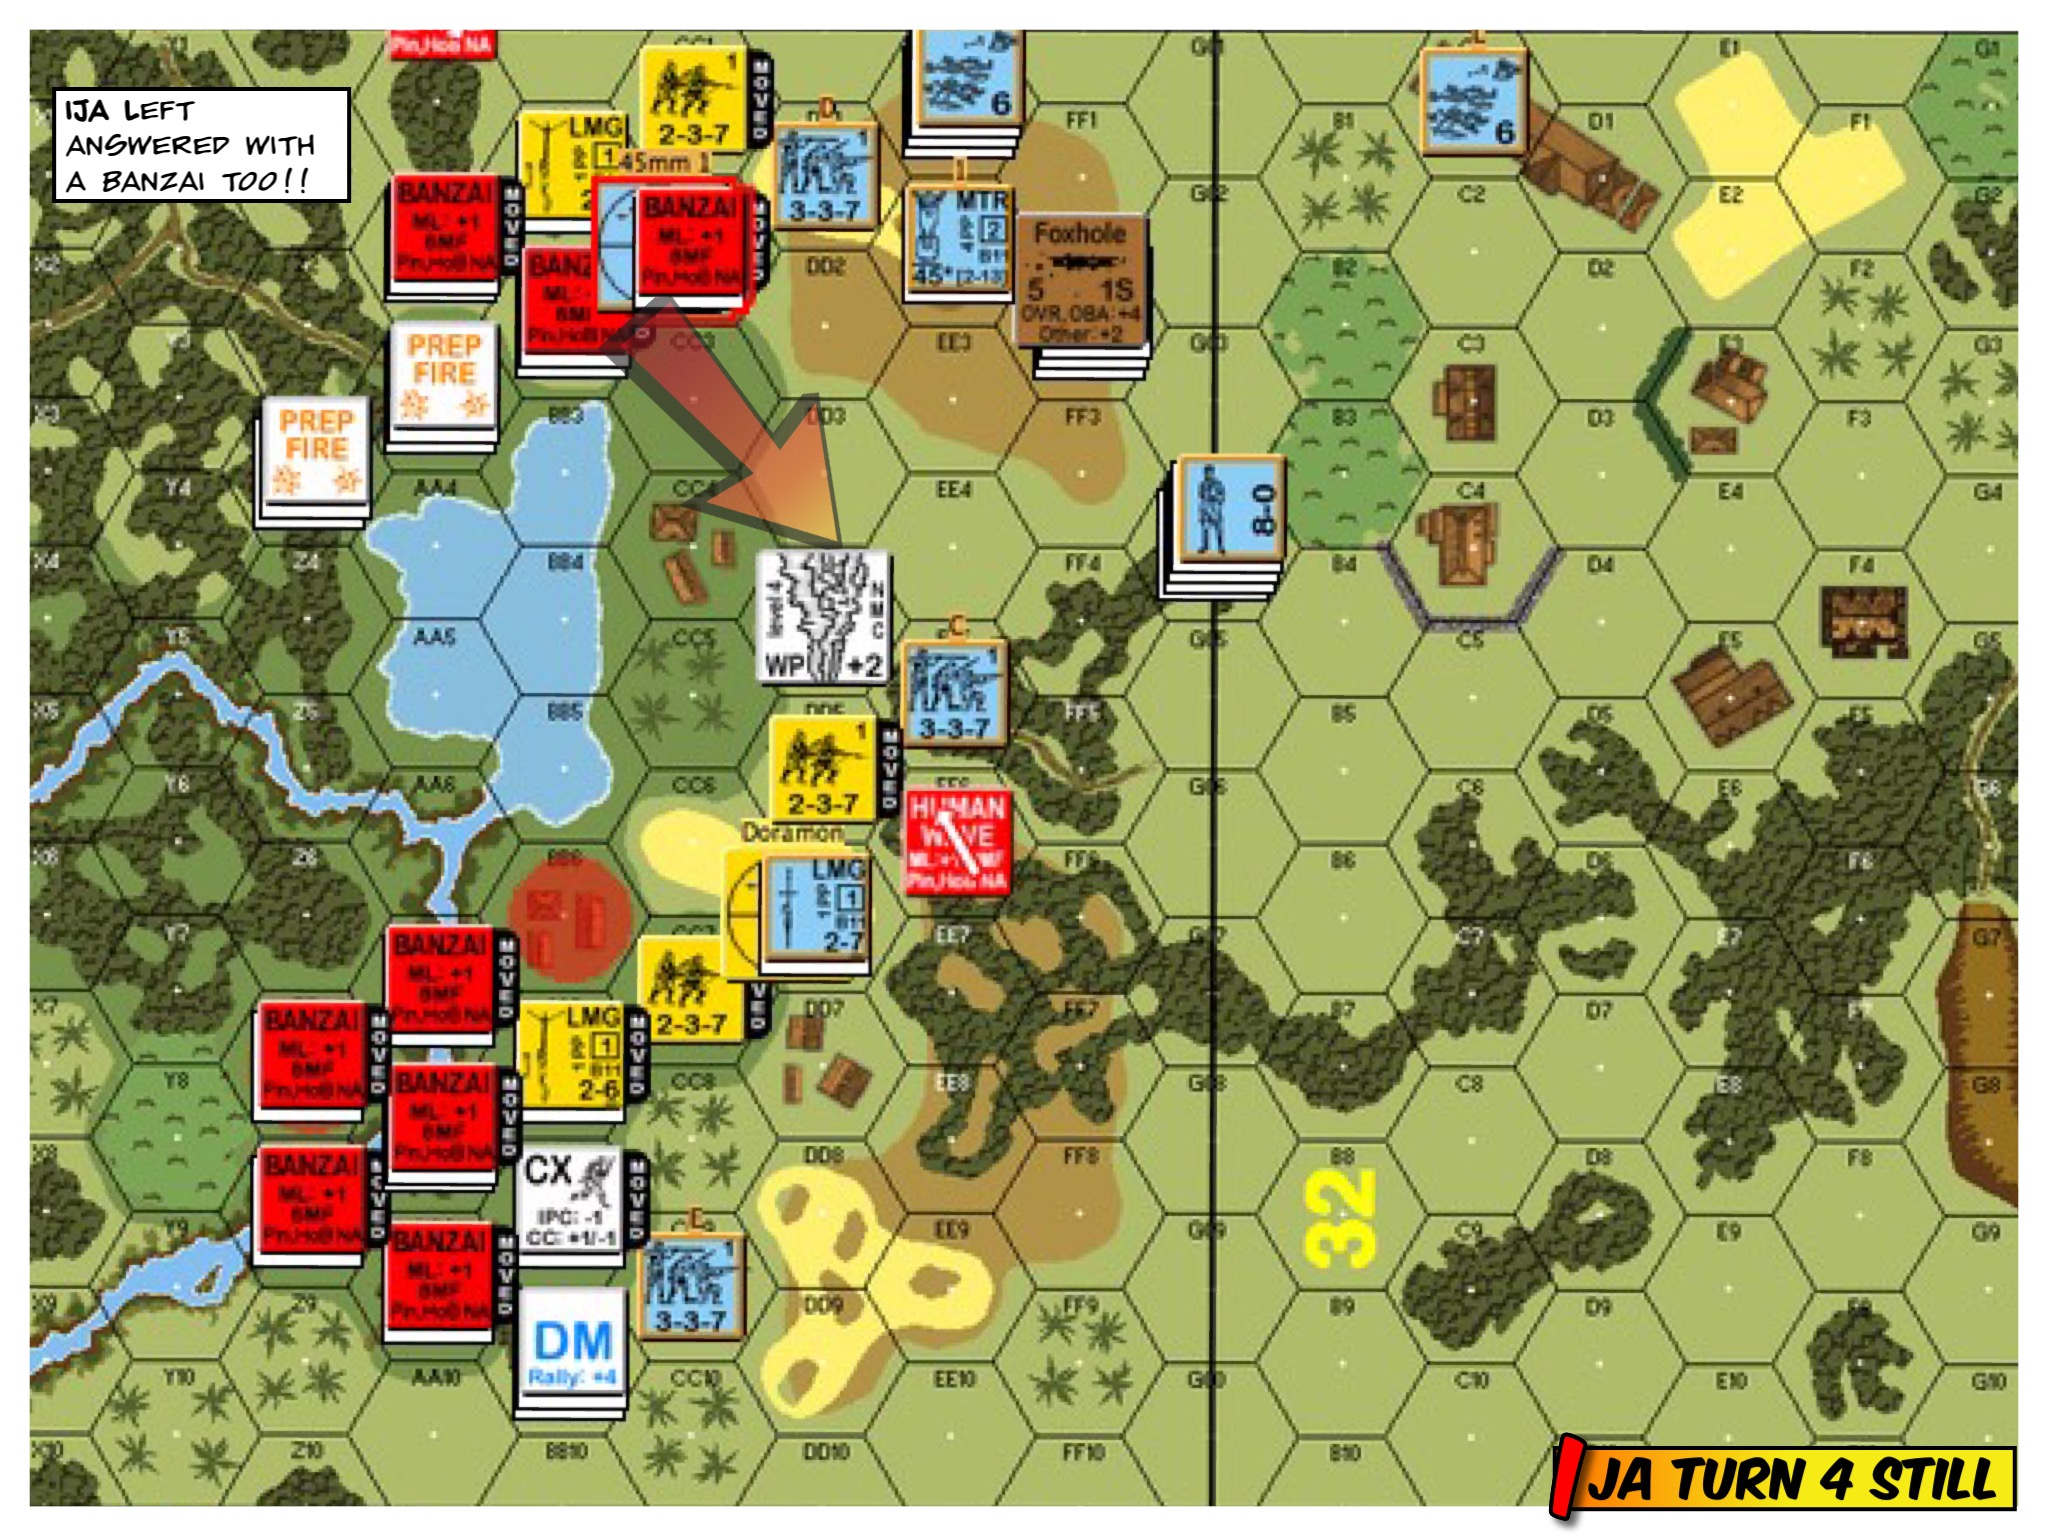
The overwatch teams were now put on Opportunity Fire. The troops were then to get as much of the defenders to unconceal as possible, especially the Chinese overwatch teams that were now in place. The Chinese kept us away from Open Ground were possible so as to burn up our time. We kept flowing around defenders who are clearly outnumbered. A HIP IJA unit leaped up and ran down the left flank when the coast seemed clear. The troops in the middle met more of the opposition in the rubble. Assault Engineer’s ability to dump WP was useful in unconcealing (and even breaking) the defenders. Chinese reinforcements were coming in. They were largely conscripts so the demand on leadership was huge. Unfortunately I wasn’t in a position to interdict them, this would hurt me at the end game I was sure. The troops on the right was on their way around the right most target building.
 Advanced Squad Leader scenario.jpg")
IJA reinforcement entered from both flanks! The challenge would then be to put them in play as soon as possible. We rushed the left most target building, running into, rounding and therefore encircling the defenders. The troops in the middle made good progress as well as they cleared the middle target building. Troops rushed up the right flank with DC’s & FT’s. That’s the target building housing the dual HMG overwatch! The Chinese reinforcement arrived on that flank as well. The overwatch team on both sides were fully engaged with their B11 heavy weapons. We luckily caught their 10-2 and broke him! The shooting got more intense all over the streets! One target building cleared.
 Advanced Squad Leader scenario.jpg")
A Chinese counterattack pushed us back out of the target building at the lower half of the map (right flank). We needed to consolidate and keep the flanks going where possible! To that end, the reinforcements reached the rest of the team on the top of the map. They would need it as they ran into a pair of fortified hex in the target building on the top of the map. As it turns out, the defenders advanced upstairs to avoid IJA fire, got pinned and couldn’t get back into their fortified hexes again. The middle saw 1-3-7’s pushing through the rubble. A team of IJA reached the other end of Chinese deployments. Too slow to interdict Chinese reinforcements but good enough to mess with their routing.  Advanced Squad Leader scenario.jpg")
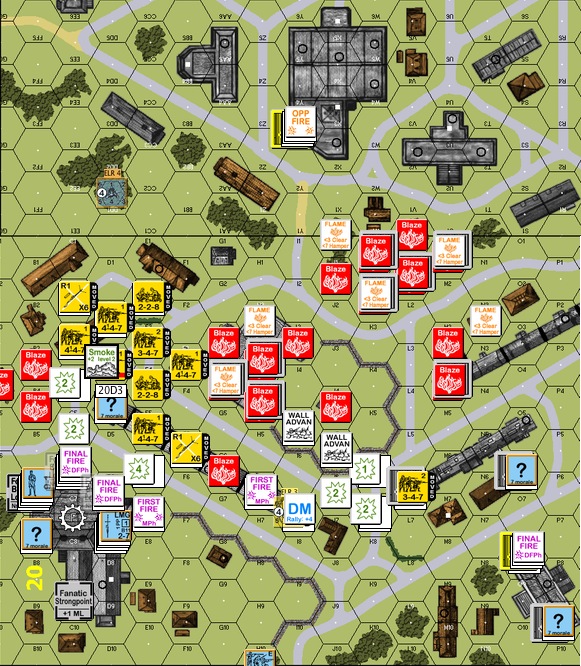
In our efforts to clear the target building on the top part of the map, a HS went Berserk and proceeded to run upstairs after a Chinese squad. We were ready to go after the third building. Prep Fire depressed the Chinese HMG nest, so I pushed harder in the center and on the right flank. Unfortunately, when prepping the right flank target building, both our flamethrowers went out of fuel! At least we pinned the rival flamethrower in the fortified hex. Time to get in there!
 Advanced Squad Leader scenario.jpg")
We rolled a “1″ on our secret banzai die roll, so now’s indeed the time, especially when his 10-2 hadn’t recovered. First, the left flank. We drew off some fire by threatening to bump scout, and we succeeded in getting real close. The gents in the middle continued towards the back so as to mess with Chinese routing. Over on the left, we opened with an assault engineering squad threatening WP grenades on the pinned flamethrower. Then a DC Hero gets generated to show others the good news (BOOM!)! While fire’s being drawn, an IJA leader stood up on the other side of the right flank target building, drew his sword and screamed “BAAAANNZZZAAAAAAAI!!!!”
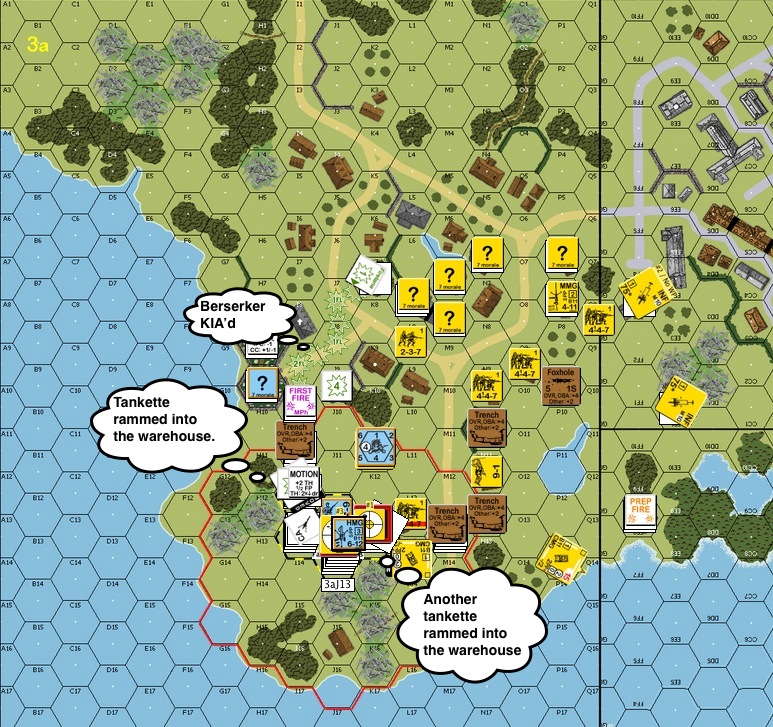
Oh did we trampled through that building. Mixed results in CC but we were in the building and some of the brokies would never recover. The berserk squad on our left unfortunately walked into a Dare Death squad (“Those guys got broadswords!”). Things went medieval and our guys got thrown out the windows in chopped pieces. Urgh, Turn 6 and only one building cleared!
 Advanced Squad Leader scenario.jpg")
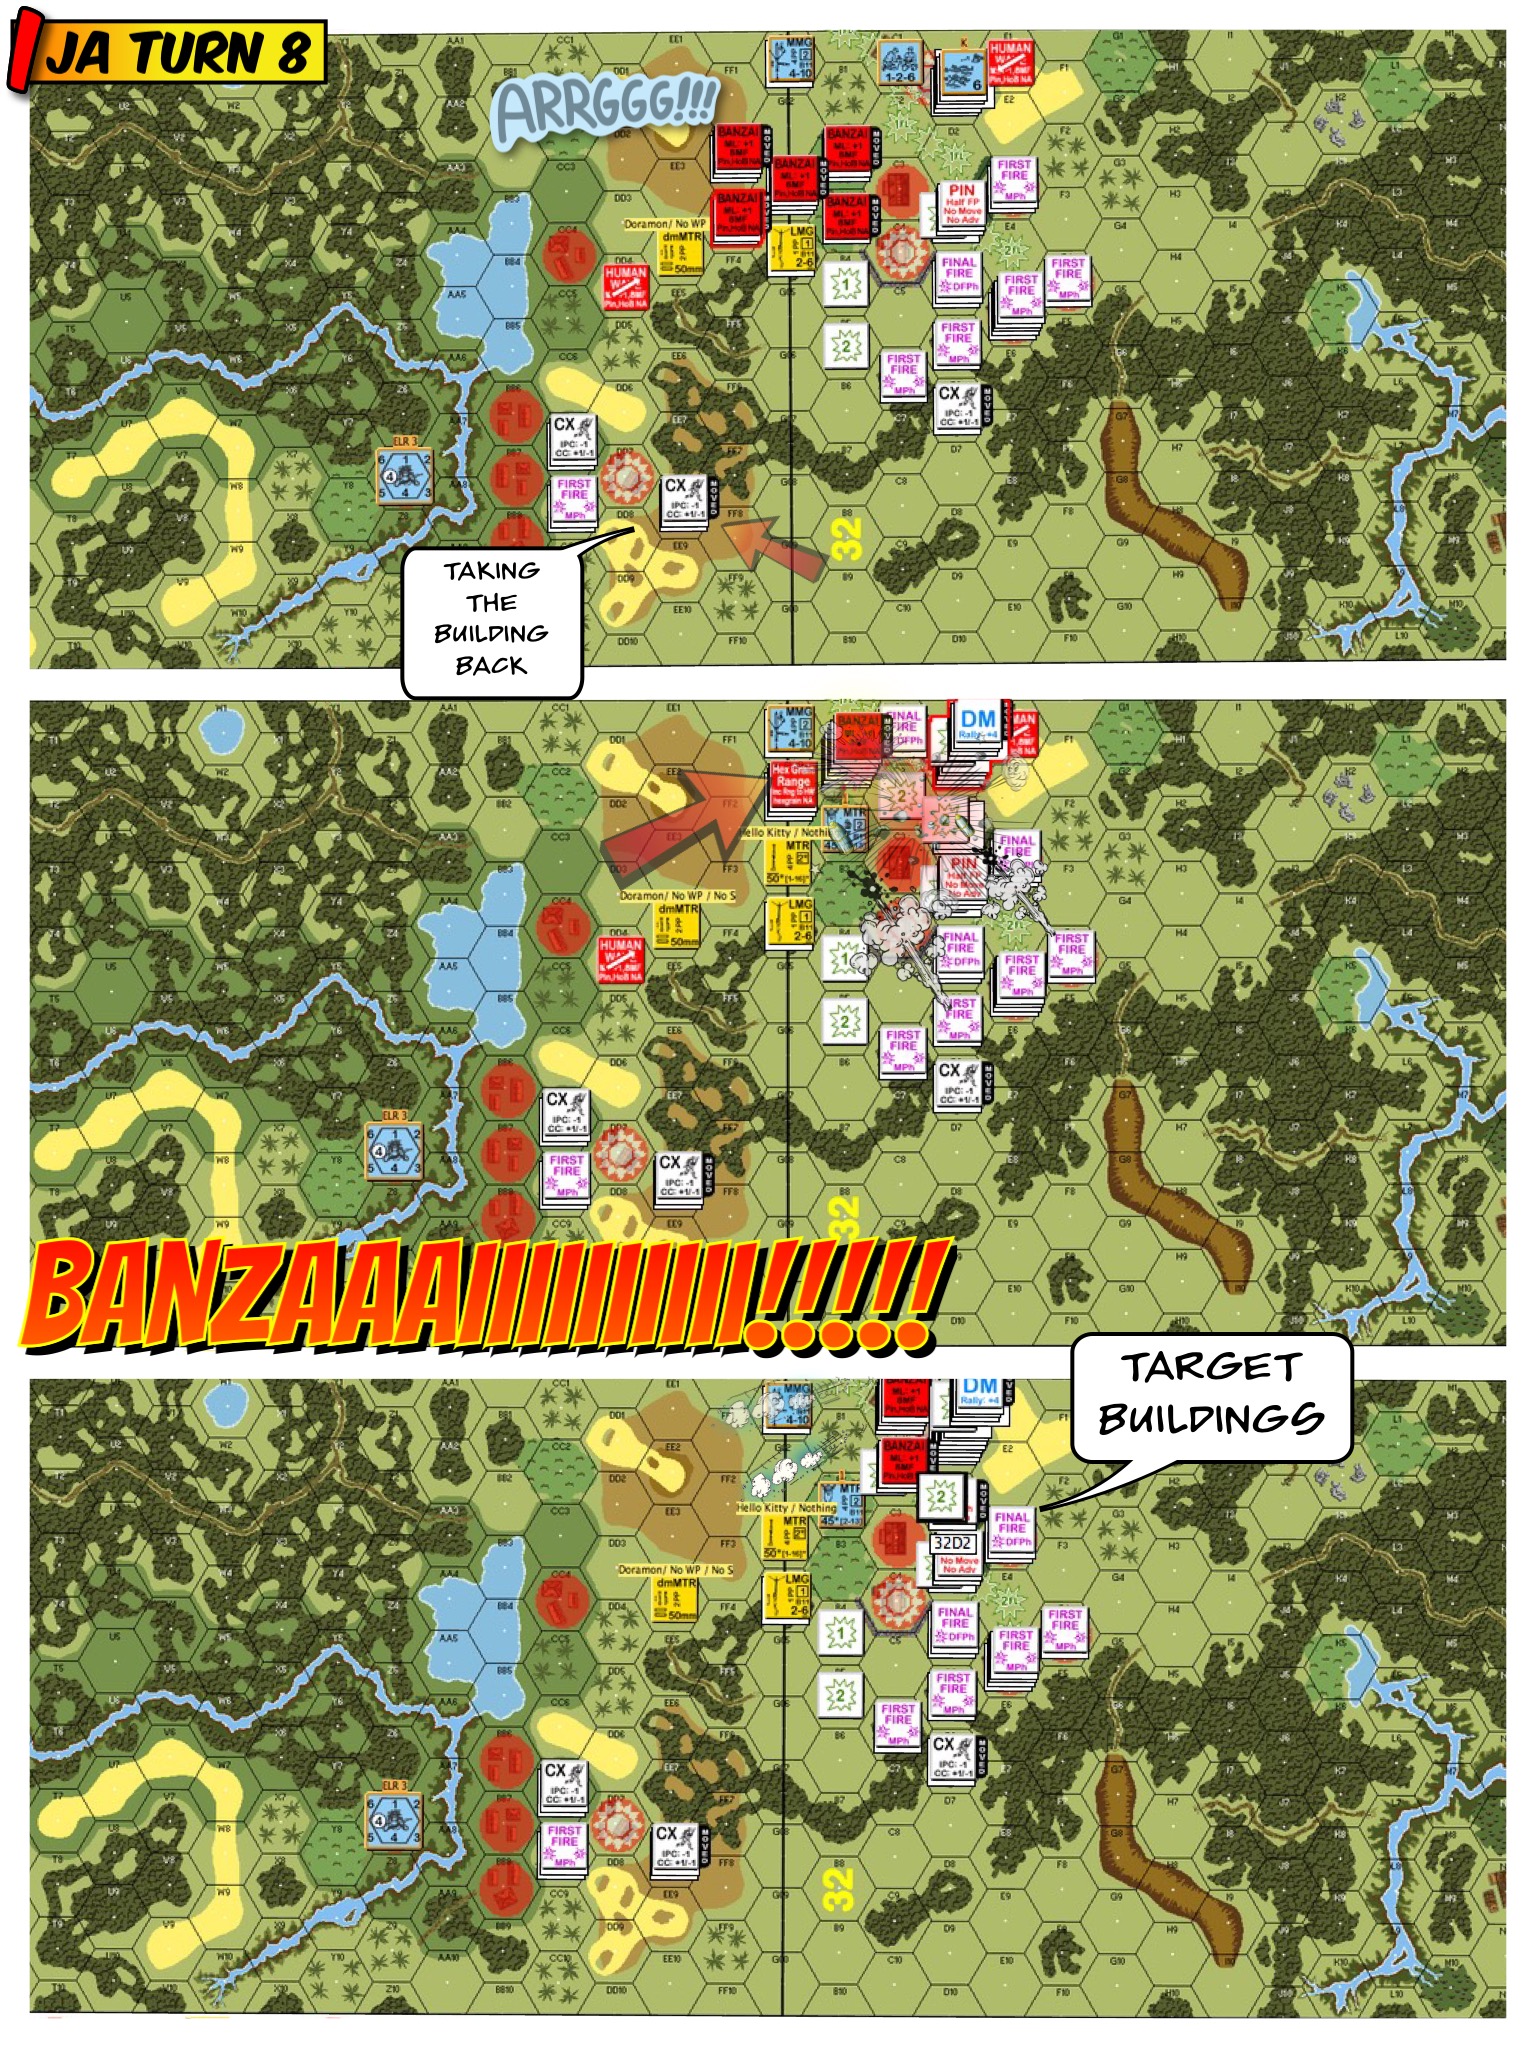
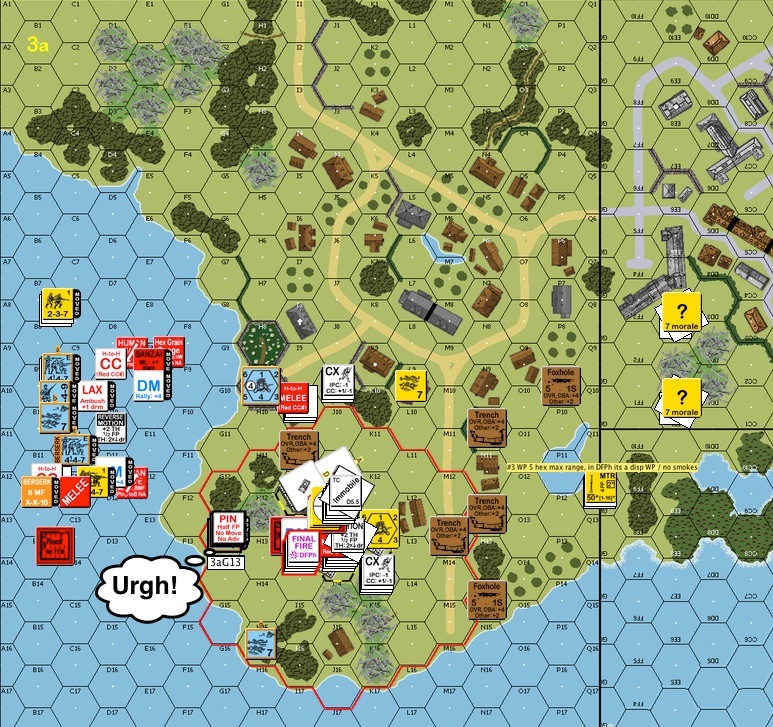
We broke and halved the Dare Death guy on our left flank (sooo thankful that we didn’t have to go HtH them!). Progress, but not enough! This scenario SSR declared “No Quarter”, so Mop Up was not an option here. The drama, however was on the right flank. A Dare Death squad went berserk, charged downstairs, killed my guys and freed a stairwell. A Chinese leader then stepped over, dropped a DC from up high on my folks (BOOM!) and snatched a flamethrower off a brokie!
 Advanced Squad Leader scenario.jpg")
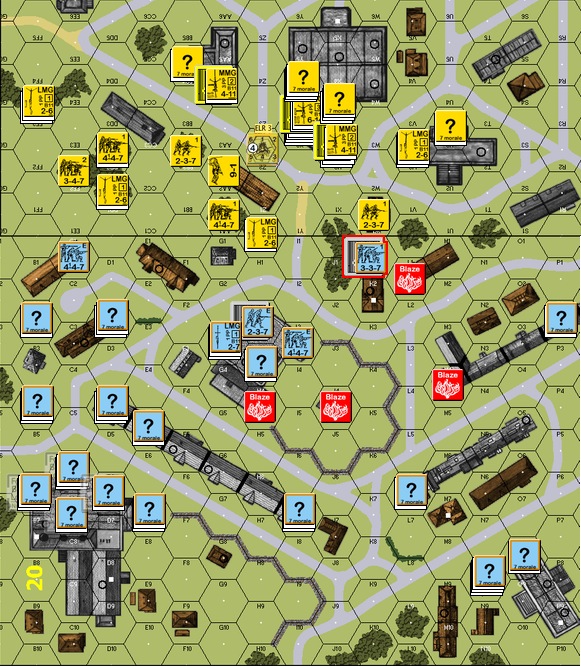
We rolled a “5” on our secret banzai die roll, so we were limited to three. Since my opponent didn’t know how many banzai’s would take place, I did one on my left flank to push into that building and to draw fire off my right. Unfortunately, the boys quickly ran into two Fortified locations (where the staircases were). I then spend my subsequent banzai MFs crashing up the fortified hex to build up bodies for firepower (+flamethrower “crispy”) and to avoid having to run outside under a pair of HMGs.
Banzai’s on the right flank started with a one man Banzai executed by a wounded 7+1 leader. He tried to make as much noise as he could and both the defending squad and the MMG squad upstairs cowered! The third Banzai came from the other side of the building. My opponent’s horrible DRs worked hand in hand with my excellent ones. We passed MCs like nobody’s business. IJA were upstairs and allover the corridors.
My opponent conceded.