FT S1 Sights on Seoul – Advanced Squad Leader AAR
Scenario Background
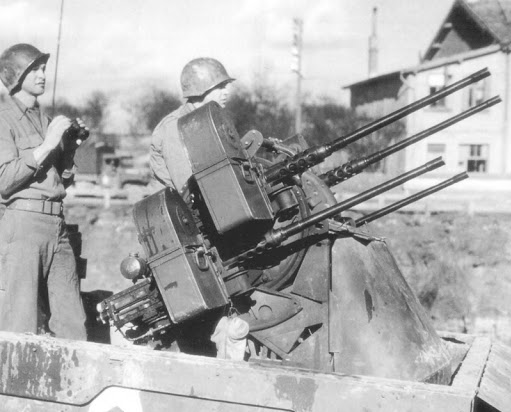
The time’s 25 September 1950. The 1st Marines were to clear the massive barricade on the wide Ma Po Boulevard (left of map), the hill top (center of map) and clear the way to the rail yard on the top right of the map.

(photo credit : m1 pencil)


Victory Conditions and Tactical Considerations
This gets interesting. There are two groups of 4 VC conditions each, you are to meet a total of 4 with at least 1 from each group. On one hand you might feel it’s complex and it can use some good re-reads between turns, but on the otherhand, it keeps the North Koreans guessing as to what you might do next.
Group A involves taking some locations on the big hill top, controlling all 3 designated buildings on the right half of the map, exiting 10 VPs of Marines off 3 designated hexes on the top right or putting at least 28 FP on either/both of the Deep Embankment Streams (one top right and one bottom left).
Group B involves taking/eliminating the Ma Po Boulevard roadblock, some of the buildings inside the Normal School compound (left of map), capturing the Marine HQ on the hill on the bottom left and one of 2 other buildings and exiting 10 VPs of Marines off 5 designated hexes on the top left.
There’s an operational boundary down the middle of the map and left of the big hill through which the Marines can’t cross. The Battalion Reserve shows up on Turn 4 and we have to decide which side to commit them to. Once they enter, the Korean SAN goes up 1 level (and both sides have 2 snipers).
The Normal School sports High Walls that are 1 level high. The North Korean’s got a secret breach in it that they could use. The Ma Po Boulevard is a wide and dangerous place. Units incur a -1 DRM to incoming fire on top of other modifiers. The Deep Embankment Stream is a road + gully combo. It’s not hard to get used to. The Fanatic Roadblocks are massive affairs that makes North Korean units with Wall Advantage plus units in the Woods/Building on both sides Fanatic. The brown hexes are all Steep Hills, ie they are Concealment Terrain. Most of the little houses are Dense Urban Terrain. They have effects on stacking & firegrouping (think Dense Jungle) and they prohibit bypass on some hex sides. Lastly, take look at the road that on the right side of the big hill. The back part’s (top) lower than the front part, which means it was difficult to interdict Korean units as they moved towards the Exit hexes.
The rules also introduce the use of Marine fireteams. This became a critical element in this battle (apart from being able to swamp the defenders).
After Action Report
 Advanced Squad Leader scenario.JPG")
The Special Rules allow 3 single hex 107mm mortar hits in the first Fire Phase. I used them for White Phosphorus to cover the Marine’s entry onto the map. On the left it was a quick push forward to the Ma Po Boulevard to see where the barricade was and to take the Marine HQ. A platoon crossed the Deep Embankment Stream into the Korean Grave Yard and threatened to turn the flanks of the bridge defenders. Unfortunately they were beaten back quickly.
On the right I planned to hit the big hill top once I get to the middle of the map where there’s much better cover. There were a couple of squads (lower central) we bypassed and this would hurt us later. We were already attacking one of the VC buildings. We wanted to put some OBA on the hill top but our Spotting Rounds went very wide and in some cases out of our LOS.
 Advanced Squad Leader scenario.JPG")
On the left, we got a spotter up on the first level (so 2 levels up including the hill) with a 60mm mortar behind. We could see down Ma Po Boulevard and into Normal School’s compound. We were shooting up the defenders across the stream and we spotted retreating Koreans entering the Normal School via a “secret” breach on the lower left of the High Wall perimeter. The Marine in the graveyard on the right of the stream got shot up earlier. I made the bonehead mistake of routing a broken guard and its prisoners together with another broken squad and broken leader. The prisoners escaped, rearmed and CC’d the remaining brokies! Good thing more Marines crossed the stream and bailed them out. They started pushing up to the Korean lines in Turn 4 after much time wasted.
On the right, the North Koreans marvelled at our wandering Spotting Rounds, the boys finally kicked their radio down the hill in frustration. The Reserves decided the right half was winning and therefore entered there to threaten the Korean’s flank. Some of the units made it to the middle of the map but the Hill team was getting shot up and was harassed by the Koreans we bypassed earlier.

 Advanced Squad Leader scenario.JPG")
We had 2 Movement Phases left. On the left the team sweeping up the graveyard forced the defenders away from the stream, but it was slow going amongst the Dense Urban Terrain. I started to have doubts as to whether we could get to the Fanatic Roadblock or exit any units in time. A hero jumped into the Deep Embankment Stream with a DC and breached the High Wall. Some Marines clambered into the Normal School compound and was surprised by a 45mm AT gun! They got shot up and tumbled back out into the stream. We were afraid that the North Koreans might counterattack back across!
On the right, the Hill team continued to get in trouble, although they did put up an amount of distraction. The big Korean 82mm mortar blew up though! We hit the last VC building we needed to fulfill 3 objectives. Turned out it was a Commissar standing with a lot of mops and broomsticks behind the windows! The man did accomplish his mission to waste our time though! We closed in on the last Fanatic Roadblock and the 3 hex exit.

 Advanced Squad Leader scenario.JPG")
Last turn!! The Marines on the left return to the stream to secure 2 VCs out of 4. The Marines on the right ran towards the exit! I got behind the Fanatic Roadblock which meant I had access to a Exit Hex. The Korean MMG team took some casualties but when the Marines shot back, they KIA’d the stack. There was one Korean conscript squad left from across the street and we thought we were home free. Unfortunately these Conscripts decided it’s important to NOT cower and laid down enough residual to make the Marines 1 fireteam short of meeting it’s 4th objective!!
The North Koreans won! Yes folks – we lost by 1 fireteam.

How’s this Scenario Interesting?
The 3rd Battalion on the left could take two VCs without crossing the stream. I decided to bypass the Normal School, leave the forces inside bottled up and make for the Ma Po Boulevard Fanatic Roadblock VC and together with it, the VC for exiting squads. Hitting the Normal School might burn up my resources for the gain of 1 VC. On the right, hitting the hill will no doubt give me an advantage over the whole battlefield but that’s only if I manage to take it quickly. The “3 Building” VC required that the 1st & 2nd Battalions go all the way to the top right, which put me in reach of the Stream VC and the Exit VC. So I decided to bypass the hill top as well especially after the big 82mm mortar blew up and we got the MMG’s smoked. I could have done better in moving more of my troops forward, unfortunately the 2 Korean squads I bypassed earlier continued to threaten one of my VC building on the bottom right.
A thing to note is that each Marine Squad in LFT Fight for Seoul is worth 3 VPs (1 per fireteam) instead of the “standard” 2 VP per squad. It certainly makes a difference on the exit.
This is an interesting introduction to the different terrain involved in the Fight for Seoul – Seoul map. It’s also a good one to get your head wrapped around the use of Fire Teams. My opponent and I are moving on to FT S2 Besting Basilone, which is a Night scenario around the Normal School, the Ma Po Boulevard and the Marine HQ on the left of the map.


.JPG")
.JPG")
.JPG")


.gif")

.jpg)


.jpg")
.jpg")

.JPG")
.png")
.jpg")

.jpg")


.jpg")
.jpg")


.jpg")


.jpg")


.jpg")
.jpeg")
.jpeg")
