BoF8 Sting of the Italian Hornet – Advanced Squad Leader AAR

BoF8 Sting of the Italian Hornet – Advanced Squad Leader AAR

BoF8 Sting of the Italian Hornet Scenario Analysis & Setup

The Victory Conditions (“VC”) for the Canadians (Edmonton Regiment, 1st Canadian Infantry Division):

  • Control buildings 10Z6 & 10oDD3, which are the two big 4-hex and 5-hex buildings (factories) on the left half of the map
  • Control 7 or more other stone buildings on board 10 (left half of the map)

The Victory Conditions call for “Control”, hence Mop Up should come in useful and therefore I should avoid No Quarters and take prisoners where possible. Besides, Prisoner Interrogation is in effect, which would be useful considering the AP Minefields and the two Fortified Building Locations in play.

The Canadian right offers more VC buildings and is less open. It also offers more rally terrain for the attackers. The Canadian left is more open, has more ground to cover and has fewer VC buildings. However, it offers a route to the flank and the side of the VC buildings on the right. There’s really only one logical spot for the OBA Observer, which is on the Level 3 Steeple on the right half of the map. I would put a heavier force on the left to hook around the closest factory on the right, as I didn’t have an abundance of time to take the 7 other stone buildings. Besides, we had Italian reinforcements coming in on Turn 4.

Italian AFVs are all Open Tops, which make them fine OBA targets. The 90L Semovente M41M da 90/53 has a frightening TK 20 vs my best armour of 8. However, it’s an SPG with no turret and it’s a circled B⑨ unless the Italians swap one of their SMV L40 47/32 for an ammo vehicle. The Italians also get two 75 ART guns with TK 10 (IFT 12) and s8. I would need to sniff them out with the Stuart Recce’s. Otherwise, the Italian infantry doesn’t have a real numerical advantage, but has an atrocious ELR1.  (“Take them all prisoners!!!”).

The Canadians have three Shermans which are solid as long as they don’t get flank shots. Their infantry has a morale of 8 and plenty of Smoke to tackle the Open Ground. The Stuart Recce’s would mill about, interdict, cut rout paths, chuck vehicle Smoke Grenades, encircle & overrun (AAMG 8 = 16 OVR FP!).

(Above: Semovente da 90/53, graphic credits Tank Encyclopedia)

BoF8 Sting of the Italian Hornet After Action Report (AAR)

BoF8 Sting of the Italian Hornet - Advanced Squad Leader AAR

The game opened with our Canadians laying a bit of Smoke on the right and advancing amidst the diagonal set of Woods. An Italian 9-1 led “Death Star” opened up, stunned a Sherman and broke the HS passenger in a Stuart Recce! The force on the left fared better. A Sherman pushed down the left until a Cannone da 75/27 popped up and took a shot. The shot bounced off and the Sherman stopped to the side of the 75 ART. The Stuart Recce saw that, sped past and stopped on the left flank near the Woods. One lucky squad found a minefield. The rest moved without too much drama. Our sniper went to work and stunned a SMV L40 da 47/32 at the back. The 90L took potshots at the Steeple where my OBA Observer was. As a final touch, another of our Shermans was STUNNED when its commander lost his head when another Italian “Death Star” opened up! This one’s going home.

BoF8 Sting of the Italian Hornet - Advanced Squad Leader AAR

We dropped Harassing Fire behind the Italians front line. The 80mm OBA translates to 4FP, but that Shocked the 90L. It also started flames in one of the building hexes. On the right, the infantry routed the gun crew and got right in front of the right VC factory. The Sherman parked itself in bypass to cover the area behind the left VC factory. Canadians on the right walked into the other 75 ART and broke under fire, the Stuart Recce OVR the Gun and it malf’d in FPF. The Stuart on the right went over in support and now we got around to the back of the right VC building on the far side as well. The Italian inside resisted with fierce firepower and they sent their L40 in there for good measure.  The leading Canadian 9-1 was KIA’d and troops broken when they tried to break in!

BoF8 Sting of the Italian Hornet - Advanced Squad Leader AAR

We continued to push amidst strong Italian resistance on the left, but their brokies were stacking up as well. We made an end run around the left VC factory to the row house beyond. Unfortunately, there’s a stack of Concealed defenders in the stone building in the middle of the field that we simply couldn’t get at. On the right, we tried to push back into the VC factory. We slid a PIAT into the right VC factory next to the bogged L40 and toasted it in Advance Fire! Well, it’s good and bad ‘cause now it channelled our lines of attack to the defenders. We were running out of Good Order troops on the right, but we pushed a Stuart Recce deeper to keep the pressure on the retreating Italians in the buildings beyond.

That stunned 90L? It’s UK (‘Unknown’) and would be dead afterwards.

BoF8 Sting of the Italian Hornet - Advanced Squad Leader AAR

It’s Turn 4 (of 6.5) and we still hadn’t got either of the VC factories! The Italian pushed us out again (leaving our PIAT & MMG) of the right VC factory. We put the OBA down to keep the Italians at bay. We had folks pushing beyond into the buildings behind, but good order manpower was wearing thin. On the left, we made slow progress into the left VC factory. An intrepid HS drew the Ammo vehicle while a Sherman rounded the corner and appeared on its left.

BoF8 Sting of the Italian Hornet - Advanced Squad Leader AAR

A lucky WP CH from a hulldowned Sherman finally blew the top off the Concealed stack of defenders in the stone building in the middle of the field! The right VC factory caught fire from the burning L40 and the Italian defenders moved out of the factory. They now threaten the Canadian attackers on the left flank. A Stuart Recce went behind the defenders in the group of buildings on the right just to harass. In reality, the lone Canadian 8-0 leader needed to run back to rally the boys. On the left, the Italian reinforcements got onboard. The Canadians were about to dash across the street from the rowhouse to capture a stack of Italian brokies. An 8-1 leader advanced into the street and took the WP’d brokies prisoners as well (most of them anyway). A Sherman moved forth and killed the Ammo vehicle and popped to the back row to threatening the Italian Renault on its left.

BoF8 Sting of the Italian Hornet - Advanced Squad Leader AAR

It’s Italian Turn 5, and we killed or captured most of the Italian OB. The Hero-led stack of defenders from the right VC factory dashed across to come up behind the Canadians attacking the left VC factory. Unfortunately, the Sherman broke everyone and wounded the Hero. Seeing that their Renault was about to be blown up the lone squad in the left VC factory was about to be dealt with and the Canadians having two Movement Phases left, the Italians conceded.

Advanced Squad Leader scenario AP142 The Closer After Action Report (AAR)

Advanced Squad Leader scenario AP142 The Closer After Action Report 

Scenario Background

This is the second part of AP141 Currie’s Favor.  Major Currie’s Canadian unit captured the town of St Lambert-sur-Dives, one of the last points where Germans units fleeing the Falaise Pocket could cross the Dives river.  However, a lot of fleeing German units were not aware of it and continued to stream to the point.  

Victory Conditions and Tactical Considerations

Twenty German squads, a Tiger, a Panther, two Panzer IVH and an armored car in three waves are pitted against 7.5 Canadian squads, 4 Shermans and a Firefly.  The Germans can win by either exiting units or killing Canadian tanks at 2 VPs a piece in 5.5 turns.  One of the challenges for the Canadians was that only the Firefly had enough punch (TK23) to kill a Panther (AF18) / Tiger (AF11) frontally.  The other challenge was of course having to defend the board length where Germans could  pop up anywhere in three waves.  The good news was that Stream-Brush costs Infantry 5MF and Stream-Orchard costs them 4MF.  The Grain fields would cost them as well so I weighted heavier on defending the Roads / Town Center.  

After Action Report

Advanced Squad Leader AP142 The Closer After Action Report (AAR)

German armor entered on Turn 3.  Frankly I was surprised that most of the armor came in on the west (top of the map) where they might need to cross (and bog) in the gully.  The Panther (probably because they expected my Firefly at the bridge) went with a lot of infantry to the east.  The two Shermans to the west backed off a turn earlier as the Canadian infantry started to get overwhelmed.  Unfortunately, the one on the extreme West didn’t get on the right side of the gully.  Another Sherman got nailed when it tried to “speed” across in front of the Panther!  (Note to self : it’s hard to flash large size tanks pass enemy guns.)

Advanced Squad Leader AP142 The Closer After Action Report (AAR)

German Turn 4.  The Tiger stopped by an killed the Sherman in the gully with a Bounding Fire shot!  The PIAT team pulled off from the city center to help towards the west.  It stood where the Bocage converges and withstood German attacks well til now.  Down east the 10-2 PIAT team pulled back along with the Firefly and the Sherman from the eastern board edge.  The Panther did a beautiful loop around the lone Canadian squad defending the road in G15 and got its gun trained on a Sherman.  Unfortunately we couldn’t hit him with a HE shot.  The Sherman spun around to get ready to leave in the next turn.  Meanwhile in the middle one Canadian squad and two stacks of expertly done dummies held the Germans back.  

Advanced Squad Leader scenario AP142 The Closer After Action Report (AAR)

In the Canadian turn that followed, the Firefly went for its sM but couldn’t get a smoke canister off to cover the Sherman.  It went down to the northern edge to cover the exit where the German tanks  to the west seemed to be heading.  Too bad there wouldn’t be a Sherman covering its flank now.  Major Currie’s PIAT team pulled off a “miracle” DI shot at the Panther though (quite understandable, isn’t it?) and Immobilized the monster.  the Currie team then put itself in a positon to get concealed, get more coverage against the Panther’s main guns and a path where it could possibly close combat the vehicle.  Unfortunately the last Sherman to the west got blown up by the Tiger and we were practically haemorrhaging Germans out of the Falaise Gap!  The western PIAT team recovered from earlier German attacks but couldn’t pull off another “miracle shot”.  The end of the scenario would see the German armor pulling back from going beyond the Bocage cover (and into the Firefly’s LOS) in favor of another route further west.  

The Canadians resigned.  

How’s this scenario interesting?

The Germans could either win by exiting enough units or by killing enough Canadian tanks.  However, killing a Canadian tank only get them 2 CVPs vs 8 CVPs (10 with the Armor Leader) for a Panther, so the Germans really need to do a good job with combined arms.  I, on the otherhand, need to play armor better.  Spread out Shermans don’t stand a chance against a Tiger or a Panther.  Perhaps I should focus my armor to one point after Turn 1 so as to converge on where German armor shows up in Turn 3?  

Advanced Squad Leader scenario AP141 Currie’s Favor After Action Report (AAR)

Advanced Squad Leader scenario AP141 Currie’s Favor After Action Report (AAR)

Scenario Background

We now open up to another chapter in Action Pack 14, this time arriving in St. Lambert-Sur-Dives, France, 19 August 1944.  The famous Falaise pocket was drawing close and German forces redoubled their efforts to escape.  One such exit was around this village by the river Dives.  The Canadian 4th Armored Division under Major Currie sped onsite to take care of the issue.  

Credit : War History Online
DK Completel Atlas of the World - Northern France
Excerpt: DK The Complete Atlas of the World 3e

Victory Conditions and Tactical Considerations

There’s a little town square in the middle of board 12a.  The Canadians win at the end of any turn if they can capture as many building/ rubble hexes as the prevailing Turn Number (after Turn 3).  The Canadians attacked at dusk and hence there’s a +1 Low Visibility hindrance for the first 2 turns.  The Germans are offered certain SW purchases and we went with a LMG, a MMG and a PSK.  They also have a 81 MTR and an 88L AA gun.  The Canadians come with a pair of Sherman V’s laden with a lot of smoke and WP plus a trio of Stuarts V’s packing smoke and cannister (C6).  There are 5.5 turns and Bocages are in play.  

The Canadians can come in from the right and the bottom edge.  I don’t have enough forces to spread around and can really only strive to block off the closest routes.  As such the “tank” at the top of the map is a dummy.  I also have an 81 MTR at the back (left) of the buildings which I completely mismanaged.  Somehow I thought it will discourage Canadian armor from coming to the back (left) side those buildings.  The thing here though, is that double layer of buildings will cut down on encirclement opportunities.  I situated the 88 close to the town center to cover 3 of the road approaches.  

After Action Report

Advanced Squad Leader scenario AP141 Currie's Favor After Action Report 01

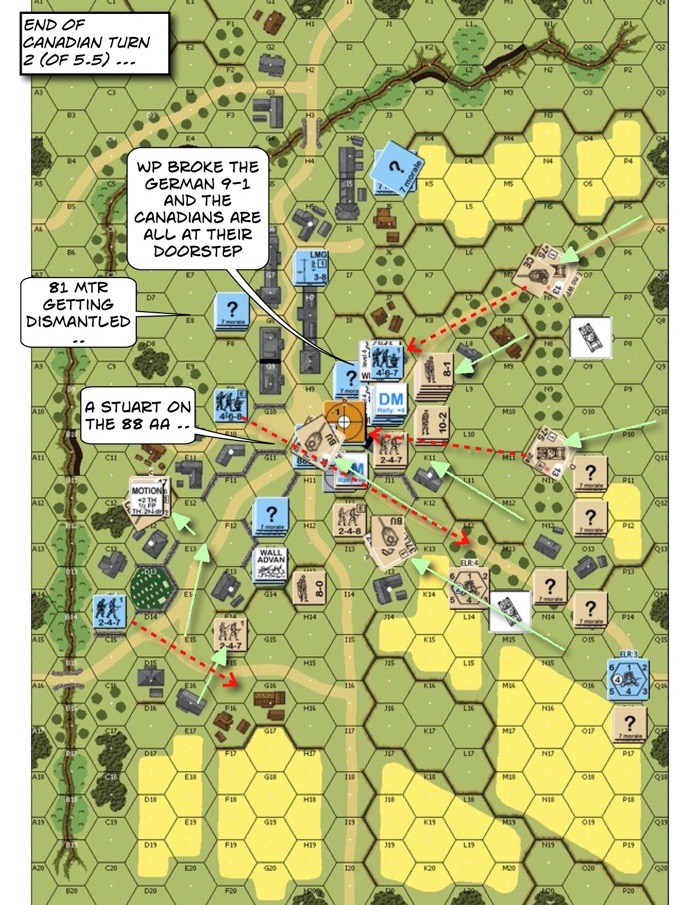
Sure enough, the Canadians didn’t go for the top right corner.  They approached largely from the right side of the map with a small flanking force from the bottom.  Unfortunately we couldn’t get any effective shots to land, partly due to the dice and the rest due to the +1 LV.  A Canadian WP broke the 9-1 and a CH sent the PSK team flying as well.  The 88 and the accompanying infantry put up a bit more fight but ended up with a Stuart on top of it.  

The bottom part of the map fared no better.  A squad moved off to cover the 88 and a HS failed its PAATC when it came time to Streetfight a passing Stuart!  The Canadians made it right up to the buildings at the end of Turn 2.  This was not going to end well.Advanced Squad Leader scenario AP141 Currie's Favor After Action Report 02

A German 468 risked Backblast and took out the Stuart sitting on the 88, unfortunately they rolled too low and got K/‘d as well.  It’s the price to pay I guess.  We need the Canadians to hit their 20 CVP cap.  The other Stuart got to the (left) back of our buildings and took out our big mortar.  Quite honestly I messed that one up, to think an 81 MTR could pose a plausible threat to AFVs.  The “double layered” buildings protected us from getting Encircled but we said goodbye to having DM’s taken off.  The Canadians were already in town and we didn’t have the firepower to take them out.  Plus we withdrew quicker than we should and that proved to be our undoing.  

Advanced Squad Leader scenario AP141 Currie's Favor After Action Report 03

The Canadian got 4 building hexes around the Town Center at Turn 4 .. and we only had 1 squad (under the -2 Acq) who couldn’t not mount an effective counterattack.  The Germans conceded.  We failed to control the tempo of the battle.  

How is this Scenario Interesting?

The Victory Condition makes this scenario interesting : “Provided the Germans have amassed ≦ 20 CVP, at least as many building/rubble hexes adjacent to the “town square” as the current Turn number.”  So the Canadians need to strike a balance between pushing to get to the town square with time to spare vs losing too many units.  The Germans also need to balance their desire to kill Canadian units versus contracting & consolidating their strength and always releasing a town square hex “too late”.  

The German SW purchases also adds a layer of variability to the scenario.  The H/MMGs will make a difference at early stages of the game, although the abundance of Bocages make efficient use of Firelanes problematic.  The DCs and the PSK will be useful towards the end.  

This is actually a small and manageable scenario for when you don’t have a lot of time.  The turn by turn tension makes this an exciting proposition.  Another interesting bit is that this is really the first part of the battle.  The next scenario: AP142 The Closer describes the subsequent waves of Germans trying to break out of the Falaise Pocket through this village.  (We are playing AP142 right now.)

Interesting Stories about this Battle

“Cork in the Bottle – Canadian and Poles at the Falaise Gap” from Legion

“The Canadian Mechanic Who Sealed off the Falaise Pocket & Trapped over 50,000 Germans” from War HIstory Online

DB104 The Police Station – AAR – Canadian Valor in Hong Kong!!

Winnipeg Grenadiers in Camp Shamshuipo HK Credits : http://stpaulslestweforget.wikispaces.com/

The IJA landed on Hong Kong island near North Point / Aldrich Bay on Dec 18 1941 and proceeded to move inland through the middle of the hilly island.  The Winnipeg Grenadiers made a particularly heroic stand at the Wong Nai Chung Gap Police Station.

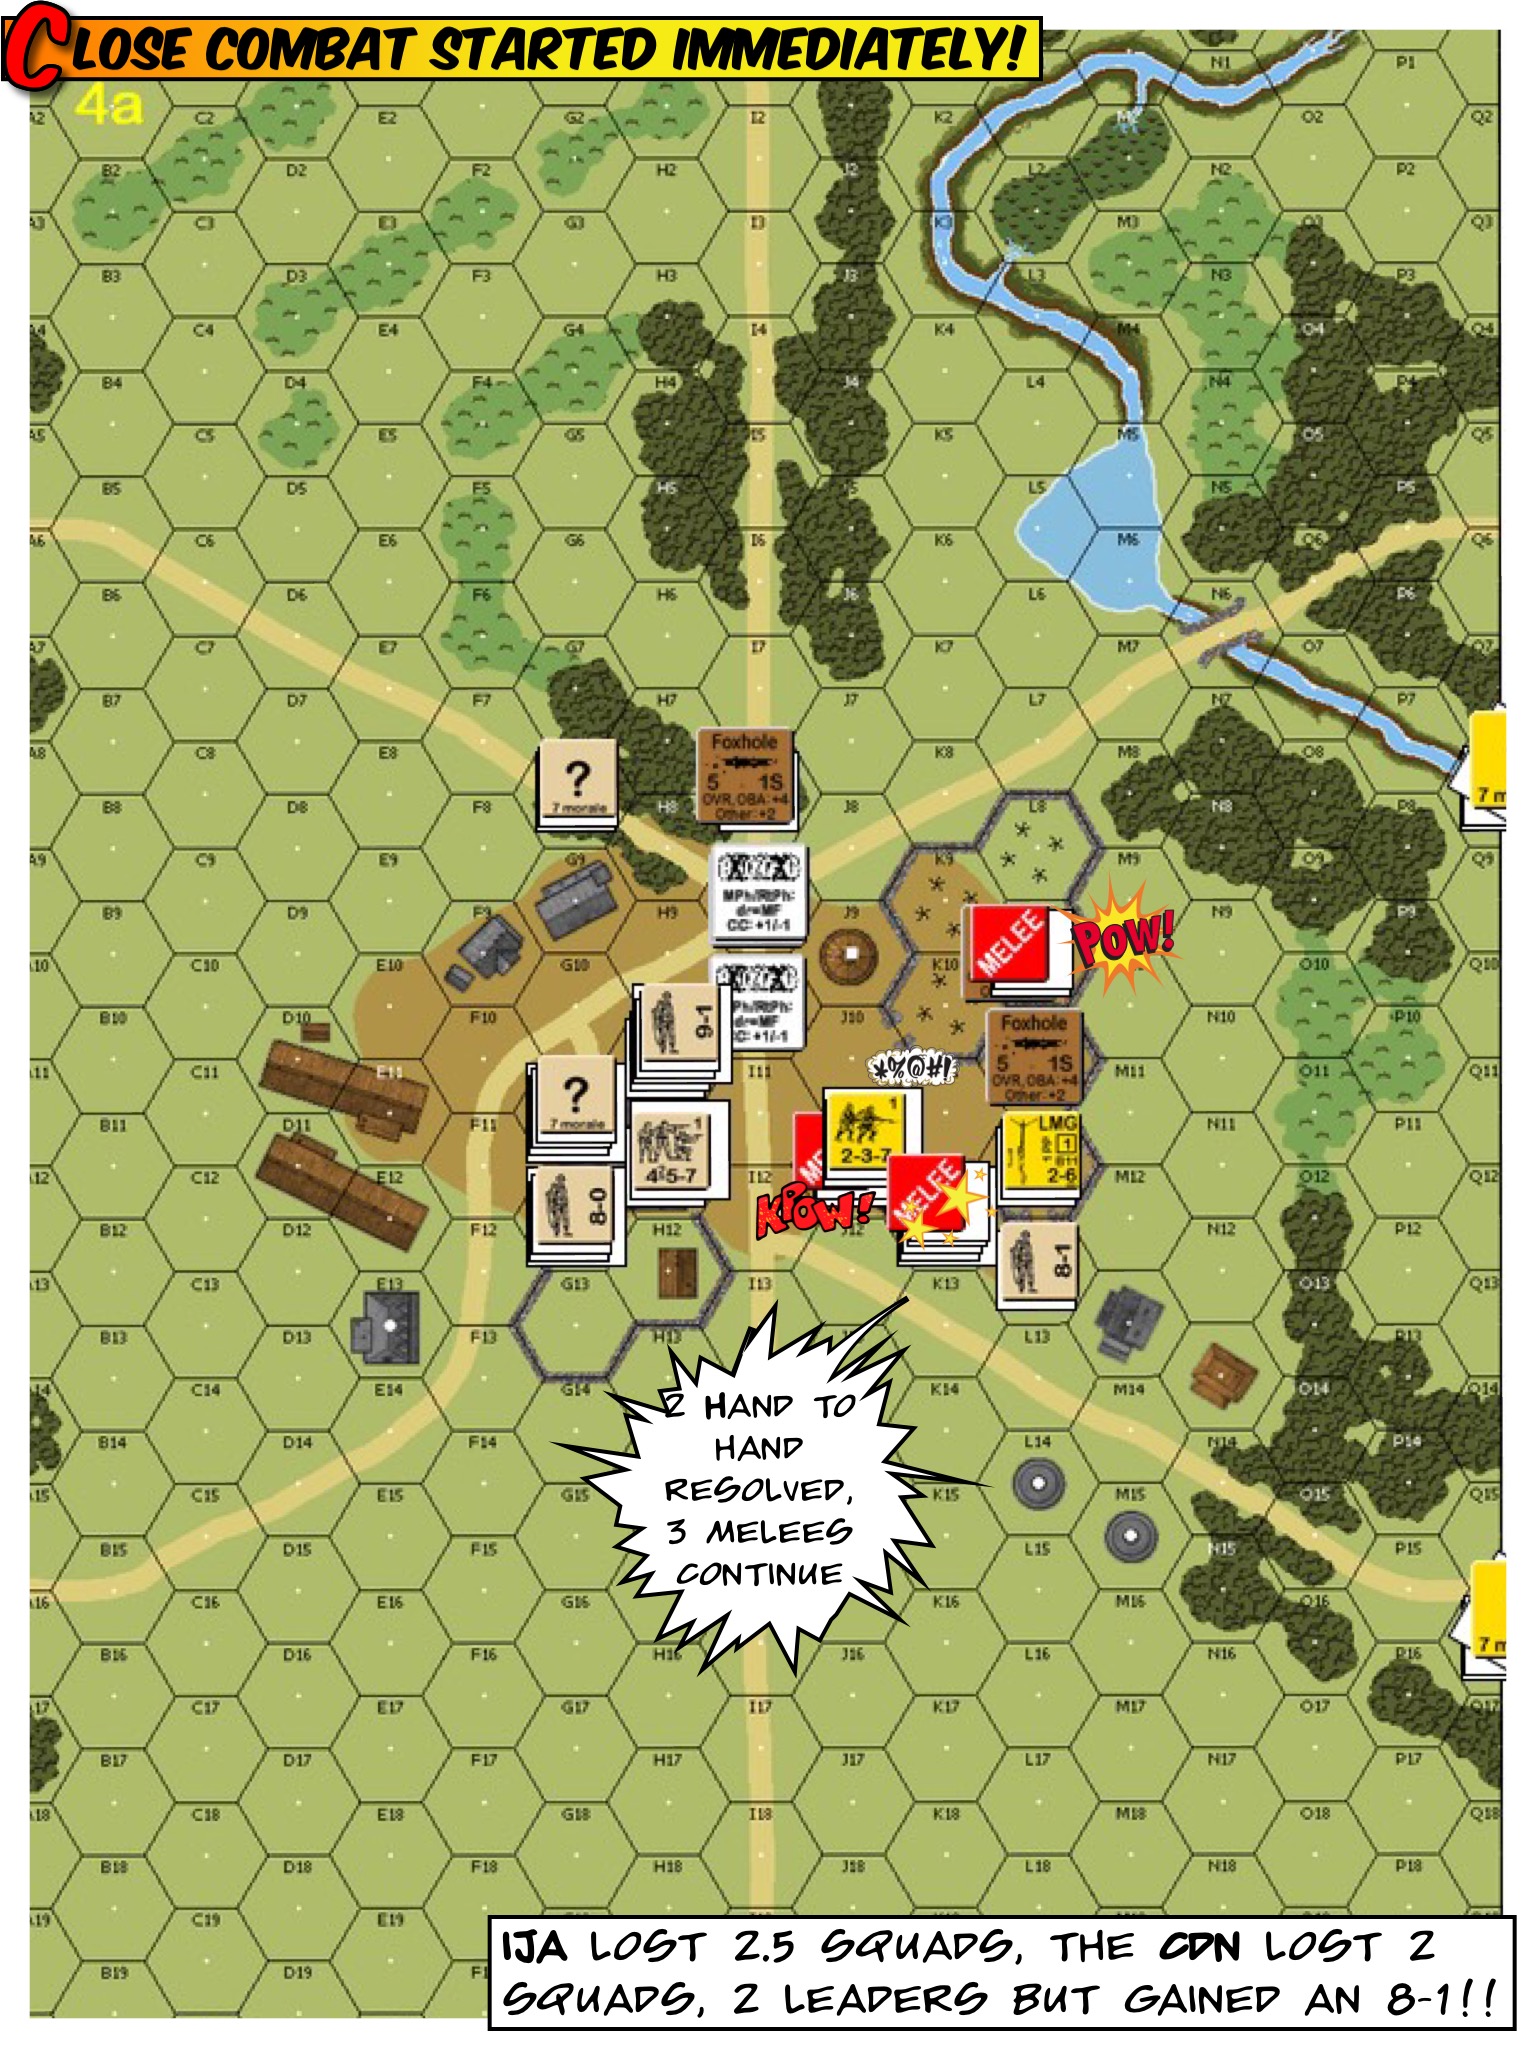
This is a rather interesting scenario in which part of the Canadian and part of the IJA forces started using simultaneous and hidden placement in an area in front of the Police Station.  The scenario began with a round of Close Combat between forces that started in the same location, two of which the IJA could designate “hand to hand”.  The IJA’s goal was to take the Police Station and to make sure that there were less than one squad equivalent of “good order” Canadians within a 4 hex area around the station, all within 5.5 turns.

IMG_1146

The game started off quite intriguingly as Carl Nogueira and I discovered where each other’s hidden forces were, where they “co-existed” and what the Close Combat odds were.  I designated two of the melees as “hand to hand” and off we went.  As expected, “HtH” battles both pretty much resulted in mutual annihilation.  The Canadians lost 2 leaders in addition but an 8-1 rise to the fore in the heat of battle!

IMG_1147

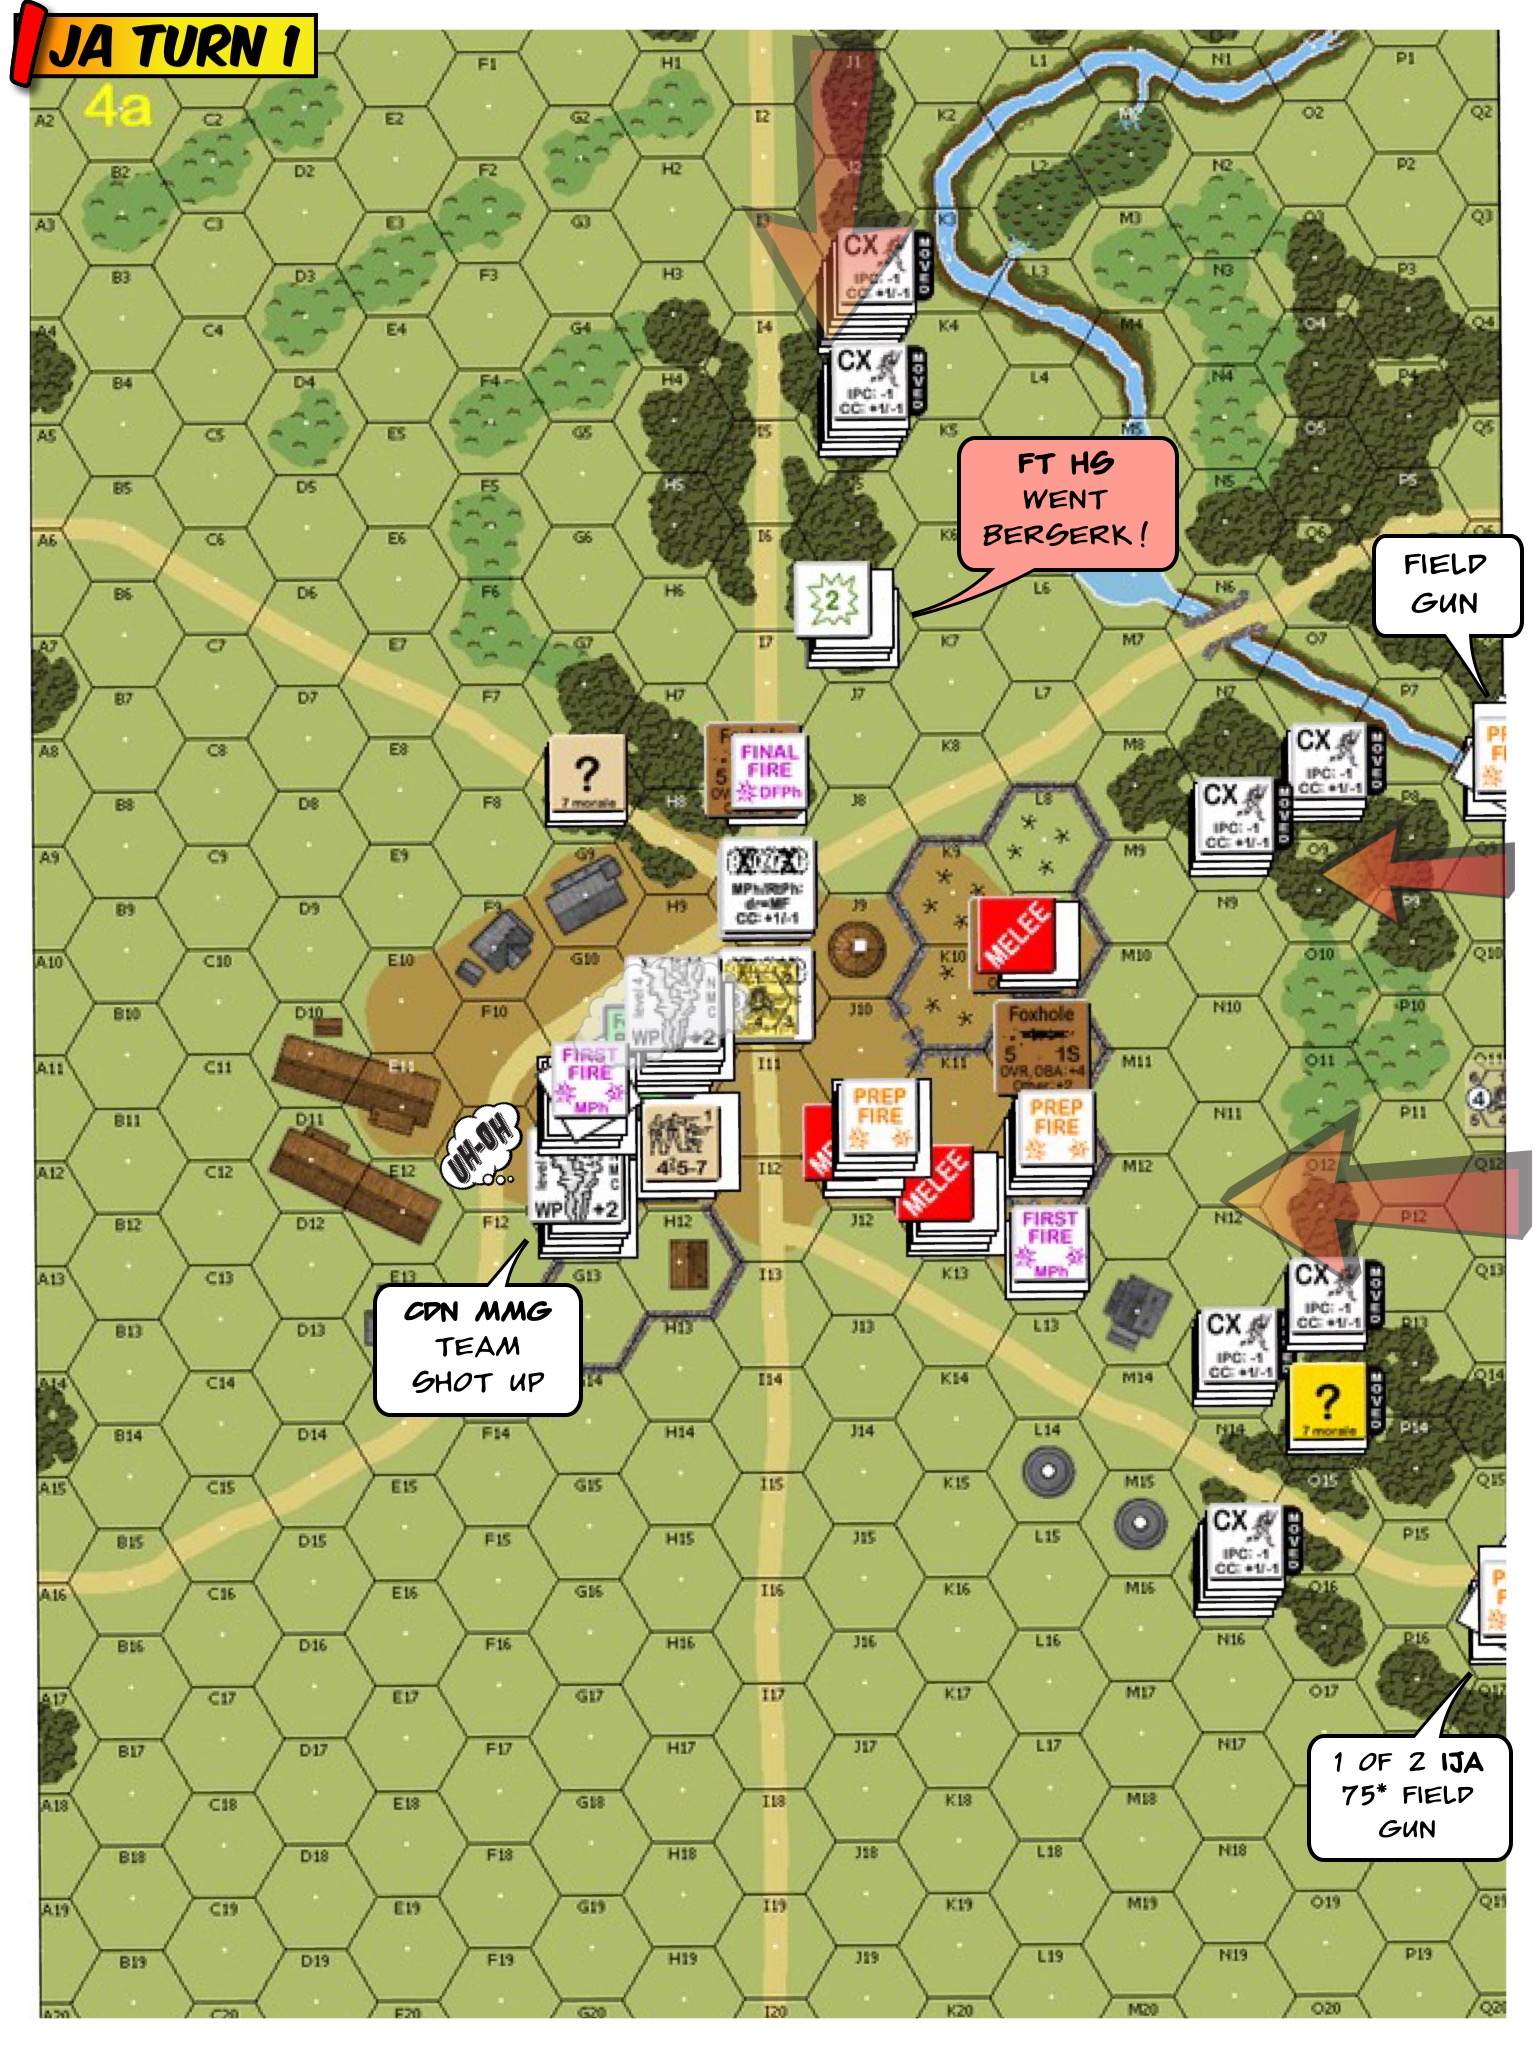
IJA Turn 1 : The IJA led off with their two offboard field guns putting Willie Pete on two corners of the rather well MG-equipped station.  Unfortunately the flamethrower team got ID’d early and was shot at.  Anxious that they’d never get to use their toy, they promptly went berserk.

IMG_1148

IJA Turn 2 : The berserk FT team rigged up their toy and in their blind fury, must had bent a trigger or something.  Flamethrower died without a shot.  The IJAs discovered the Canadian pillbox cross the front of the Police Station.  Fighting outside took quite a toll on both sides.  The IJA hoped to hook around the back (left) of the police station as “Failure to Rout” seems to be the only way to clear the station of Canadians.

IMG_1149

IJA Turn 3 : The IJA malf’d one of their two offboard guns and therefore proceeded to setup their mortars so as to provide smoke cover.  To the top of the map, the IJA piled on top of the pillbox while trying to hook around the left.  To the right, the IJA continued to navigate through the open field and hoped to advance though the pillbox laid fire lane.

IMG_1150

IJA Turn 4 : The berserk HS charged across the street and into the station!!  The maniacs survived fire that left 12 and 8 residuals, only to die later in Close Combat.  Their buddies took advantage to the situation and walked around the left.  The IJA on the right continued to hit the station in front.  The newly established deathstar had a malf’d HMG, true to IJA weaponry of the period.

IMG_1151

IJA Turn 5 : So the Berserker couldn’t stay in the station.  The IJA opened with a DC HS that got shot out of existence when they advanced to the MG nest. On the other side of the station, poor Toshi was volunteered to be the “DC Hero of the Day”.  They sent him to the front door, patted him on the back and stuffed a DC into his arms.

They couldn’t get the berserker either, they said.

Toshi popped out to the middle of the street and was promptly vaporised along with his DC.

IMG_1152

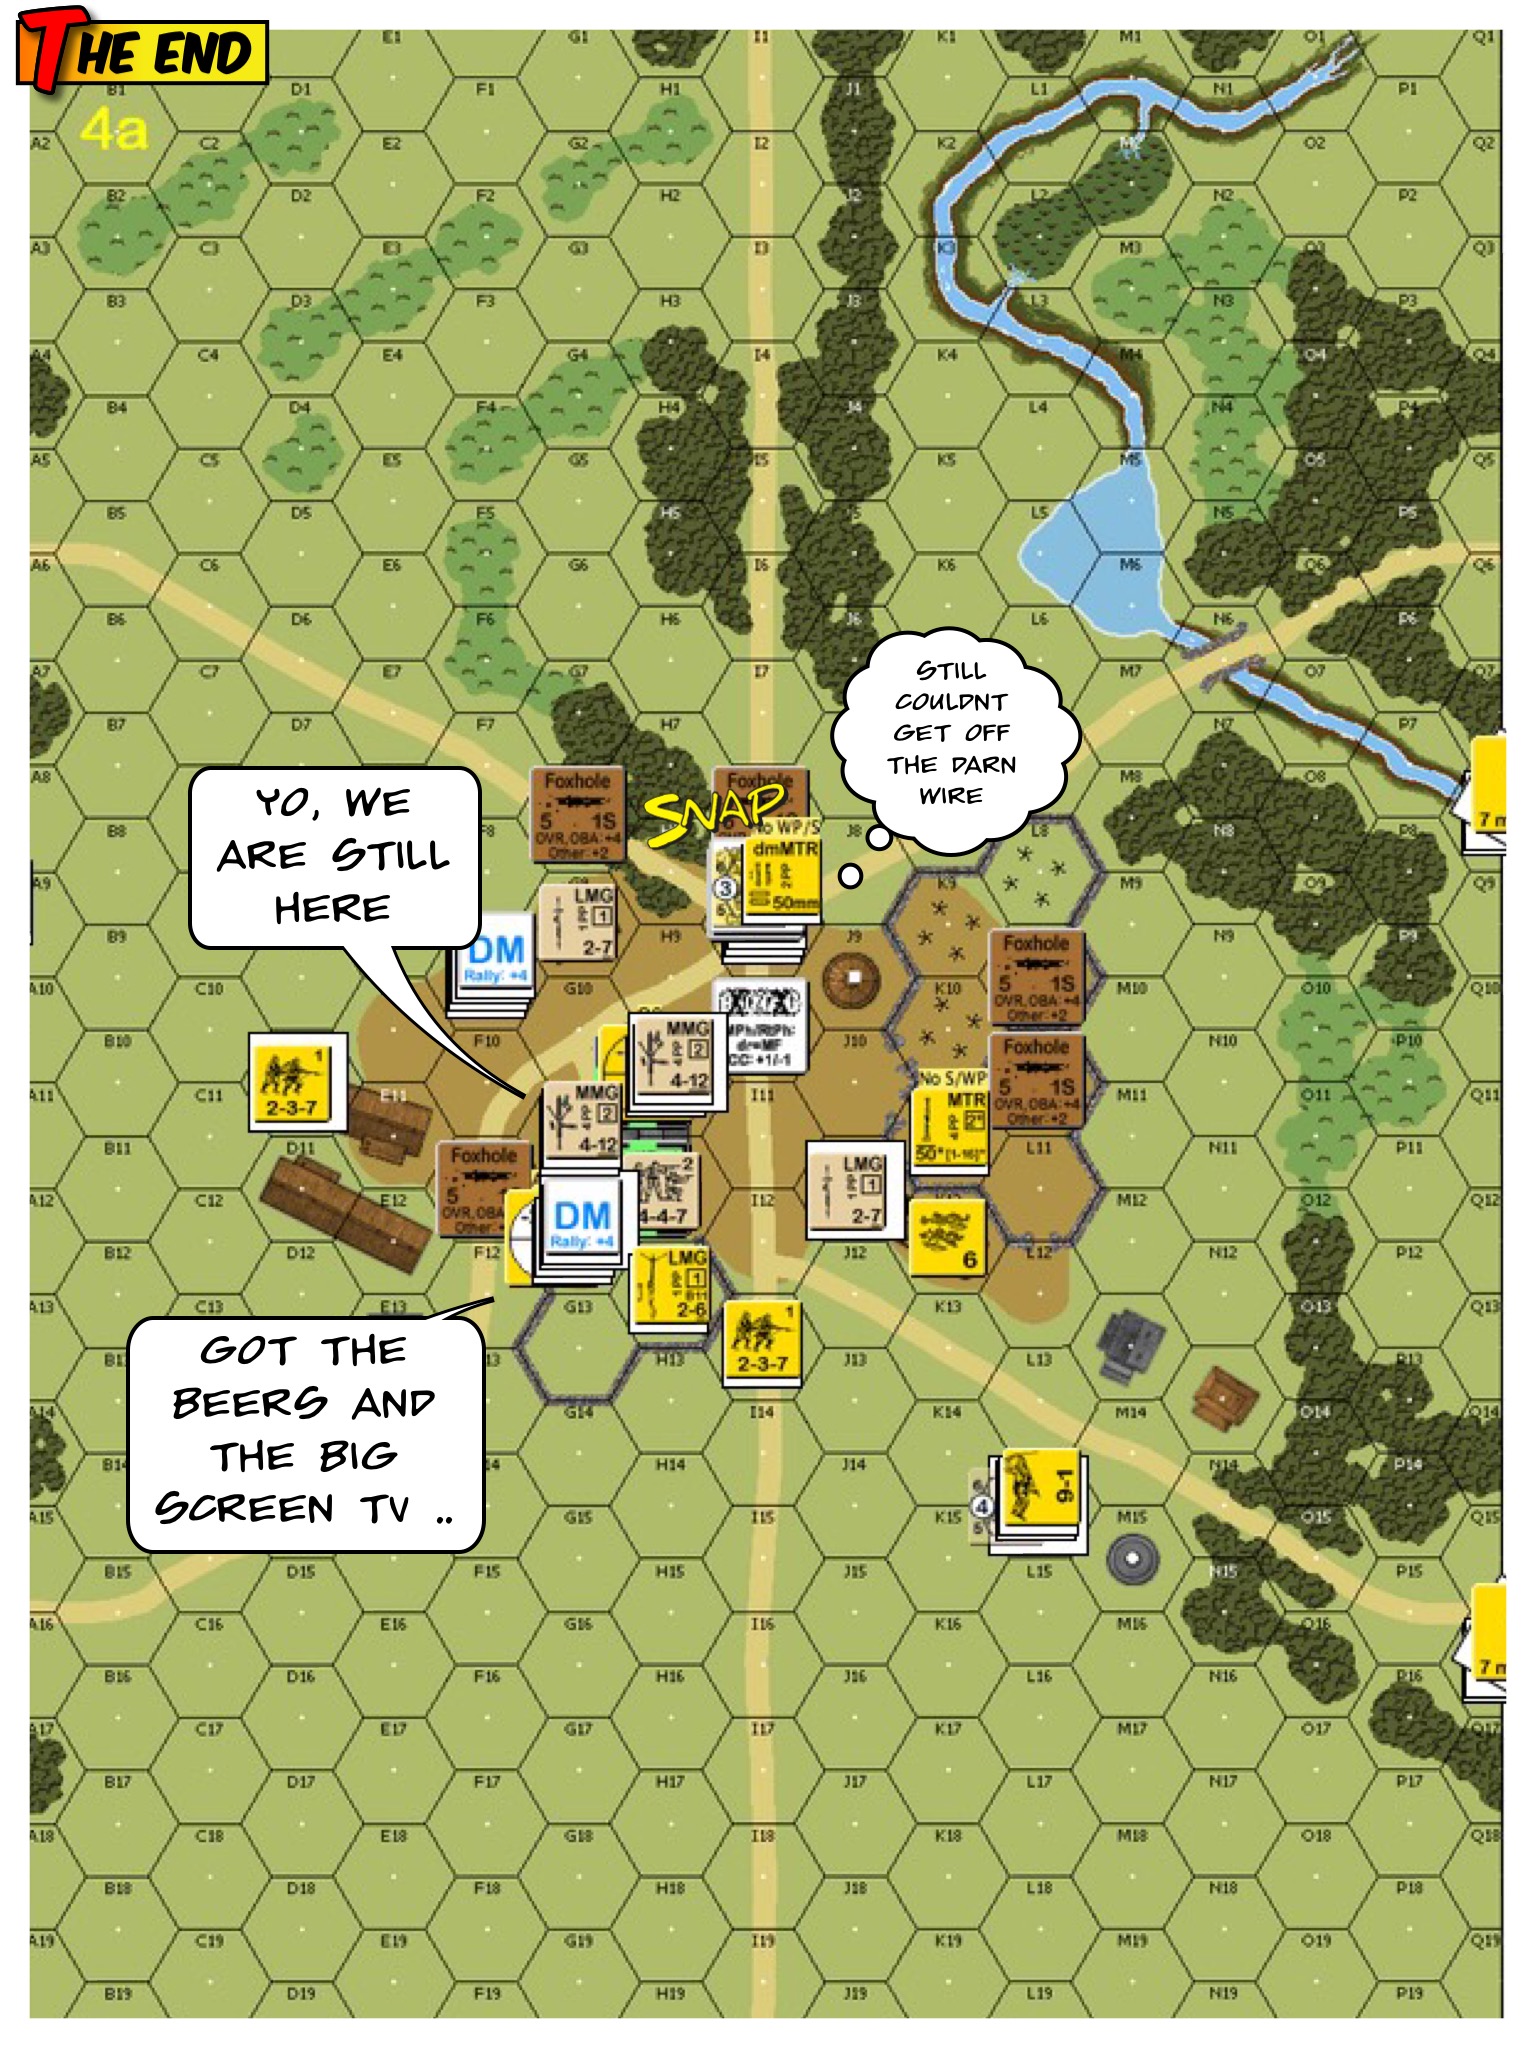
Canadian Turn 5 : With 1 Movement Phase left, there was not enough time for the IJA to clear the building (nor the 4 hex radius around it).  The IJA conceded.

Thoughts :

  • Forget about walking around the station.  Turn 2 is probably when I should just walk STRAIGHT UP to the station and get part of the gang into the house.
  • I used WP and smoke from the offboard guns.  I should probably have used my knee more for additional cover.
  • I should have protected my Flamethrower a lot better.

What else would you have done?  Please comment.

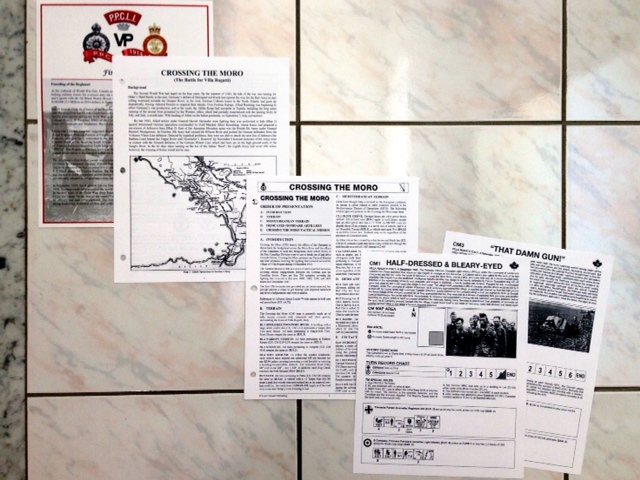
“Crossing the Moro” by Lone Canuck, Pictorial

Got up on this fine Saturday morning after two days on the road and decided to give the mailbox a peep … found this delivered by Helen & Chris at BattleSchool today!  George Kelln’s (Lone Canuckdescription of the scenarios therein.

photo 1

photo 2

photo 3