John Knowles and I recently purchased the few “Into the Rubble” packs (Bounding Fire Productions) that Sam Tyson found laying around. So we decided to play the pack out one by one over the next year or however long it takes. The first one in the pack is Scott Holst’s “Debacle at Sung Kiang“. There are a few places called 松江, but since Scott mentioned “the city of Sung Kiang”, I take this as the area to the southwest of present day Shanghai. This scenario takes from a battle on November 8th 1937 when the Chinese GMT still had their German trained & equipped elite troops. As with all the scenarios in the “Into the Rubble” pack, it’s all about city fights. What I didn’t realise until the first Prep Fire was how unversed I am with city fights – I have definitely been running around jungles too long!
So here’s an account of my miserable loss (not an infrequent experience for me of course, but I don’t blog about my losses often enough) :
There are 16 multi hex buildings on the map. The IJA’s task is to capture 11 or more of them with 16 first liners, 2 elites, 4 leaders and 3 armoured cars in 6.5 turns. The Chinese fielded 9 elites, 7 first liners, 3 leaders, 2 76 guns and 2 of their funky Type 22 dual MG armoured trucks.
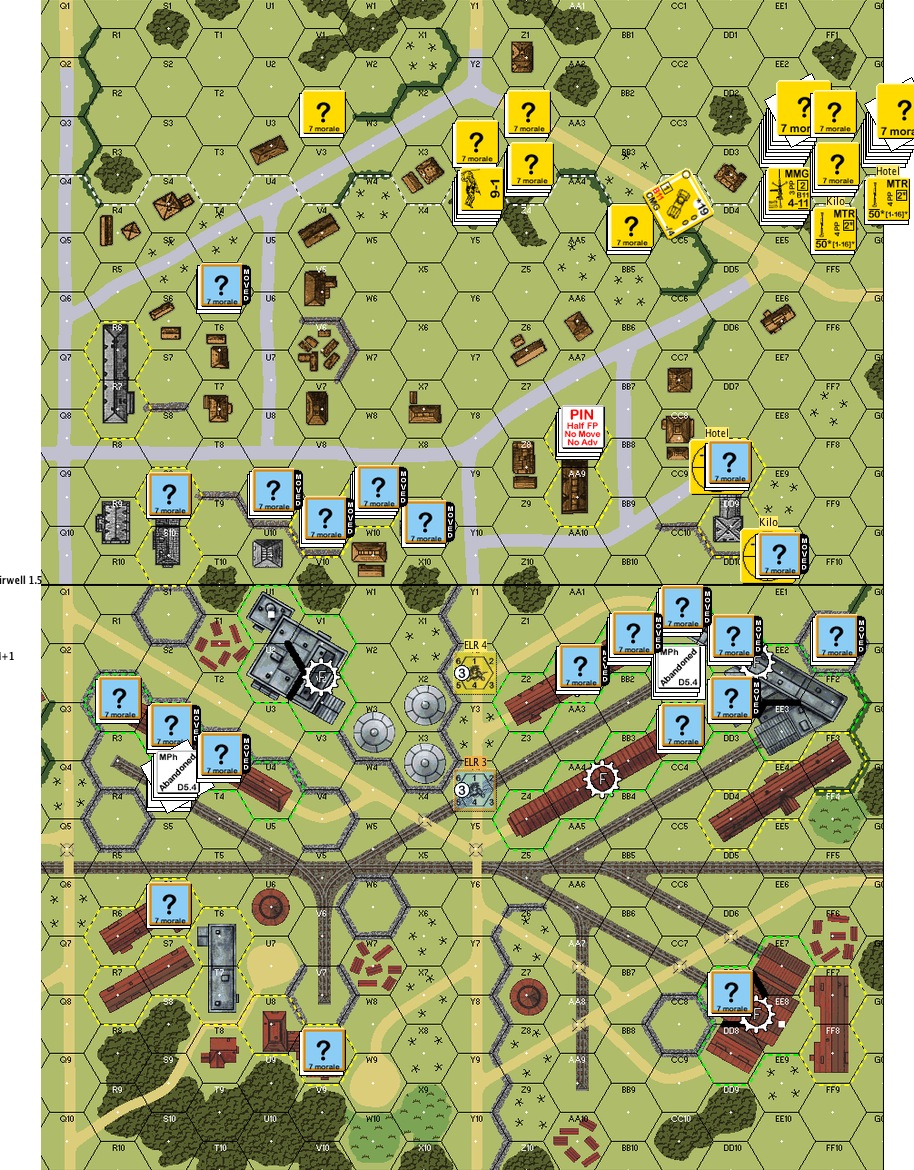
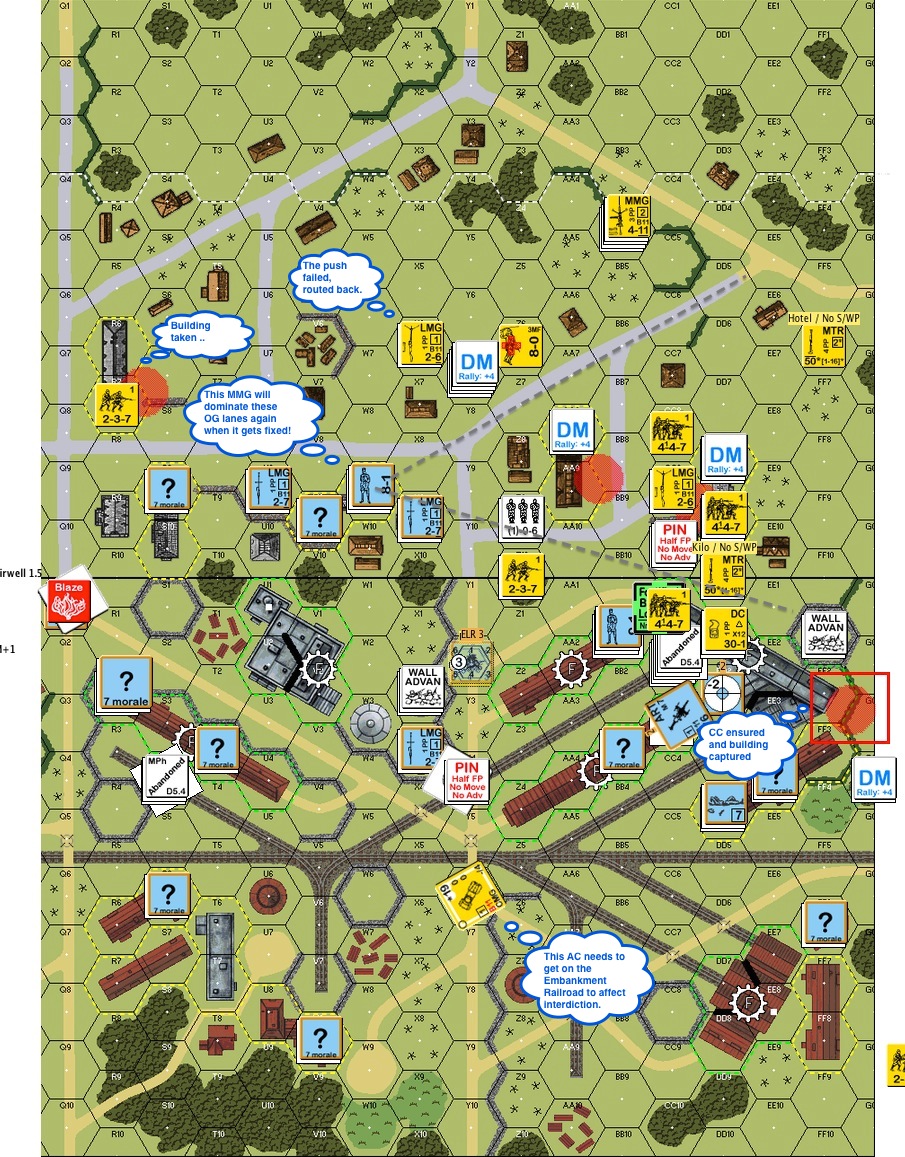
Chinese Turn 1 : This is what it looked like at the end of the first Chinese turn. The Chinese decided to use their “armoured” trucks a different way. Instead of running the trucks around with “0” armour, they decided to rip the 2 LMGs and the crews off them. That’s 4 new LMGs with 2 elite units that self rallies. The Chinese now have 8 LMGs, fantastic news to the IJA I am sure.
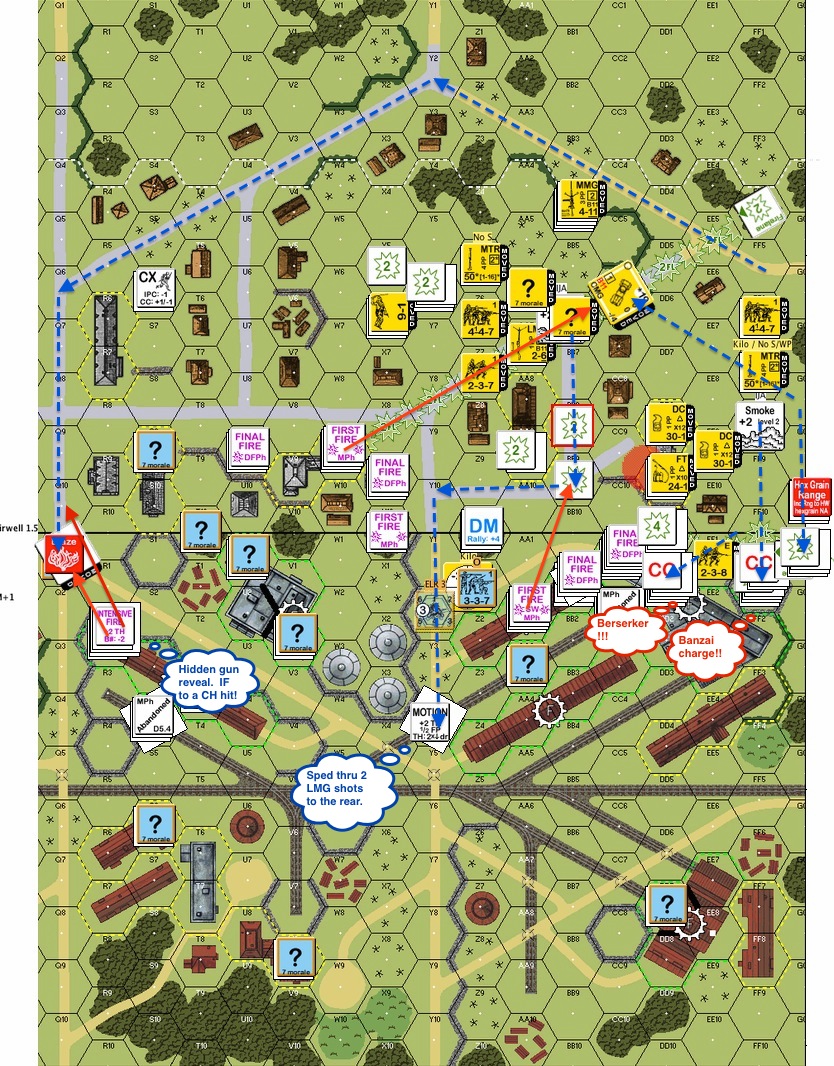
IJA Turn 3: The action exploded. First the IJA Banzai’d down the left edge of the board. Several fire lanes sprang up but the IJA made it across the open ground at acceptable losses. I then figured this was going to take too long : I should have an armoured car behind the Chinese lines to interdict routs and to limit Chinese movement. Therefore I ran an armoured car down the streets (just follow the blue dotted arrow that emanated from the concealed counter on the top left quadrant of the map). It survived one shot from the Chinese MMG that laid down a fire lane. Then the AC sped due south and made a right turn, surviving another LMG shot at close quarters. It then arrived at the center of the map. Another AC decided to do the same but via another route. This is the blue dotted arrow that encircled the top part of the map from right to left. Unfortunately it discovered one of the Chinese 75’s the wrong way. It was still hoping that its speed was going to save it. Boom – no hit, it laughed. The gun then went for Intensive Fire as the car came closer. Boom – Critical Hit!! The AC bursted into flames as car parts careened down the middle of the street!!
Chinese Turn 3: The Chinese moved folks over from the left, one of which CC’d my AC. The IJA uncovered a fortified position and strangely, a 75 gun popped up in the middle of the building complex on the right. That, together with the interior wall in the stone factory (see the hex side on the hex in “direction 2” of the gun) made it a little difficult to clear it out. The Chinese sped a unit to the far right to close the flanks.
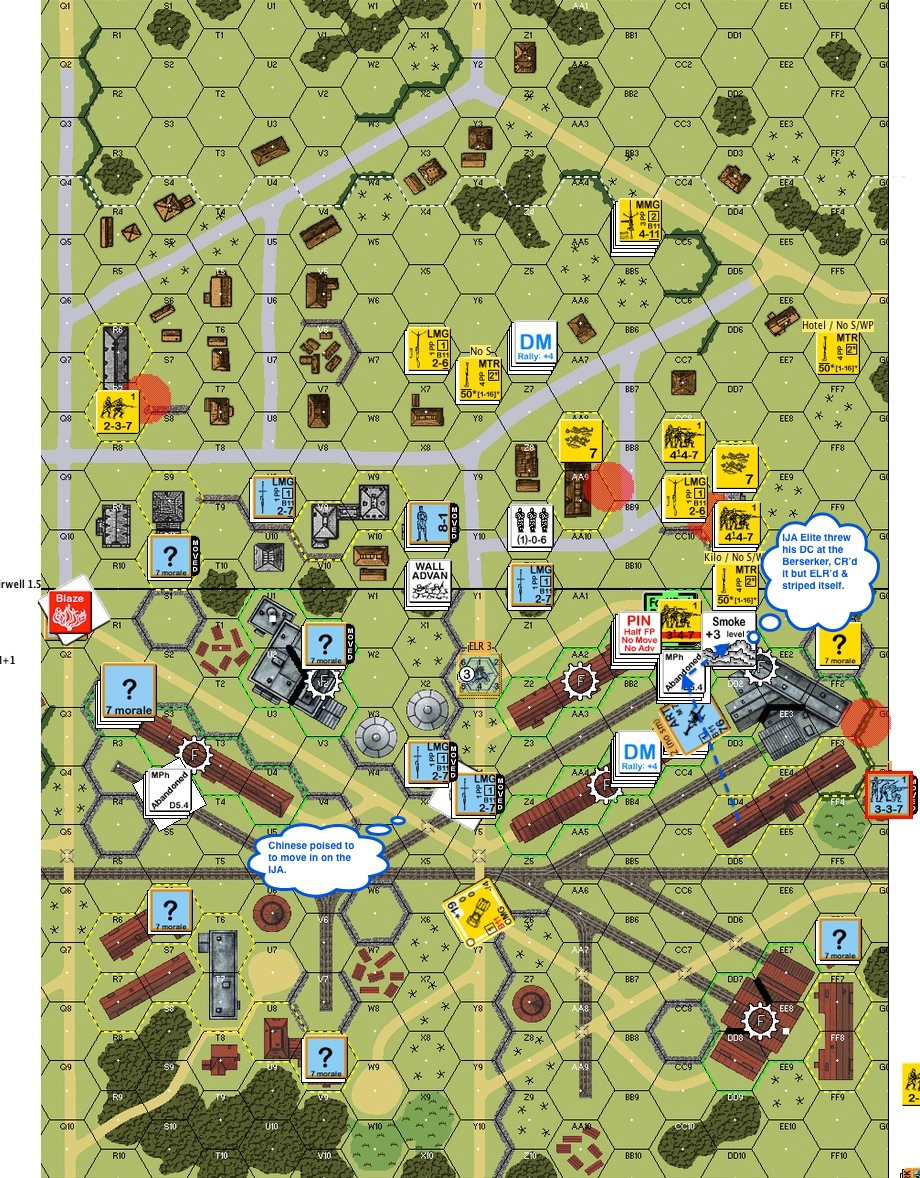
IJA Turn 4: Check out the middle of the board – here’s one of my extreme moments of stupidity: with a Chinese squad in the hex, I decided that it would be good idea to back the AC up to the Embankment Railroad. So I stopped the car meaning to go in reverse. The Chinese folks promptly declared CC Reaction Fire and disabled the car. A subsequent LMG shot killed it. *Brilliant*
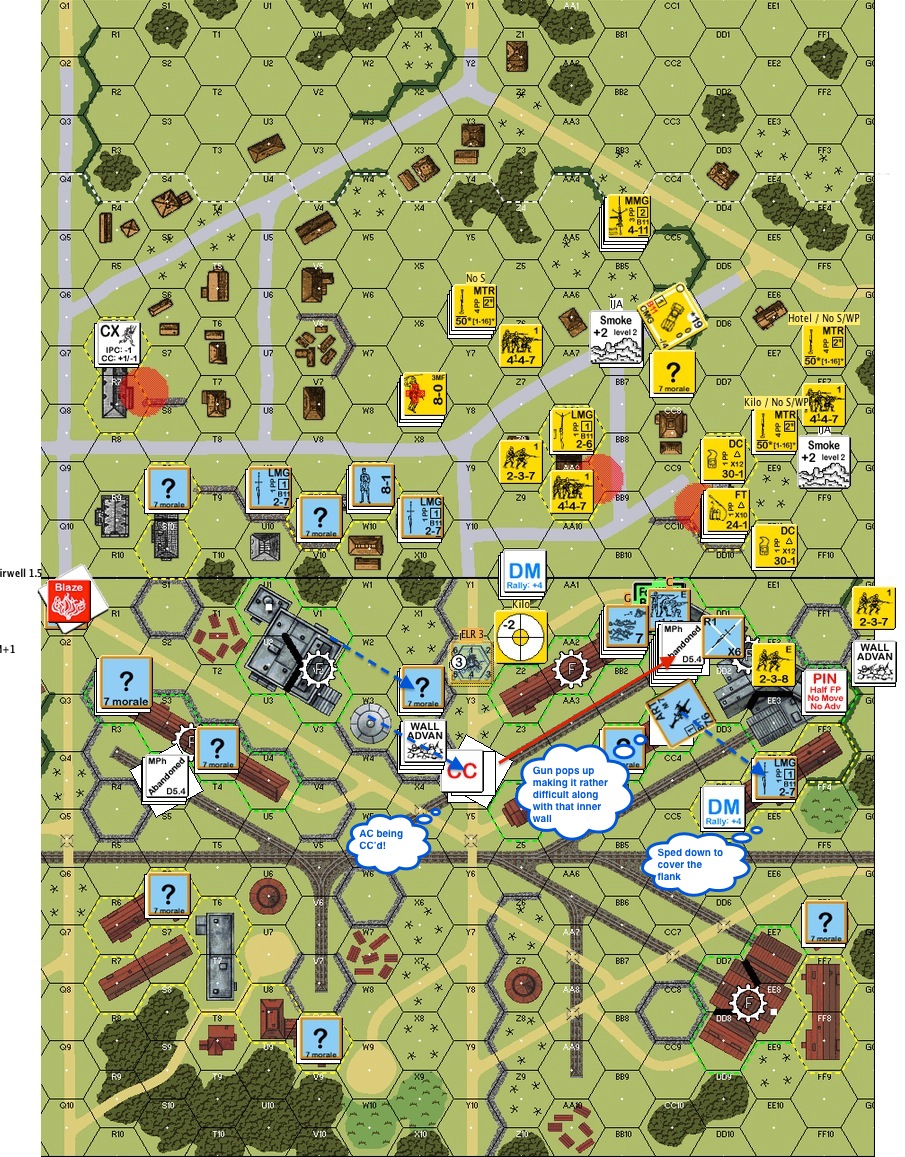
All the action on the right were the IJA trying to pile more troops into the factory. The Chinese started shooting a lot better than they did a turn before unfortunately. The good bit was that the IJA finally broke the folks in the Fortified hex. The IJA folks in the top part of the map were starting to appreciate how exposed their positions were. Having said that, the Chinese MMG malfunctioned the turn before and so they were having a go at crossing the street.
The IJA then ran the last of their armoured cars down the middle of the street to help take the building complex on the right.
Meanwhile on the quiet left side, a couple of Chinese troopers pulled out a bag of marshmallow and strolled over to the bonfire ..
IJA Turn 4 : This is end of IJA Turn 4. IJA managed to capture the big factory on the right. In retrospect I should then have “spilled” more forces down the right edge to turn the Chinese flank. That would perhaps take me to the buildings to the lower half of the board. The folk in the center had to rout back. The MMG that malfunctioned was fixed prompted in the next Rally Phase. Meanwhile, the AC got into a threatening position but it had to get on an embankment to interdict any Chinese movements.
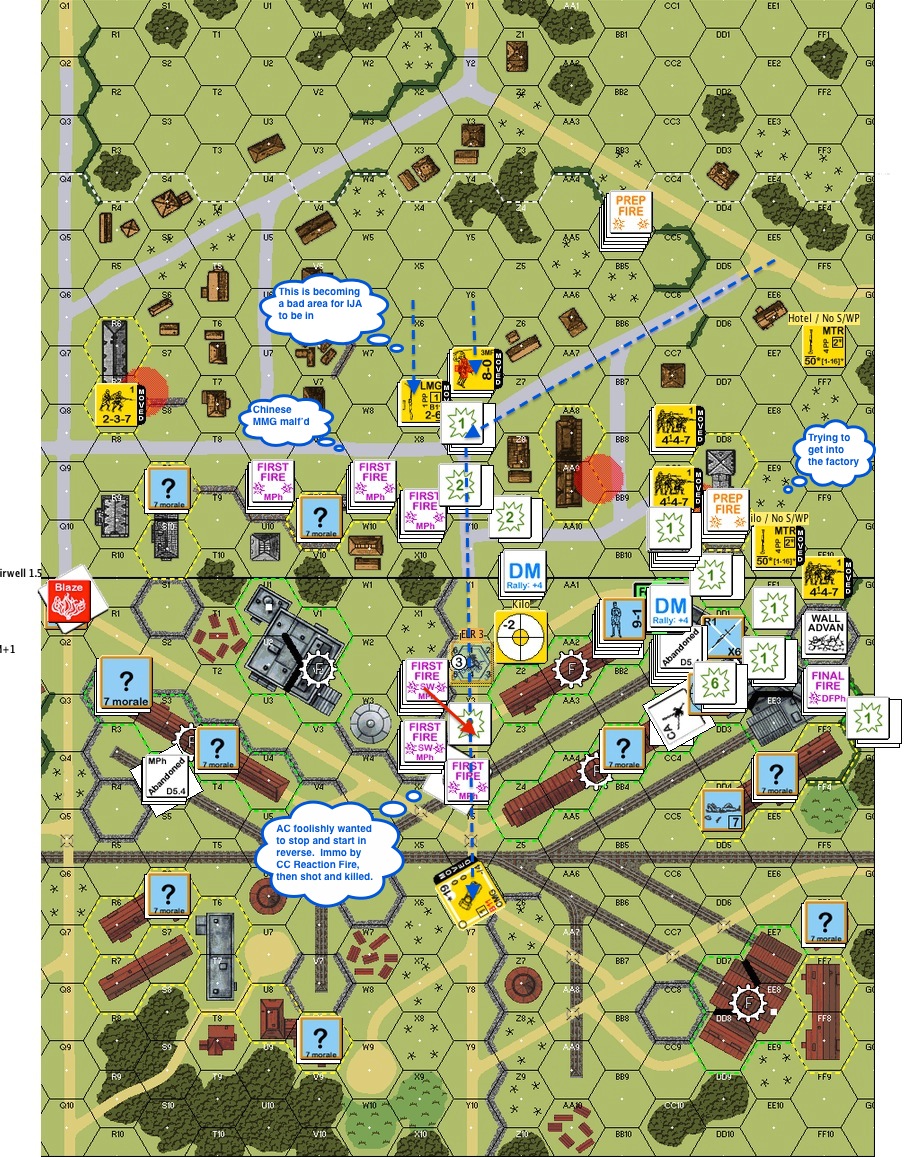
Chinese Turn 4 : Two Chinese squads went berserk and both targeted the striped IJA squad sitting in the Fortified hex on the right. One of the berserkers was underneath the Pinned squad next to the green Fortified hex so you can it imagine it doing the zombie dance against the wall. The other Chinese berserker rushed up (blue dotted arrow), spotted the IJA elite through the smoke to the right and switched directions. The IJA elite squad threw their DC at the crazies but only managed to CR the berserkers while ELR’ing itself to a first liner. The berserkers rushed in and got wasted by gunfire but it caused enough damage by taking the one squad the IJA had with a decent smoke component plus used up their DC!
The Chinese shifted their forces to the right as other sectors were not under threat (a street party was in progress around the bonfire by now). Notice also the 2 LMG squads closing in on the lone AC sitting in the middle of the board.
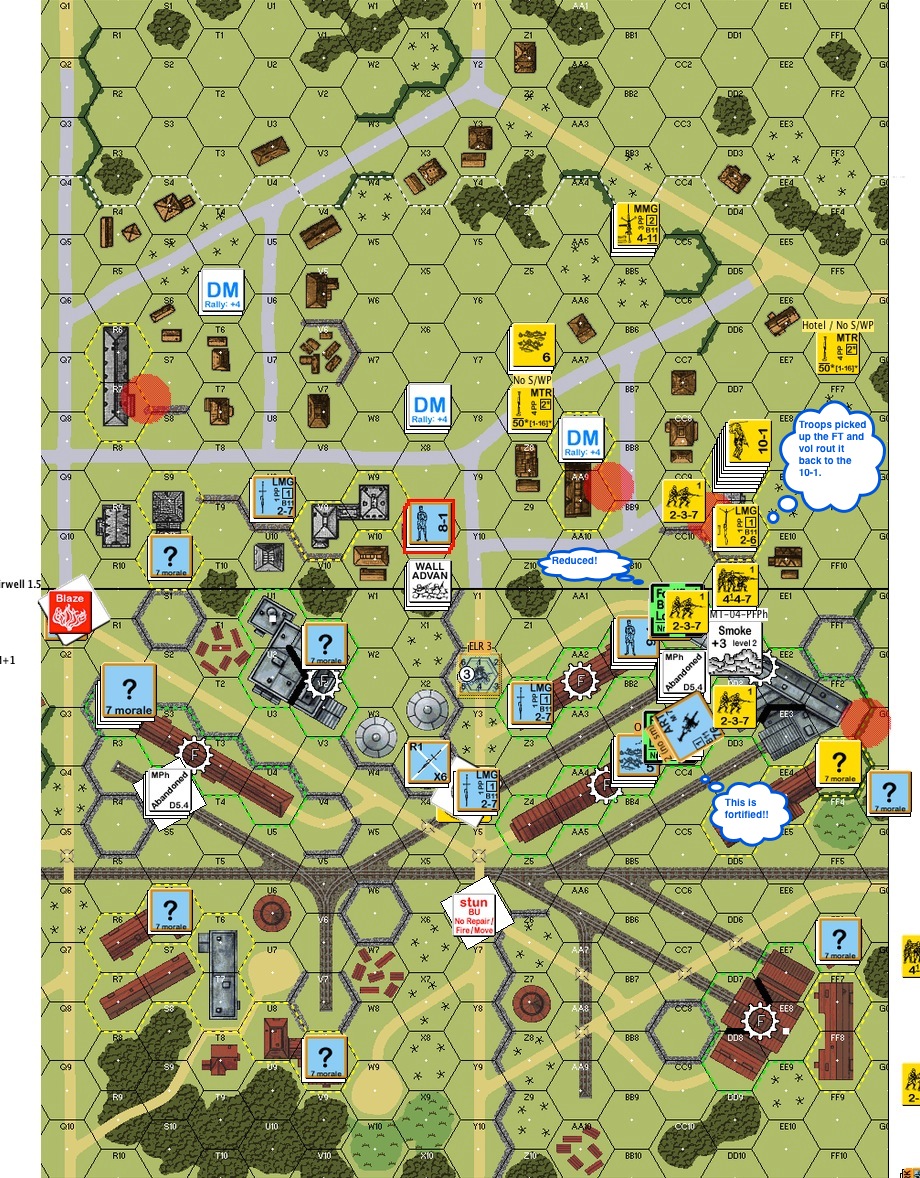
IJA Turn 5 : With all 3 mortars out of smoke and the one elite squad ELR’d to a first liner, the IJAs were not able to put more troops into the factory on the right as the Chinese had an MMG under an 8-1 in the middle of the map. Tried as they might, the IJA group in the middle couldn’t put much pressure on that MG, apart from discouraging it from putting up a fire lane. This is the end of IJA’s Turn 5. The troops inside the IJA’s hard won Fortified hex was steadily reduced. The fact that it should have advanced into the HMG squad (with the 9-1) long time ago to take them out by CC only occurred to me now. (Urgh..) Meanwhile, the 10-1 came forward to rally the troops. The 1st liners grabbed the flamethrower they recovered, vol broke and routed it back to the 10-1 in the hopes that the 10-1 would know how to use it.
I was definitely not at my best!
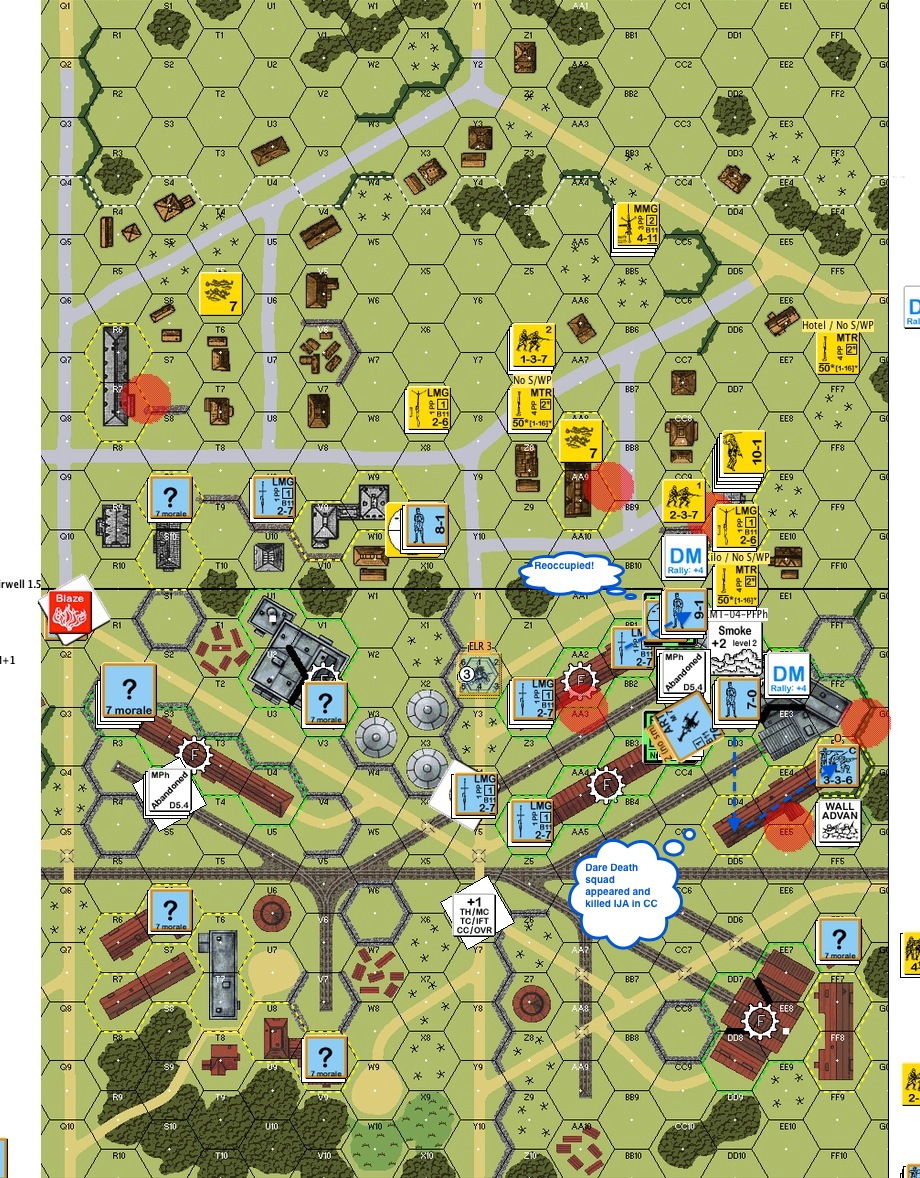
Chinese Turn 5 : It’s increasingly evident that the IJA were getting bogged down at the first factory. The Chinese reoccupied the Fortified hex and a Dare Death squad successful took back another building. While the retaking of the occupied hex didn’t mean immediate reversion of control, it did pretty much put the IJA at where they started with a lot less troops and only 2 Movement Phases to go.
This was where I conceded.
Review :
- In retrospect I should probably have approached from the left side of the board where there were more cover. The center group should be anywhere BUT center in that wide open space.
- I didn’t fully appreciate the threat that the MMG with the 8-1 poised on my operations either. We should have at least wrecked an AC in front of that building if nothing else.
- Running the Armoured Cars around to the enemy’s back field was the right idea but they should not be left on their own for too long.
- I should also have focused more efforts on sliding my troops down the right side to turn the Chinese flanks. Had I done that earlier, the dynamics would have been different. Instead, all the IJAs where bogged down in front of the big gun (of all places) and in the Fortified hex next to the highest ranking enemy officer and their HMG. The first thing IJA should have done was to advanced out of the Fortified hex and CC that HMG stack like there’s no tomorrow.
These are some of the major points I should have done better. In real life the IJA prevailed (and the ROAR was 15:11 Japanese:Chinese). As with real life, this is how much damage a bad leader (yours truly) can do!
What else could I have done better? What are your thoughts? Please comment.

Don’t think I have played that one but the pack is full of great scenarios
Ian
I think the fourth bullet-point in your Review was dead-on…once you punch the hole, swing the back door shut on him. A long-range weapon in the Y4 woods would have been perfect to bisect the battlefield, making his reinforcement of the right flank considerably more difficult. Definitely give the Republicans the Balance in ITR-2, murderous crossing that open ground.
Heya, Jackson! Just got through Turn 5, with 1 1/2 turns to go; this one IS a blast! Wasn’t going to re-read this AAR until it was over, but just couldn’t help myself. 🙂 It is still anyone’s game due to two CHI squads rallying in the rear, V9 on the top board was turned into (eventual) flaming rubble by the IJA DC. One CHI Gun dished out some damage before breaking, the other fired on the 10-1, 2x 2-2-8 w/ MMGs stack, got two hits with rate, but they just laughed at it!
Got a Chinese Hero generated in the FF2 factory which has helped them hold on to that building, and the left flank has the IJA bolloxed at the V1 factory…..but the center has crumbled! IJA has only done a few small-scale Banzais, so they are not too terribly striped for the endgame. This should come down to the last 1/2 turn!
Allowing the Chinese to declare HtH has proven to be a monumental SSR. they can pretty much afford to trade troop for troop to a certain extent. Really glad I finally got this one on the table!