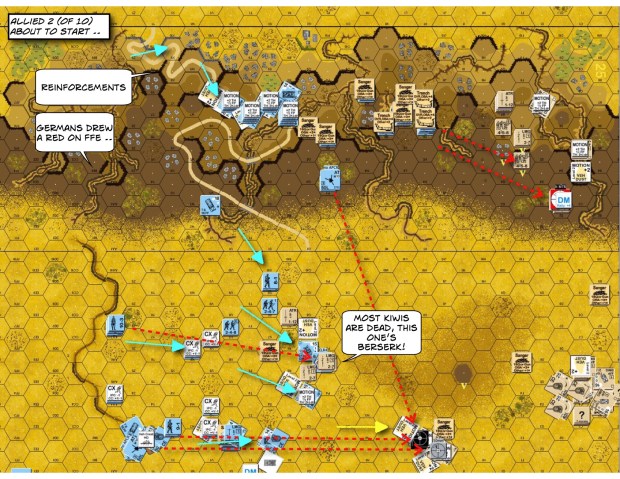
One sunny day in Libya, Nov 1941, a victorious column of New Zealanders from the 25th Battalion got ambushed by a counterattack personally directed by Rommel! One Valentine caught several rapid shots from their ROF3 guns but 2 managed to ran off! The New Zealand infantry were caught in the open and were getting shot at, blasted and overranned.
This is an Advanced Squad Leader scenario: 42 Point of No Return. Unfortunately for my cardboard Kiwis, this is my first real DTO ..

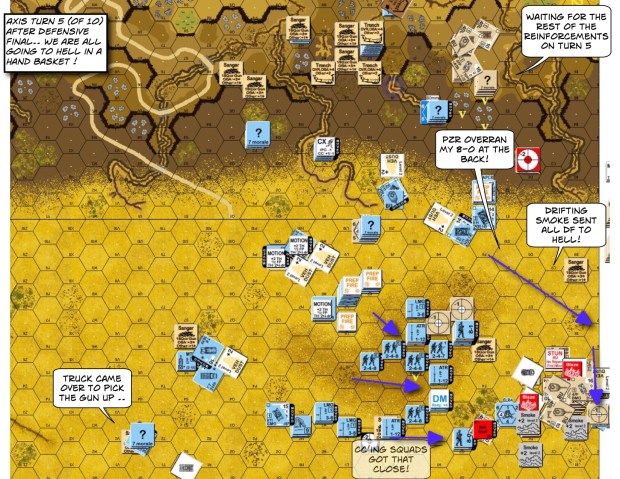
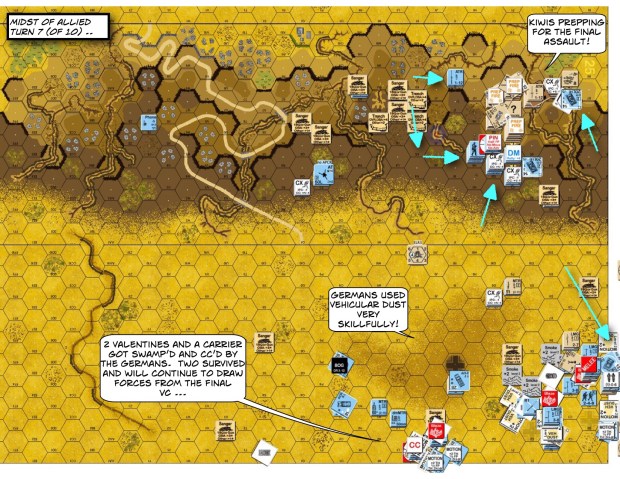
DTO is definitely not as open as the mapboards might lead you to think. There’s light Dust that affects every shot and there’s Vehicular Dust that every vehicle drags around. There’s also a Mild Breeze in this scenario that creates Drifting Smoke (changed direction too!). The southern group has kept the bulk of the Germans engaged for 6 turns now. Unfortunately it’s not quite enough, the Kiwis probably need to tie them down for 8 out of 10 turns to get a victory. The good news also, is that the reinforcements largely arrived intact from the north.
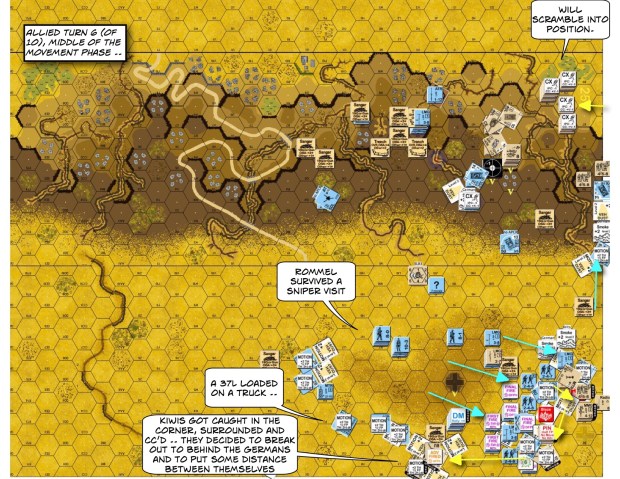
The small band of survivors in the south are trapped by the German onslaught. The rest of the armor broke off to the left along the bottom of the map. The carrier thought about picking up the 8-0, HS & the MMG. Unfortunately that would burn off too many MPs. The infantry stepped back and hope to recover the radio and the “double small” carrier sped off. It was largely shielded by Smoke, Dust, Vehicular Dust and Wrecks. The carrier headed straight for the German truck with the 50L 5cm PaK 38 onboard. The two Valentines followed quickly in support ..
We have 4 German Movement Phases to go. I thought the Kiwi armor breakout will hold the bulk of the Germans down at the bottom of the map but doesn’t seem like it’s going to be the case. The 2 Valentines and the carrier were all in CC at the end of the German turn. One Valentine was NOT in motion and was caught with the German 10-3 “Darth Rommel”. Darth Rommel alone adds 4 CCV to any squad and practically ripped the Val apart with his barehands! All the southern Kiwi infantry are wiped out and the Germans start to converge on the final VC to the north.
Will the surviving carrier and the Valentine be able to hold off the Germans longer?

Reality was that even though the hedgehog outpost held out til Turn 7, it wasn’t enough to keep the German off the main cluster of VC hexes. Drifting Smoke and Vehicular Dust wrecked havoc here. The 2 Valentines down at the Alamo couldn’t keep the German AFVs off the squads. The Kiwi’s didn’t have anything about ground to keep the Germans from aggregating either. When the Germans blew the Alamo apart, no one can reinforce the hex and hence we lost at the last turn!
I like this introduction to the DTO though. The Desert is really not as “plain” as it looks. Vehicular dust and (in this case) Drifting Smoke make the landscape as variable as Night.

Pingback: Recently updated AARs, June 4 2019 | Hong Kong Wargamer - an Advanced Squad Leader Blog
Pingback: Recently updated AARs, July 23 2019 | Hong Kong Wargamer - an Advanced Squad Leader Blog
Pingback: Recently updated Advanced Squad Leader (ASL) AARs, August 26 2019 | Hong Kong Wargamer - an Advanced Squad Leader Blog