 I was chatting online about Gary Fortenberry’s new Advanced Squad Leader Action Pack “ASL Action Pack 9: To The Bridge!” when Sam Tyson offered to play. The next thing I knew, I was experiencing a truly action packed scenario, well designed and well “interpreted” by Sam. This was February 1942 in Burma. Patrols from the King’s Own Yorkshire Light Infantry discovered IJA roadblocks around Danyingon. So elements from the King’s Own Yorkshire Light Infantry and the 1/7th Gurkha Rifles set out to evict the IJA from the area.
There were 2 roadblocks in predestinated positions on the map. The British goes from the bottom of the map to the top. They get an instant win when they clear both roadblocks or if there are no good order IJA troops around either roadblock after five and a half turns. The British got a mix of armoured cars and (scary) Gurkha ladened carriers. The IJA got to hide (always good) plus a Mountain Gun. 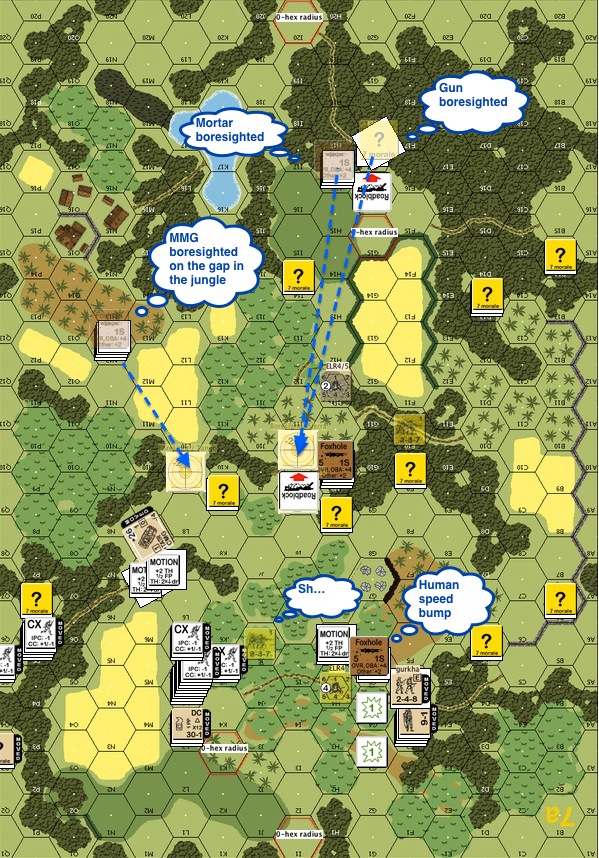
British Turn 1 : You can see where the IJA gun was hidden and where it was bore-sighted. There was an MMG on the hill to the top left bore-sighted to a path through the jungle. There was an IJA half squad hidden in the brush hoping that the British would pass him by and another IJA half squad near the first roadblock in the middle of the map. There’s a scenario special rule that requires all hidden IJA to reveal themselves via Banzai attacks in Turn 4. I figured that might be where the British would be by then. The British were very aggressive in their first move given the short time frame. My foxhole on the hill on the bottom of the map was immediately overran. Nothing but a human speed bump! The carrier hooked around the foxhole and made sure there was no escape for the IJA half squad therein. 
British Turn 2 : The British methodically beat down the brush and found our first hidden IJA half squad. A British armoured car headed straight for the defending IJA at the roadblock. IJA’s LMG scored a hit and a lucky kill. The IJA started backing off. 
British Turn 2 Rout Phase : The IJA started melting away before the British could engage them in close combat. The IJA looked to delay and to collapse into the last roadblock gradually. They formed a line right before the tree line where the hidden IJA half squad was. 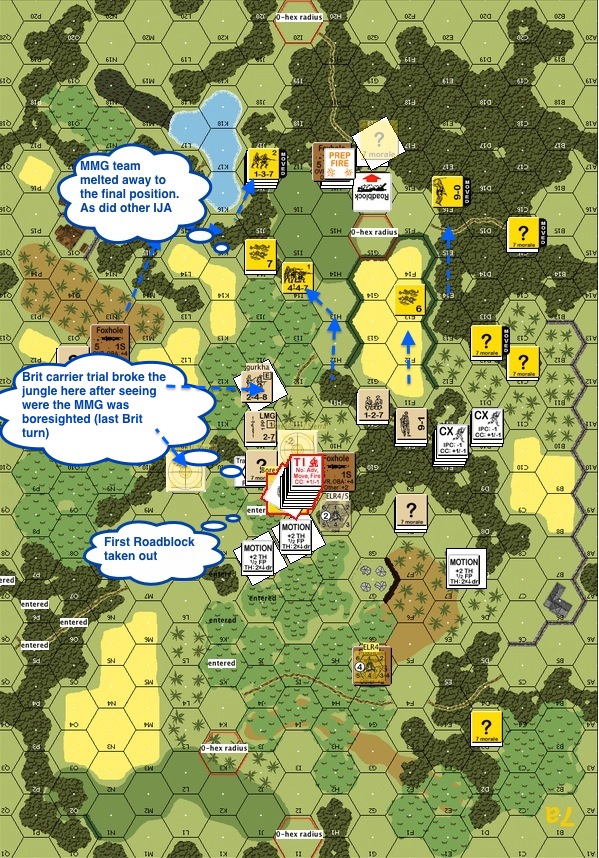
IJA Turn 3 : The end of the turn saw the IJA melting away again, collapsing towards the last roadblock. Before the MMG team on the hill on the middle of the map did, they vaporized a British half squad coming down the jungle path. The Brits then decided to use a carrier to create a trail break in the jungle nearby.
 IJA Turn 3 : The IJA MMG team from the middle of the map repositioned to around the last roadblock, MG trained onto the road. A big stack of British troops successfully removed the first road block. A British 9-1 and a Gurkha squad walked into the hidden IJA half squad in the last turn. The half squad should have popped up in the earlier British Turn when this happened. Hand to hand fighting nonetheless ensured immediately and they were all killed.
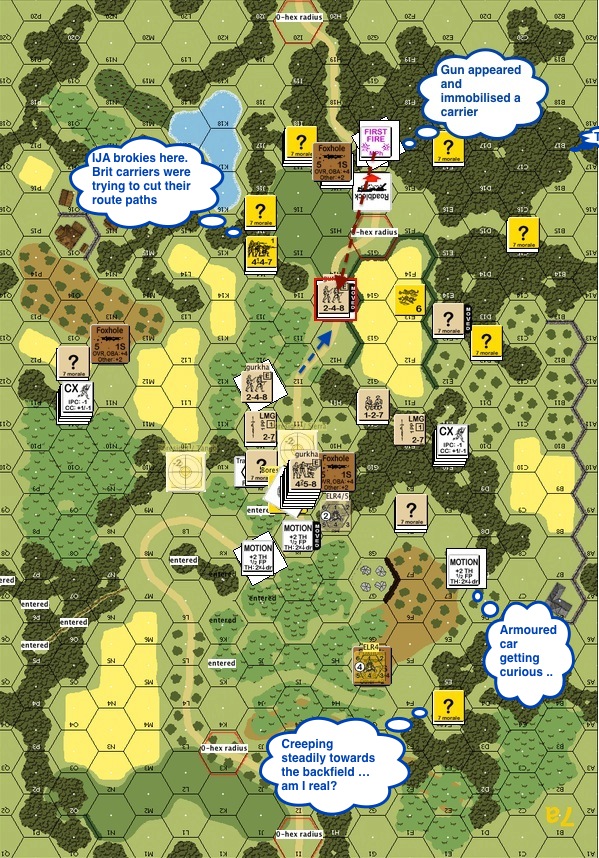
British Turn 4 : The Brits were out to chase down the routing IJA squads. The first carrier sped down the road and the IJA gun roared from behind the second roadblock. The carrier was hit and immobilized. Meanwhile the hidden stack on the bottom of the map tried to get the British armoured car’s attention by slowly creeping towards the British backfield. 
British Turn 4 still : The action heated up as the second carrier comes running down the path. The MMG managed to score a hit but the bullets bounced off. This carrier managed to hook around and cut off the IJA brokies’ rout path. The third carrier went straight for the roadblock! The gun crew intensive fired and killed that one too. The rest of the British troops moved in quickly. This was Turn 4, the British had 2 more Movement Phases to go.
 IJA Turn 4 : The IJA mortar crew laid a white phosphorous (WP) round on the carrier but the Gurkhas were too tough for it. The WP round did allow the IJA troops to slip by and escaped back to around the second roadblock. The IJA gun killed the immobilised carrier, taking more of an interest in its Gurkha crew. However, I should have left the gun pointing towards the right for the next British round. The British were consistently great at cutting rout paths and taking prisoners. The IJA realised they need to stop the British from getting behind them if they were to survive – hence the line.
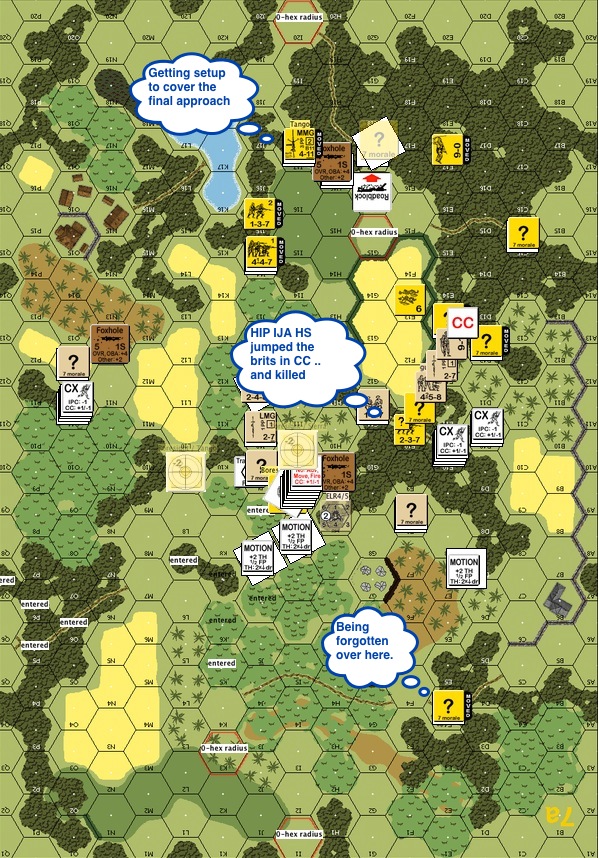
British Turn 5 : While their comrades held the line, the IJA on the left melted away so they could counter attack against the British troops at the roadblock. The armoured car on the bottom of the map finally verified that we had a moving stack of dummies. It was a miracle that the IJA kept this armoured car out of the battle for so long! 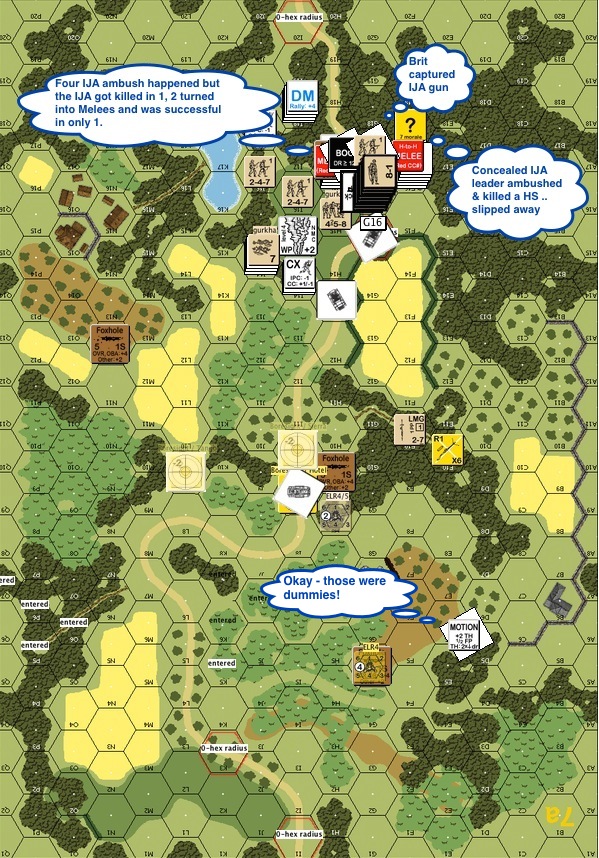
British Turn 5 still : The British were unlucky in that all four close combats started with IJA ambushes. However the IJAs were killed around the gun and 2 of the fights resulted in melees. Only on the right did we see a solitary but concealed leader slaughtered a British half squad and slipped deeper into the jungle. 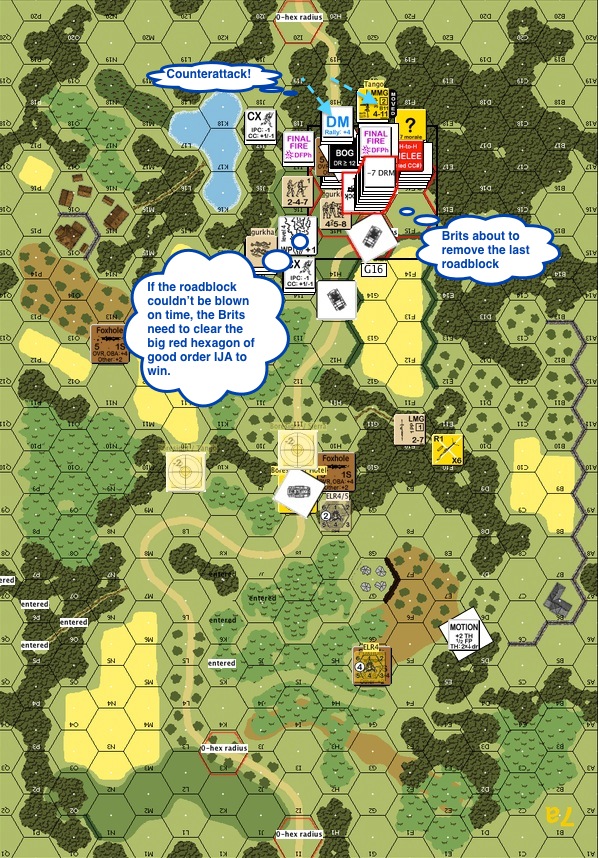
IJA Turn 5 : The routed IJA again rallied and attacked towards the roadblock. The British were assembling around the roadblock at this stage. If they manage to clear the roadblock, they get an instant win but if not, they would need to makes sure there were no good order IJA troops around the area marked with a big red hexagon. 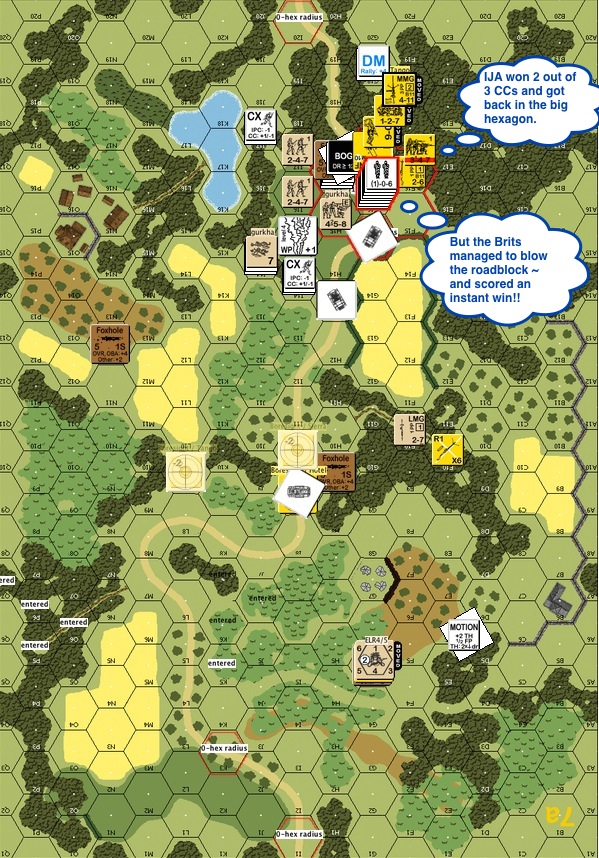 IJA Turn 5 – Game End : The close combat phase was a good one for the IJA, they reclaimed two of the hexes around the last road block. However, the British were able clear the roadblock by rolling less than 10. (You need to roll 2 or less on a pair of dice, but the Brits had enough people to get a -7 modifier.)
Mr. Sam Tyson won!!

Awesome AAR as usual Jackson!
This looks awesome! I love the Burma theater for ASL. We should do the SP Gurkha trilogy next!
I will be playing through the whole pack so was very interested in your AAR
Ian
Always enjoyable to read!
Always fun to hear of your ASL adventures. Sam really knows how to clear a roadblock!
Nice aar as always over what looks like a fun game.
good use of wp and it looks like aggresive carrier use was the deciding factor – something i would equally find difficult to handle…
Interesting to see how your IJN voluntarily break to rout away. Learn something new everyday…