Don and I waded a little into scenario RPT1 Ferenc Josef Barracks this week. The Romanians got on the board intact. Most of them manage to keep their concealment. I will need to rely on the buildings for cover going forward because I simply don’t have the time to retain concealment / to assault move. The only squad with smoke grenades is the one 4-4-7 holding the flamethrower and that’s only with a die roll of 1 (17% chance). As an attacker with a short schedule, I have to balance the urge to rip up the streets against taking stupid risks and losing the bulk the Romanian force before getting to the barracks. From the way Don was setup, the Hungarians are looking to do a fighting withdrawal back to the barracks. It’s therefore going to be a running street battle all the way back.
Guys with low firepower like the 3-4-7s are simply ineffective against defenders concealed in stone buildings. For my shooting to be effective, I need die rolls so low that will trigger the snipers in most cases. I only have 2 leaders in the pack so I need to avoid low probability shots.
Turn 1 Romanian

What you are looking at here (blue marking) is two of the Hungarian squads who came out of concealment and took a shot at the Romanian 3-4-7 assaulting up into the road hex in Y10. I expected a good number of Hungarians to be staring at that road hex all day. They would open up and the residual fire would rip up anyone else coming after, pretty nasty on an open road hex! This Romanian squad got lucky though and no one else was going to come through.
On the other hand the elite Romanian 4-4-7 squad in building F9 (orange marking – underneath the 1-3-7) was eager to unleash their flamethrower on the concealed Hungarians in DD8 they caught a glimpse of when they ran up. Unfortunately flamethrower FP is halved at 2 hexes and halved again versus concealed targets. FP 6 flat is still a good shot though considering the alternative but the Hungarians escaped a fiery fate for now.
Turn 1 Hungarian
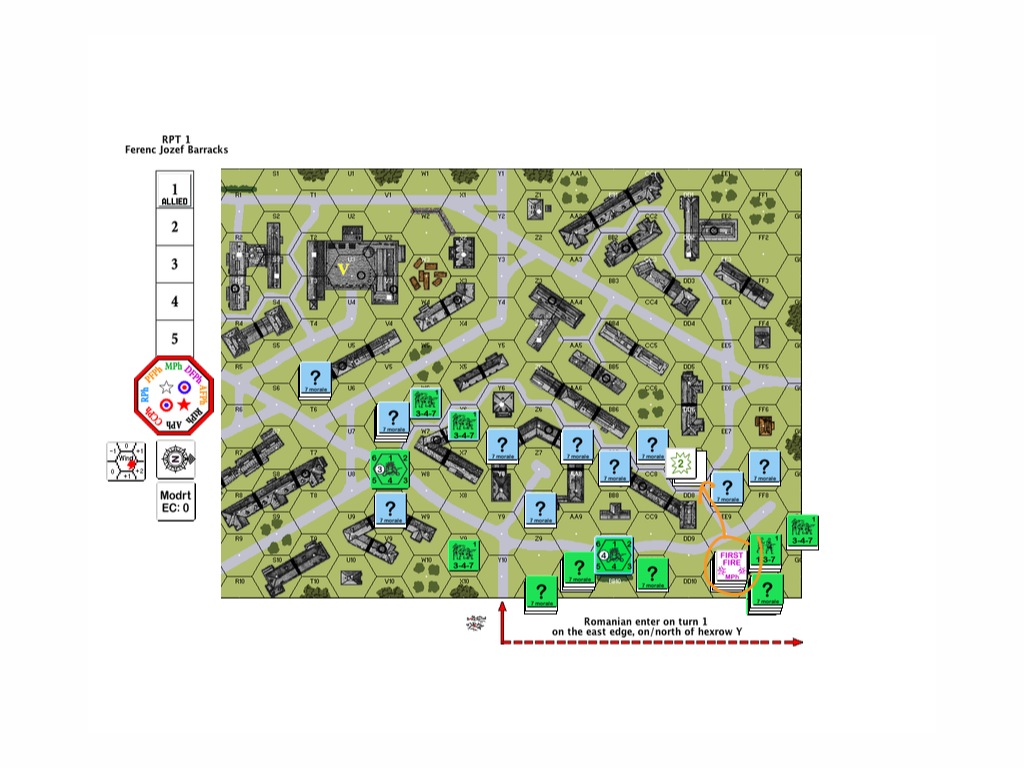
Don executed the time-honored strategy of skulking. He assault-moved all of his squads from concealment territory to concealment territory and in most cases out of my line of sight. (Note: this denied me the opportunity to fire at them in the Defensive Fire Phase and they would advance back into their original position at the end of this turn, ready to stop my next advance!)
The Romanians in EE10 decided to come out of concealment and took a FP4 +3 shot at the folks skulking off at DD7 (orange marking). The Romanians needed a die roll of 4 or below (17% chance) to have any effect but that was the one chance where they could disrupt the Hungarians in preparation for the coming Romanian Turn 2. Again, the Hungarians were well concealed and the stones protected them well – no effect.
Turn 2 Romanians

It was time.
The Romanian management said it was time to go out there and do some business. The elite 4-4-7 squad decided to give their toy another try. They looked to roast the Hungarian squad that spotted them on the open ground coming over. Another FP6 flat shot across the street – and the big toy broke with a “clunk”. They carried their flamethrower all the way over and it spluttered on the second shot!
Anyway, it was time to reach out and touch someone. The Romanian squads and half squads assaulted out into the street, trying to spread out as much as they could. This is a picture of the Romanians in the street and getting fired on. The gods are with them as only 2 of the squads/half-squads were pinned and the rest were unscathed.
You can see also where the Romanians pushed two squads into GG7 and GG8 (orange markings on the right), running over open ground and risking -2 shots. They saw their compatriots before them being relatively unharmed and hence they took the chance to flank the Hungarians.
The Romanians piled into the concealed Hungarian positions in the buildings across the street (DD8, EE8, FF7) and on the left of the map, into V9 – the one concealed position that was blocking the way.

SURPRISE!!! All positions except DD8 (marked “CC”) came up empty. The good news was that the Romanians uncovered all the fake Hungarian positions. The bad news was that they failed to catch the bulk of the Hungarian forces.
The same Hungarian squad that survived two roasting attempts decided to hold their ground and fight. The Romanians weren’t going to let them get away this time either and so they went for a bloody hand to hand combat. It was over quickly with the Romanians taking some losses and the stubborn Hungarian squad finally eliminated.
Turn 2 opens for the Hungarians. Will they be able to retreat safely? Will they be able to delay the Romanian hordes?


How about coming home everyday to 30 mins of PBeM game over VASL?
Whether you are a fellow newbie who would like to learn together or an experienced ASLer who don’t mind helping me up the curve. I play to enjoy and to learn. Please message me at jackson-dot-kwan-at-gmail-dot-com!!
Related articles
- RPT1 Ferenc Jozef Barracks – A View of Advanced Squad Leader Scenarios (Part 1) (hongkongwargamer.com)


