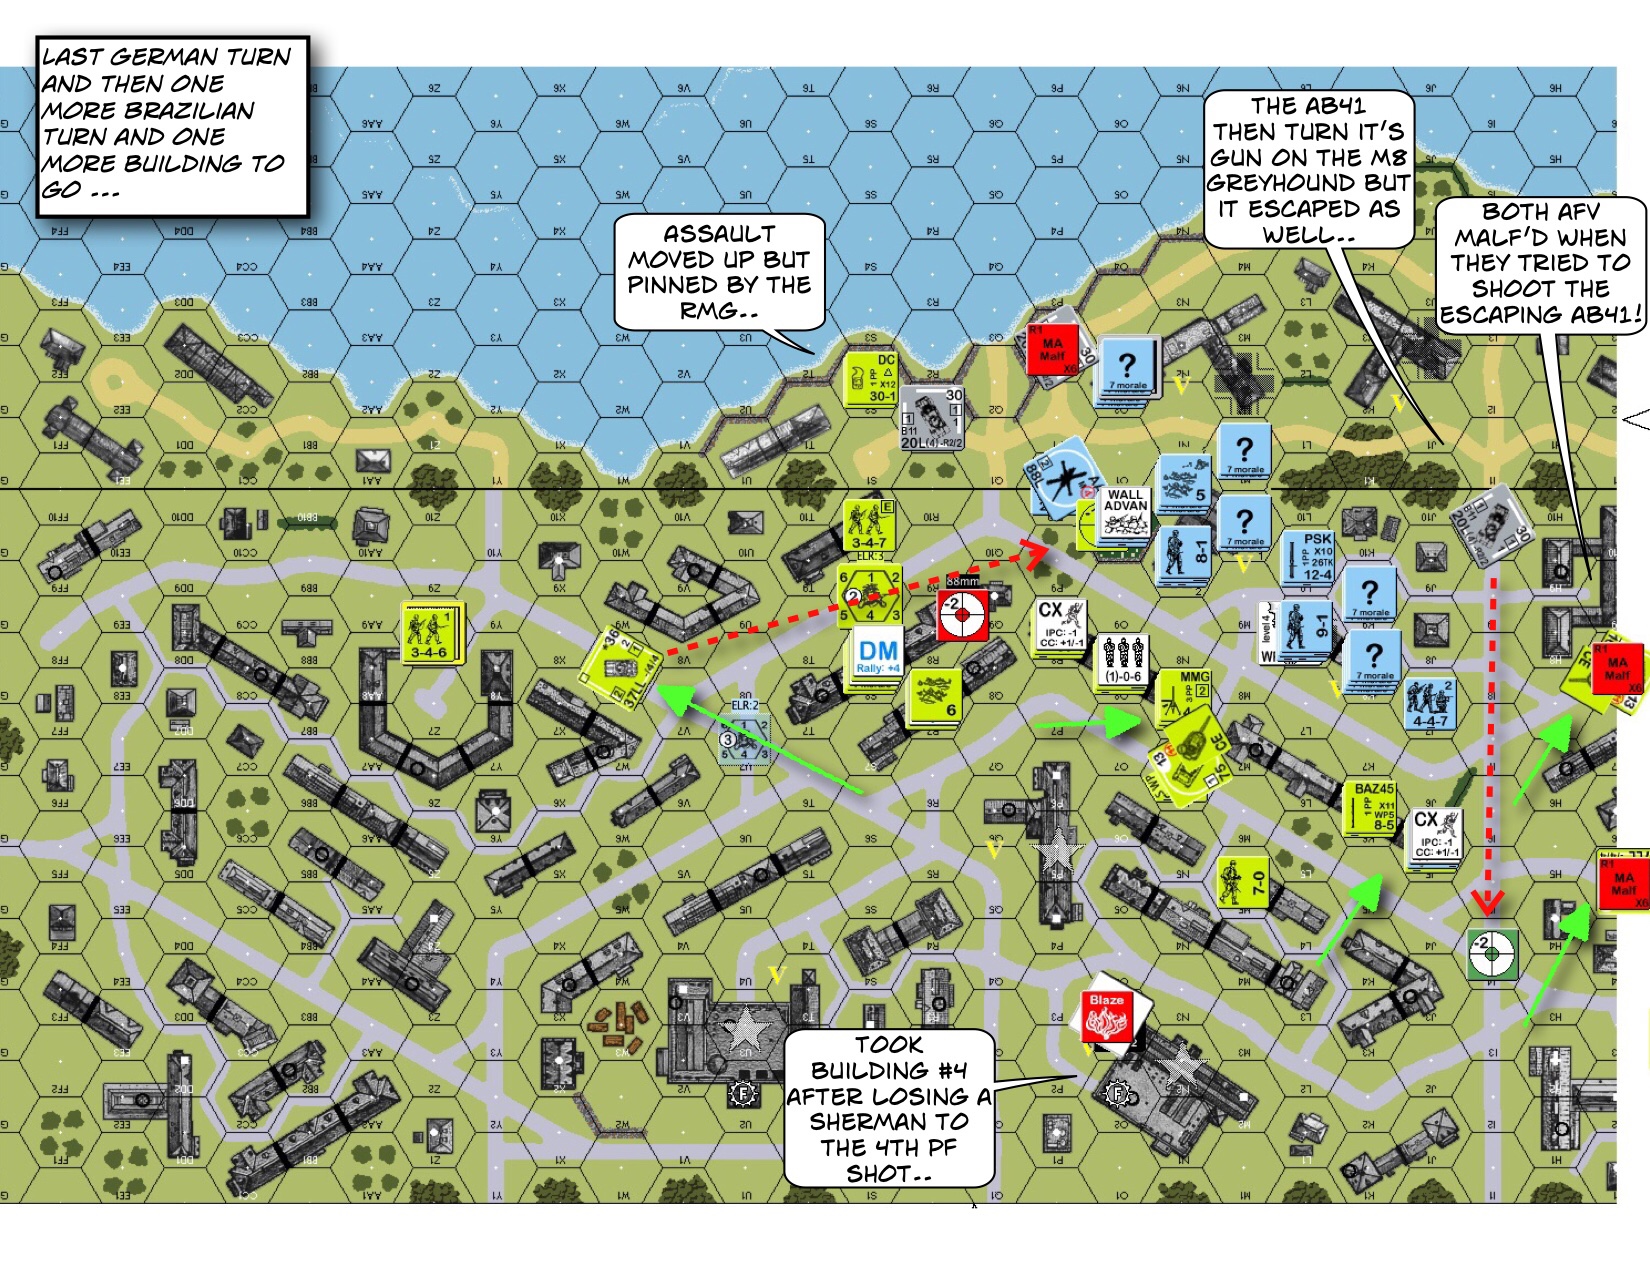
DB127 Grand Hotel Britannia After Action Report (AAR) Advanced Squad Leader scenario
Victory Conditions
The Royal Scots (British) opened up with 3.5 squads, a 9-1plus a DC in the Grand Britannica Hotel (Netherlands). They also got a Smoke OBA in the building. The rest of the crew comes from the left of the map: 9.5 squads of fearsome quality plus a 9-2. They win if there were no Good Order German MMC inside the hotel in 5.5 turns. The Germans got a mix bag of units with a 20L AA Gun and some fortifications.
After Action Report
 Advanced Squad Leader scenario.jpg")
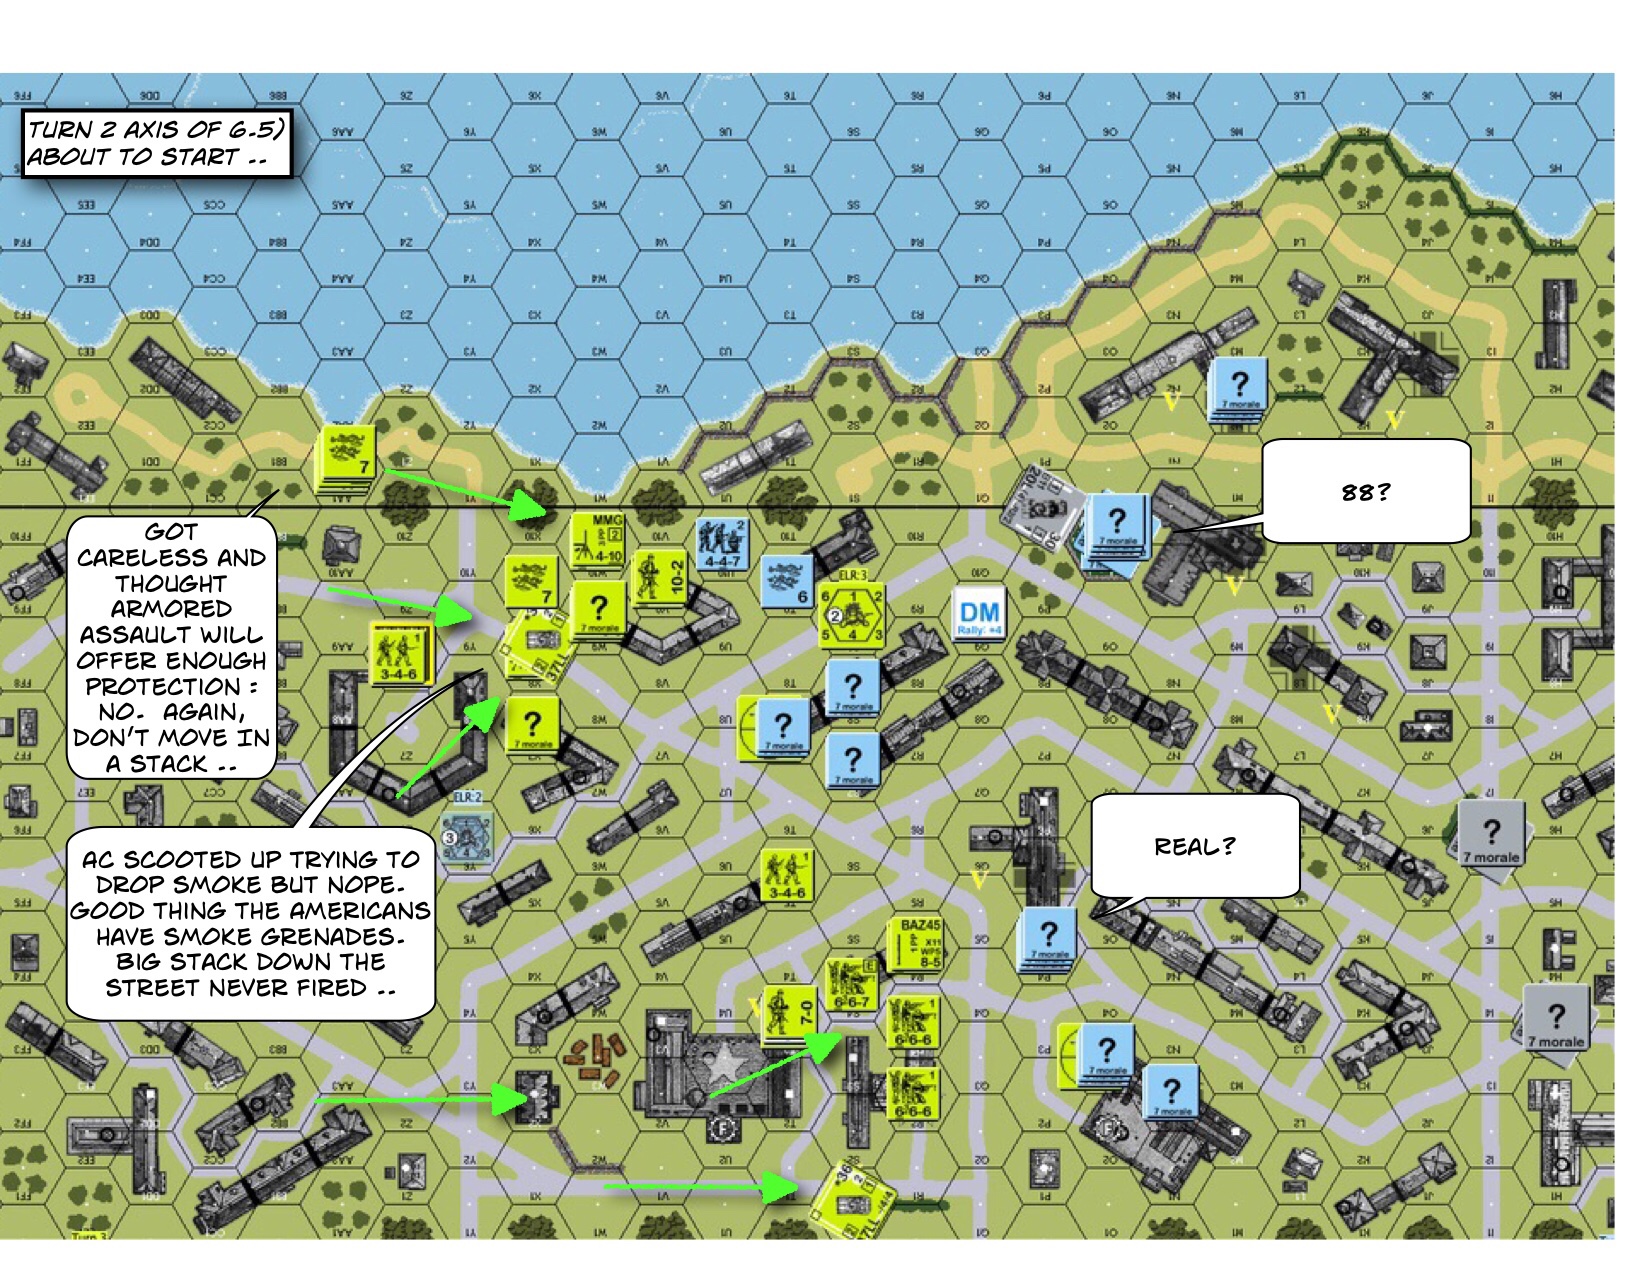
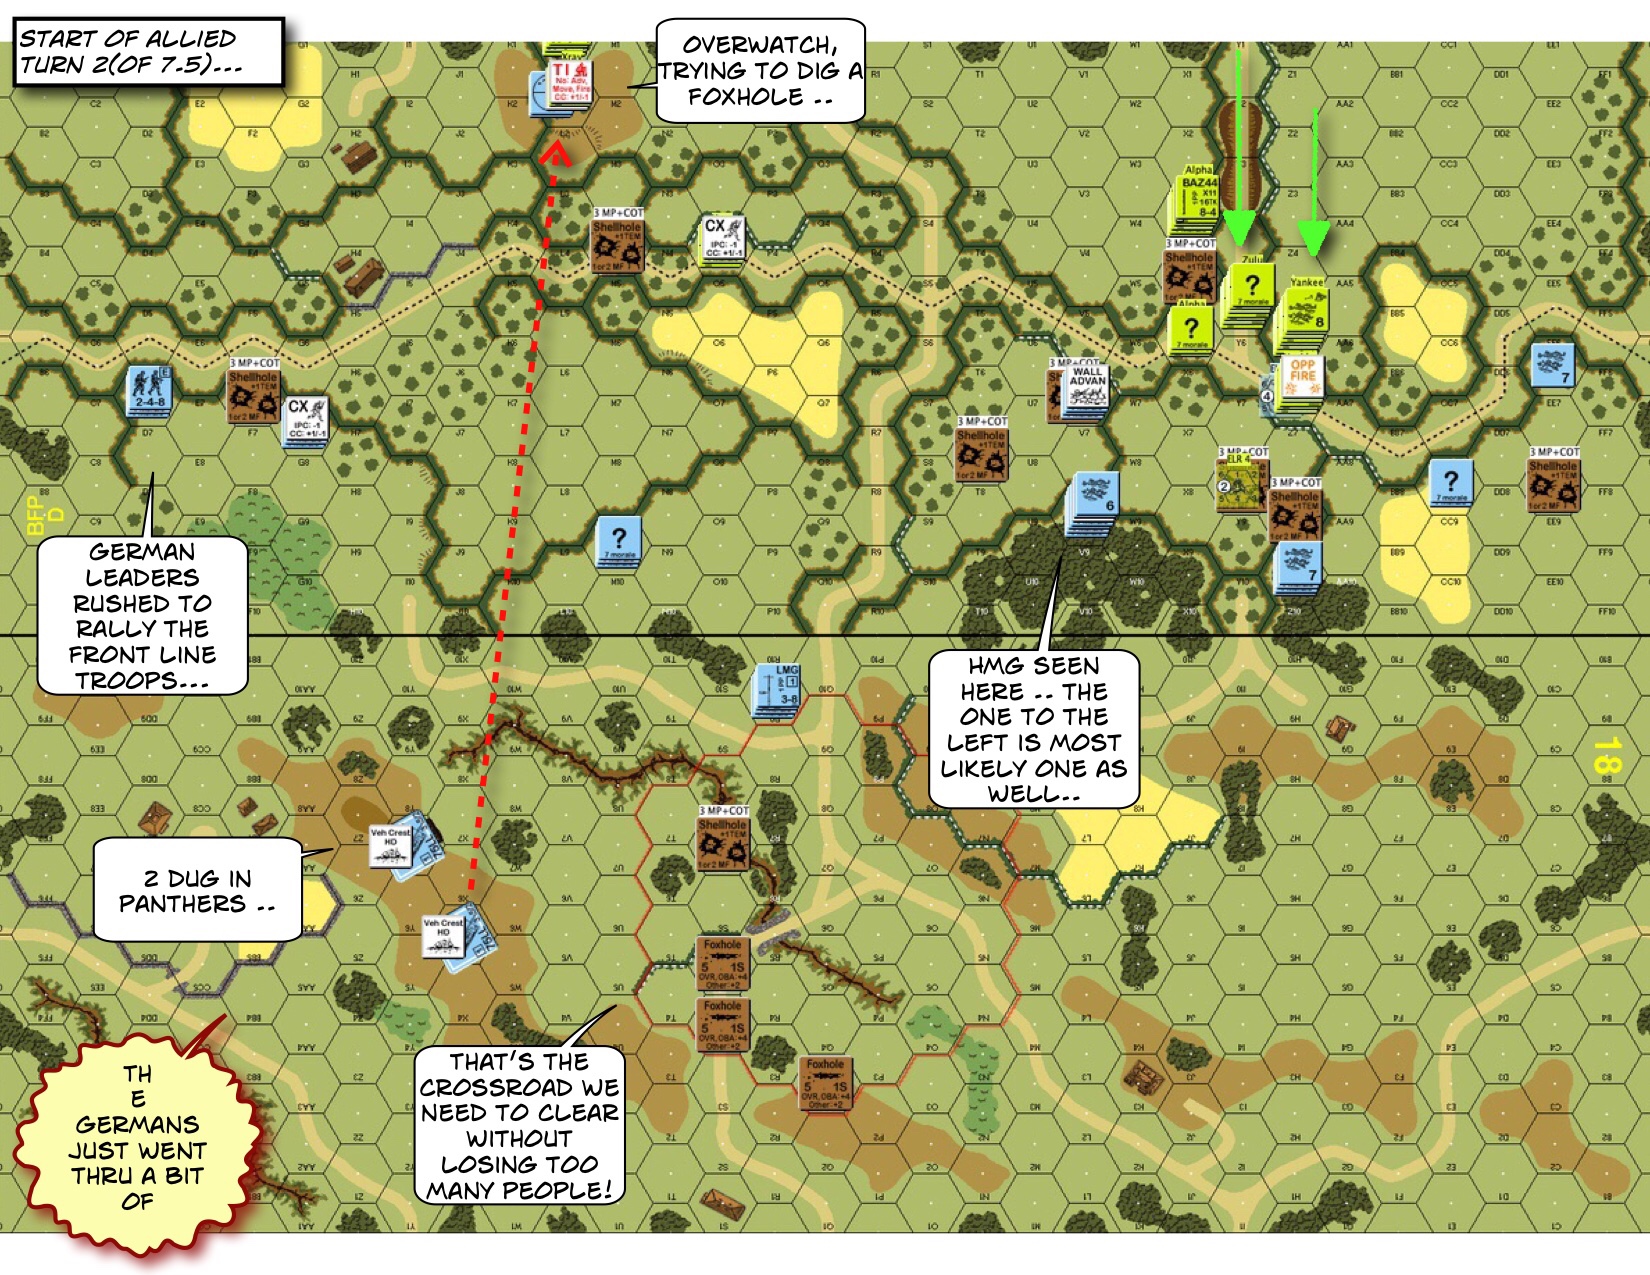
On Turn 1, the Scots popped a DC on one of my (Concealed) stacks inside the hotel. The Germans also chucked a DC into the biggest stack of Scots and broke a few of them. The rest of the Scots jumped off from the left. Their mortar fired its last Smoke round into my trench in the middle of the street on German left and they moved towards the stone wall. The Germans had their AA gun hiding in the Woods behind a line of Wire. The Bunker, the MMG and the panzershreck stationed on the right flank, daring the Scots to come through the open.
 Advanced Squad Leader scenarioPh.jpg")
We got lucky on one of the CC’s but the other 2 in the Smoke turned into Melees. The Scots decided to all push up my left. The Germans shifted to that side to block the Scots hex by hex. Meanwhile the German left flank shifted to the back of the street to keep it dangerous, looking at covering the back of the hotel all the while. On the German right, the Germans in the pillbox prepared to move back into the hotel. We couldn’t afford to let the hotel Melees last too long, we needed to resolve them and free up troops for defence before their friends approached the hotel. The Scots were already pouring over the stone wall in front of our roll of wire in the woods. We moved a unit on top of the (still) HIP’d AA Gun just so it wouldn’t look suspiciously empty. I was just waiting for that 9-2 stack to brave the open and come to my right. Perhaps not, may be they were just overwatch.
 Advanced Squad Leader scenario.jpg")
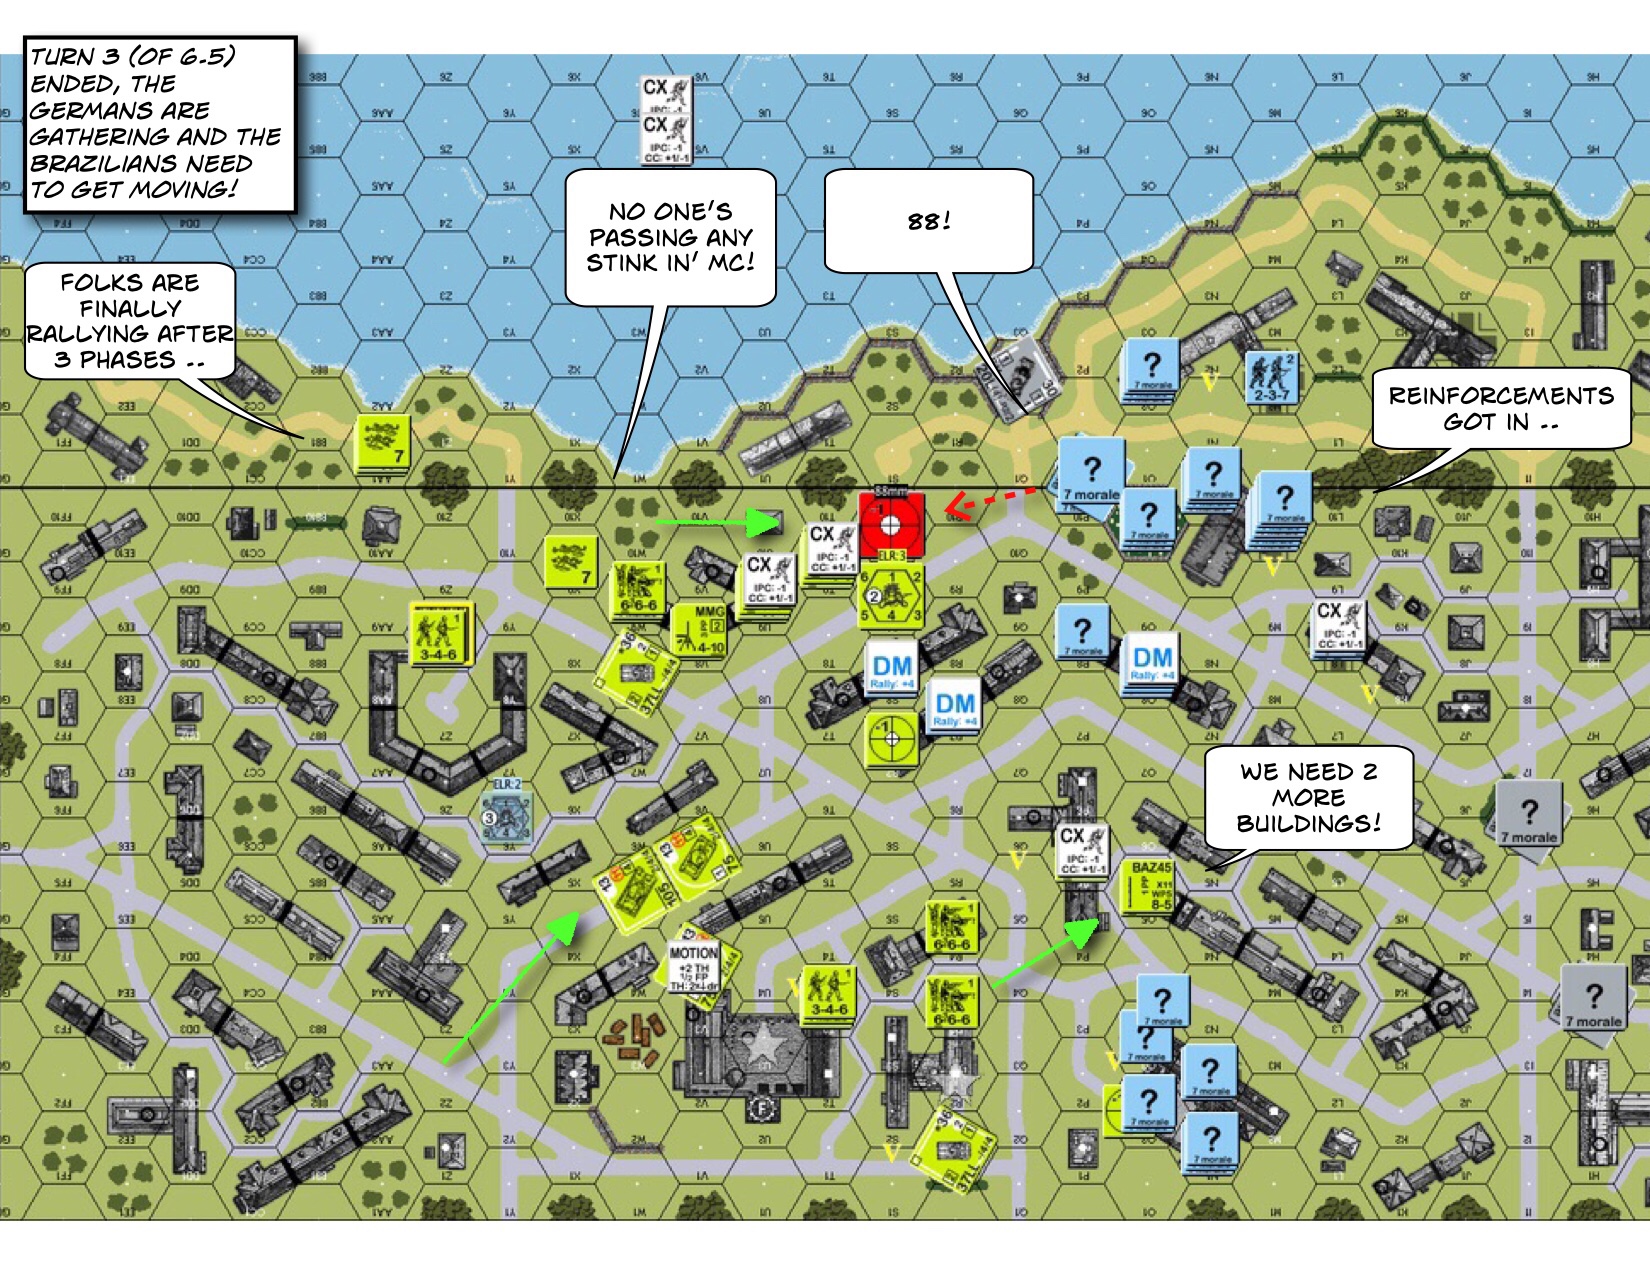
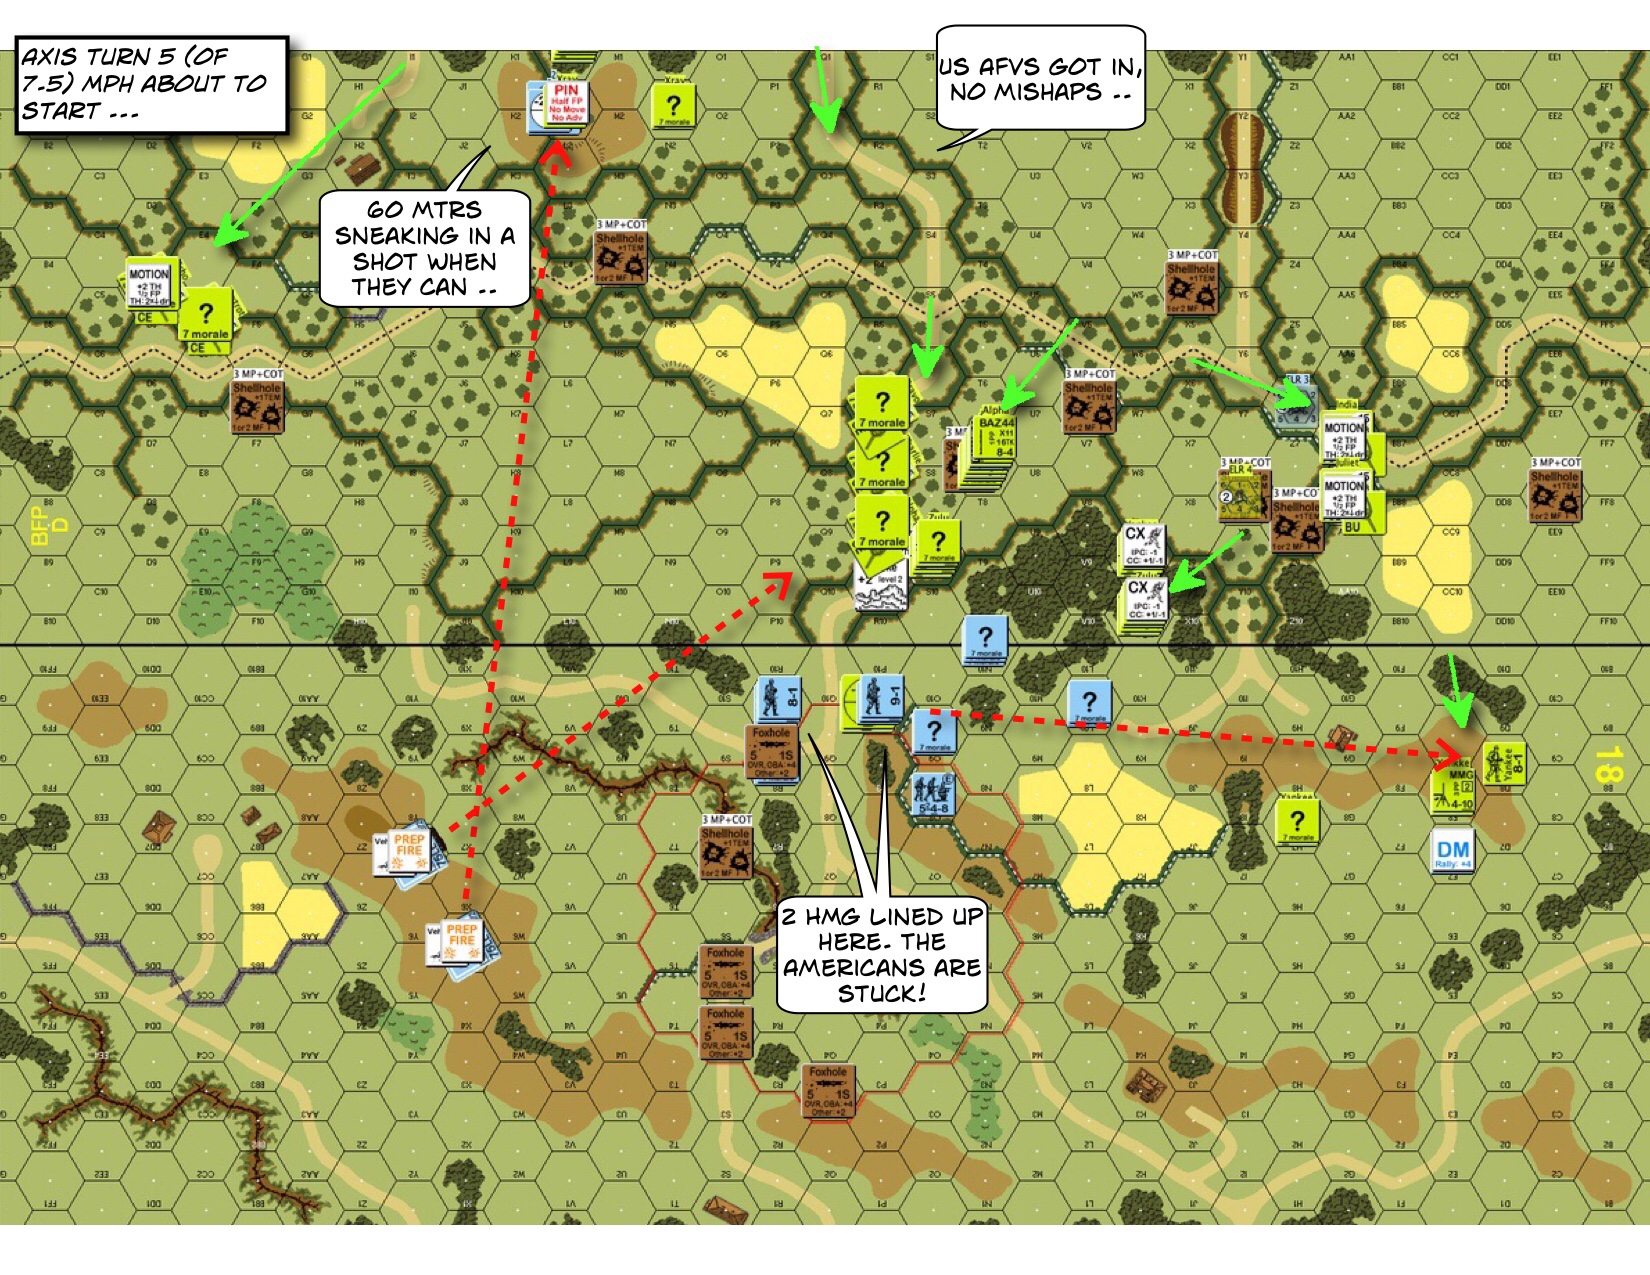
The Brits filed to my left. With only 5.5 turns, they didn’t have time to “soften” the Germans up on the right. A lot of them popped over the wall and dove the Woods. When the first squads braved the Wires, my hidden AA opened up pointblank, breaking a lot of the intruders. A platoon of Scots went down the road on our left, banking on the Smoke round to protect them from fire. The Melees were still going on but we shifted what we could towards Hotel left.
 Advanced Squad Leader scenario.jpg")
Urgh – the Brits hit our lines again on our left. the AA gun crew broke and a Green squad picked it up. The idea was to fire it so much that we delay another British MPh and render the Gun useless for the Scots. We lucked out on the Melees. There’s a pinned Scottish squad left on the right of the hotel but we did not have a large British pretence in the Hotel Lobby yet. The LMG team that was guarding the German left returned to the hotel at the back. (In retrospect it would been more interesting had we scramble up the multistory, single hex house in J7, and shoot at the attacker’s right flank for a few turns.)
 Advanced Squad Leader scenario.jpg")
Both the Germans and the Scots fell back from initial contact! The Germans in particular deployed and concealed as much as we could.
 Advanced Squad Leader scenario.jpg")
The Germans kept deploying, concealing, spreading out while focusing on Stairwell control. It’s going to take time for the Scots to render all German MMC not “Good Order”. They would have to shoot/ close combat us one by one.
 Advanced Squad Leader scenario.jpg")
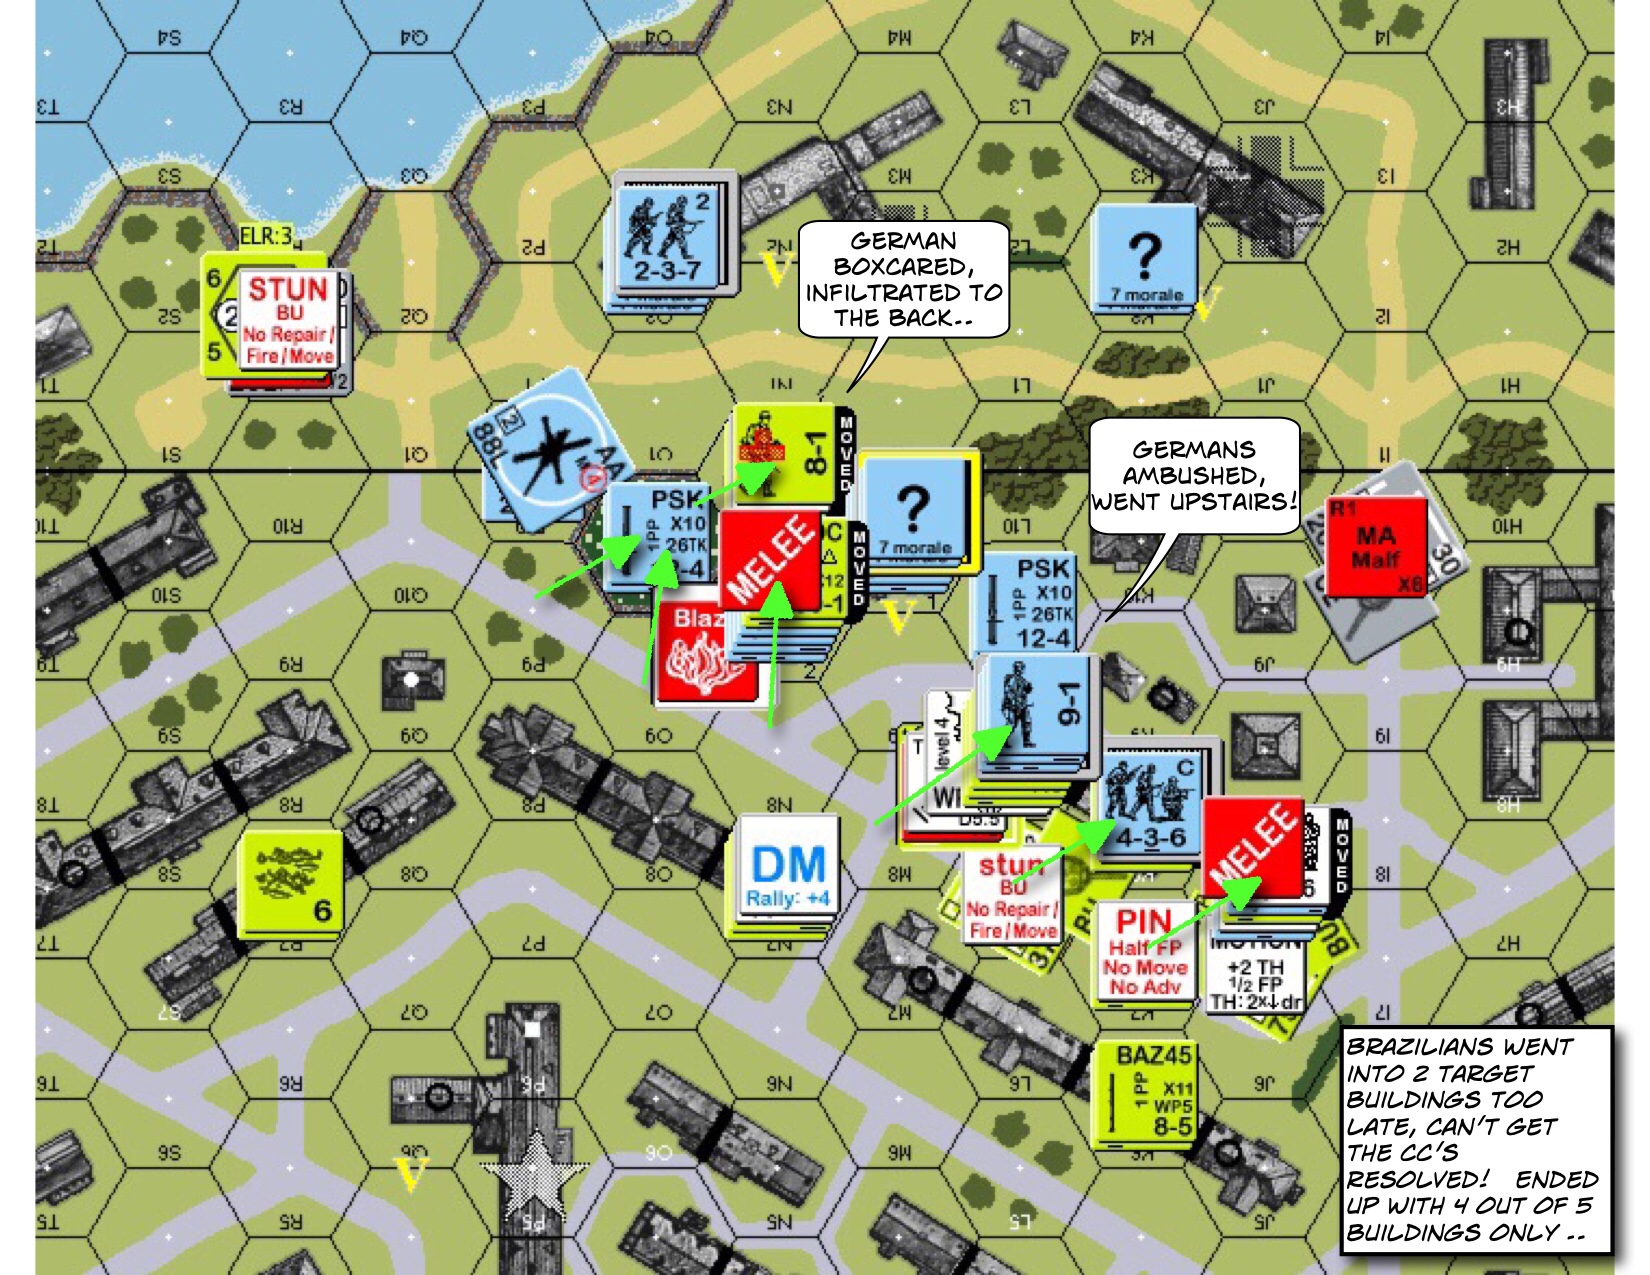
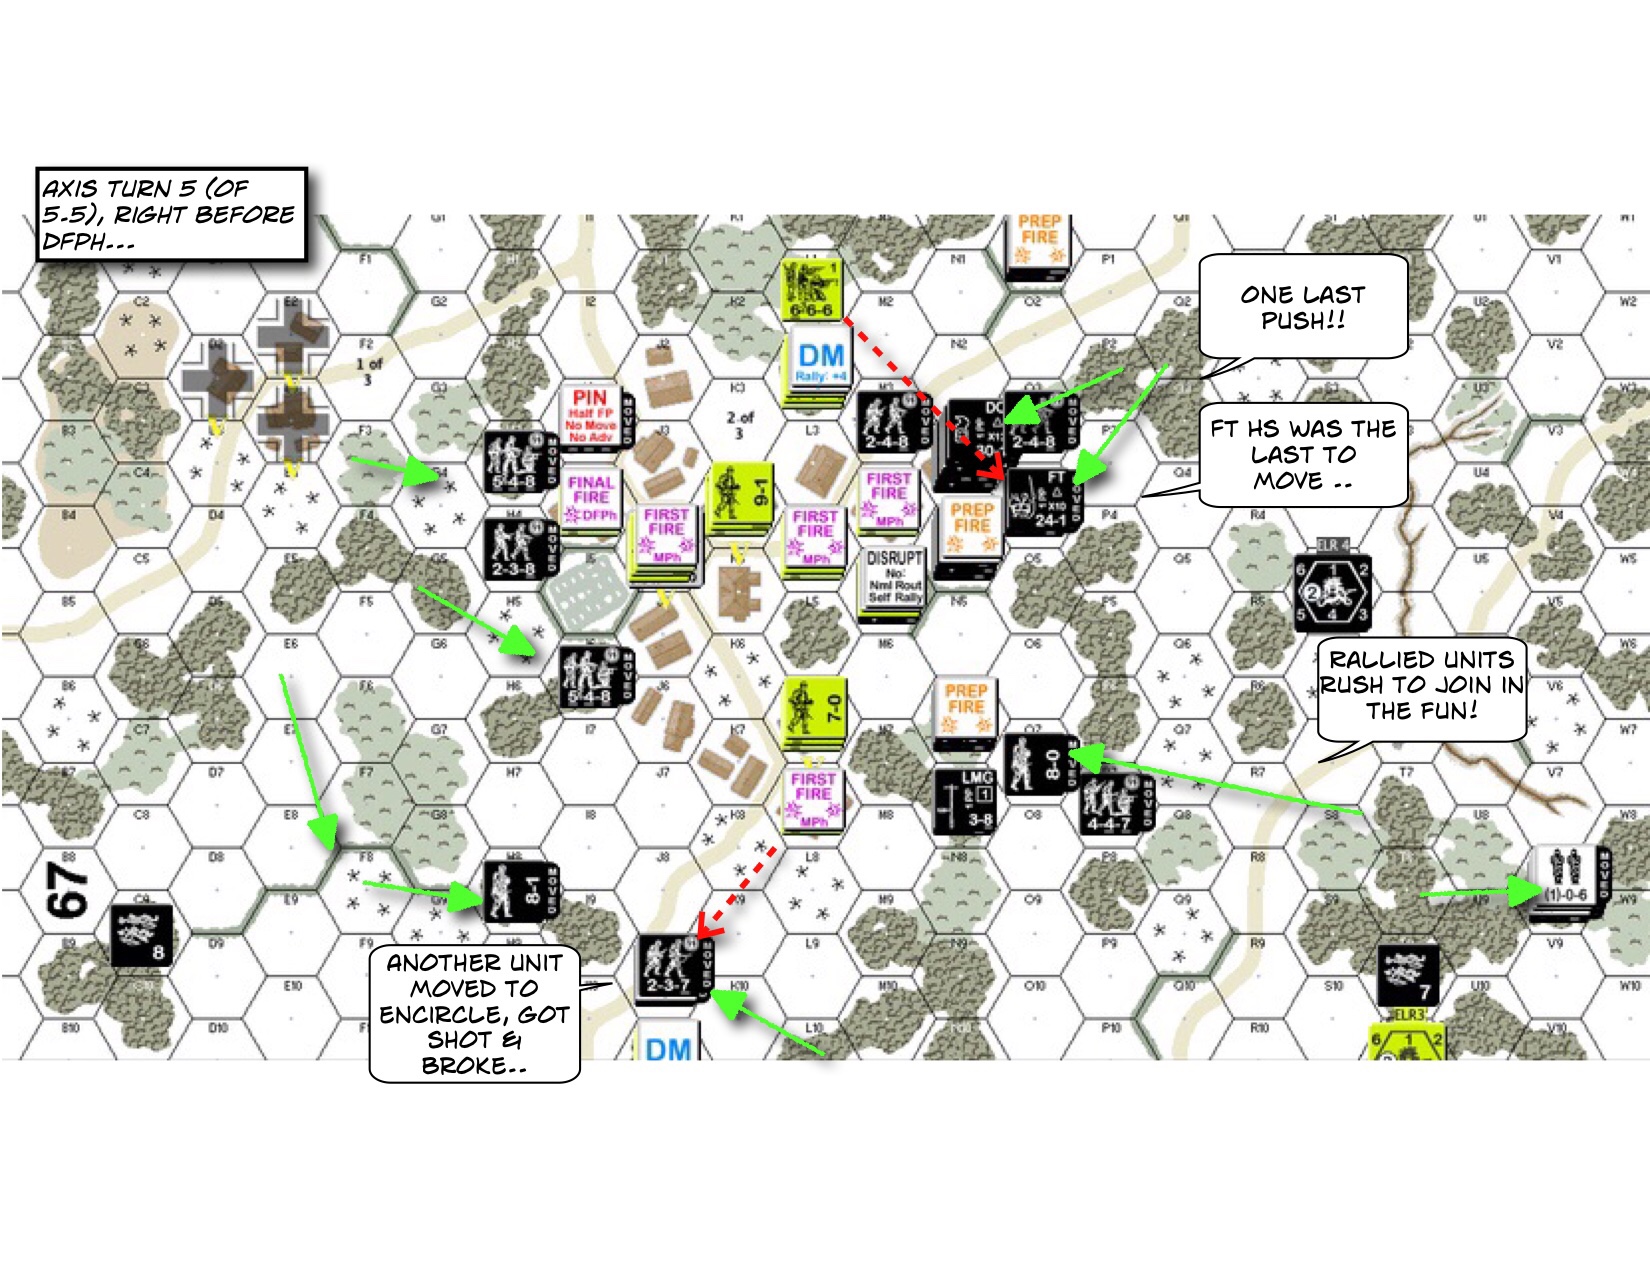
The Scots made another big push. They took one stairwell and went up to Level 1! Unfortunately the Germans had already spread themselves around the hotel rooms. It’s going to take a while kicking each door down, so the Scots conceded.