FT SmR6 Fox’s Fretful Night After Action Report (AAR) Advanced Squad Leader scenario

FT SmR6 Fox’s Fretful Night After Action Report (AAR) Advanced Squad Leader scenario

Victory Conditions

Eleven squads of North Koreans got 5 turns to clear 4.5 squads of Marines off 7 hill top hexes.  All Marines setup HIP’d and had Trip Flares and a 100+mm OBA with Variable Time (VT) Fuses.

After Action Report

FT SmR6 Fox's Fretful Night After Action Report (AAR) Advanced Squad Leader scenario

So the North Koreans had 5 turns to push the Marines off 2 hilltops. The Marines looked very understaffed at first glance but my opponent is never deterred by odds, big or small. I look at terrain differently at Night. Open Ground offers +1 LV straight up especially when most Marines should be on hilltops (equivalent to having Woods everywhere). Walking into Concealment Terrains required +1 MF though which made Open Ground more appealing. This was especially significant when you look at the hilltops. Getting onto a hilltop Brush costed 5 MFs, same of course for Woods. Five of the seven hilltop hexes were covered with Brush or Sparse Woods. So  getting into CC in most cases meant going in CX’d. While it’s harder to rally at Night, Marine squads self rally at 3 and get rid of their DM counter at 8.

Running around in the open when a Star Shell was overhead means certain death against Marine firepower. The threat of Proximity Fuses in the Marine OB is a big cause for concern. We needed to fish out the radio guy as quickly as we can.

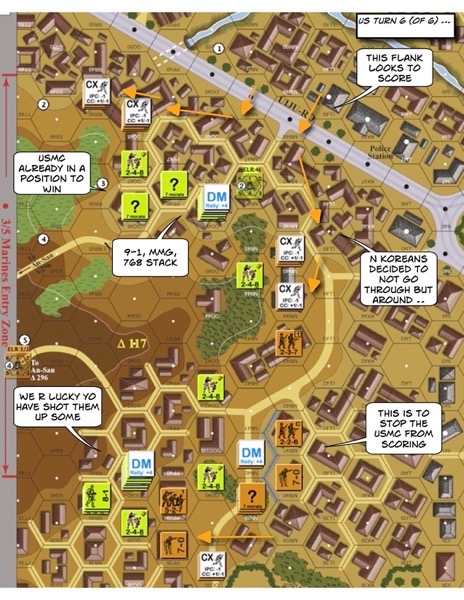
We approached the left hilltop from both sides. The way we setup, it would be tough for Korean leaders to get to everyone, but we only have 5 MPh’s to get things done. Not many Americans popped out of HIP but we broke the Marine MMG team early on.. We surrounded the left hilltop but we were too relaxed about the broken MMG team wandering about. No Hipped unit popped up the top though.

We approached the left hilltop from the bottom with the other half of the force coming in from the right. Marine firepower broke up our initial entry but the sunken road offered the Commissar a safe space to talk sense into the chaps.

Two turns down. Marines were not going to show themselves unless we get even more aggressive.

FT SmR6 Fox's Fretful Night After Action Report (AAR) Advanced Squad Leader scenario

We ran NK squad up the hilltops to see if there’s anyone there.

NK piled into the left hilltop CX’d and commenced Close Combat!! We kicked off some wires for trip flares but nothing flared up. We had the left hilltop almost cleared apart from a fireteam taking us into Melee. 

The bad news was that we allowed the broken MMG team to self rally and join the right hilltop defence! The good news was the Marine radio malfunctioned and was inadvertently pushed off the Steep Hills without a shot! The Koreans kept close with the Marines but their concealment were getting rapidly stripped by the insane firepower.

FT SmR6 Fox's Fretful Night After Action Report (AAR) Advanced Squad Leader scenario

The Koreans reinforced the Melee on the left hilltop but that fight continued. Well placed Marine star shells prevented us from getting too feisty in the open when the Marines had -1 leaders in choice places.

The right hilltop unfortunately saw the Americans got their act together and blew some of our troops away now that most of the sticks and branches we held up for concealment were decimated.

FT SmR6 Fox's Fretful Night After Action Report (AAR) Advanced Squad Leader scenario

The left hilltop finally got that Melee over with. The star shell situation convinced the North Koreans to stick with their Concealments as they pushed to the right. It was a mistake as I have only 1 MPh left.

Over on the right, the shot up Koreans were rallied by their fearless Commissar to have one last go. We finally had a DC bearing squad in position to launch a DC hero but the union cited personal safety concerns (the boys sat back down for more tea and cake). The Marines consolidated into solid chunks. We got a Melee going anyway which kept some of them from shooting.

FT SmR6 Fox's Fretful Night After Action Report (AAR) Advanced Squad Leader scenario

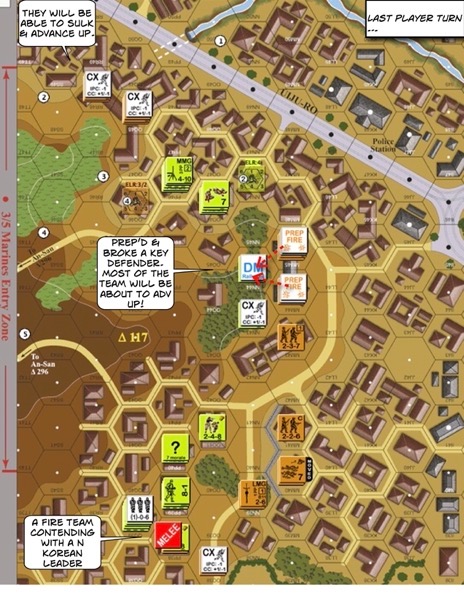
Bob came back from his bio-break and the chaps quickly volunteered him to be the next DC hero. Someone suggested the moniker ‘The Flash’ but they decided that might not be entirely auspicious. So Bob went off screaming, the Marines opened up and Bob was practically doing the Matrix bullet time all the way up the hill!  He was about to dive into the Marine foxholes when he tripped on an empty coke can, smacked his head against a rock and died. Bob did cause enough distraction for the rest of the band to move up to CC position though! Some of the Koreans got close enough on the left side of the hilltop as well when CC time comes around. 

We couldn’t clear ALL the HDPs at the end though. Plus you know what? It wouldn’t have mattered. A HIP’d fireteam popped up from a hex the left NK team never checked and reoccupied the left hilltop.

`Ah well.

FT SmR5 Fox on the Hill After Action Report (AAR) Advanced Squad Leader scenario

FT SmR5 Fox on the Hill After Action Report (AAR) Advanced Squad Leader scenario

Victory Conditions

The Marines had 5.5 turns to attack up a couple of hills and capture 5 out of 7 “HDP” (Hilltop Defensive Perimeters) hexes.  The KPA wins immediately if they could amass 13 CVPs or more.  

After Action Report

FT SmR5 Fox on the Hill After Action Report (AAR) Advanced Squad Leader scenario

It’s US Turn 2, after the Rout Phase.  The Marines plodded through some rice paddies and reached the hills.  The NK wasn’t shy about shooting at anyone who looked a bit too comfortable.  The Marine overwatch however, shot and broke the NK MMG team.  Thus taken out the most powerful gun in the NK arsenal.  I actually expected the right portion of the HDP to be more vulnerable.  Turns out it’s not the case.  I had a unit on the bottom left desperately trying to dig a hole, just so the reinforcing Marines would have a tougher time flanking the left hill.  

FT SmR5 Fox on the Hill After Action Report (AAR) Advanced Squad Leader scenario

US Turn 3: some of the Marines got shot up on their initial approaches to both portions of the HDP.  The broken NK MMG team (leader & squad) failed to rally on time and so the forward elements came back and tried to pick up the MMG.  At around that time, we managed to get a proper foxhole on the left.  Marines crowded the middle of the field, so my guards on the right flank came into reinforce the right hilltop.  The North Koreans had to constantly make the correct choice between shooting or staying concealed for protection against Advanced Fire.

FT SmR5 Fox on the Hill After Action Report (AAR) Advanced Squad Leader scenario

US Turn 4: my left hilltop got swamped by Marines!  Everyone’s pretty much broken in the area with no aspect of rallying.  The right hilltop was holding on, tried to keep the Marines off the backside even but the Marine 8-1 firebase is steadily taking its toll.  Could we take a hex back?

FT SmR5 Fox on the Hill After Action Report (AAR) Advanced Squad Leader scenario

NK Turn 4: my left hilltop was completely swamped.  The Marines were now able to form a firebase against my right hilltop (that’s a trench I shouldn’t have put into hex BB27!).  The right hilltop could only try to keep concealment and keep the Marines guessing.  They had the advantage in that it would CX a Marine to CC three out of the four hexes on the right.  The Marines only needed two more!

FT SmR5 Fox on the Hill After Action Report (AAR) Advanced Squad Leader scenarioWhat could be broken were pretty much all broken.  The Marines would be able to advance up at least 2 hexes on the right HDP with no opposition in their last MPh.  The North Koreans were done.  

Thoughts

Most of the fights in LFT Fight for Seoul involves forces with very asymmetrical capabilities.  It’s an art that I have yet to even catch a glimpse of a steady toehold.  As the North Koreans, how do I find the balance between hiding from the insane Marine firepower but yet take steady attrition of his smaller manpower?  How do I take advantage of my ownership of the terrain but yet not get into standup firefights?  Close combat seems to be the natural answer but how do you get close enough to execute?

The elusiveness of these questions is perhaps the key element that brings me back to the game time and time again.  

FT SmR4 Passage of Lines After Action Report (AAR) Advanced Squad Leader scenario

FT SmR4 Passage of Lines After Action Report (AAR) Advanced Squad Leader scenario

Victory Conditions

The Marines started dispersed across the rice paddies and had to take at least 2 out of 3 HDP (“Hilltop Defensive Perimeters”) in 8.5 turns.  In retrospect I might have thought about HDP’s wrongly.  You don’t have to take all the HDP hexes to control a HDP.  You only have to take most of a HDP’s hexes to take the whole thing down.  

The Marines had a 81mm mortar and 2 HMGs (6-12) with a 9-2 posted on the hill on the top, giving 2 flat shots in most cases to the Korean positions.  They also had a 60mm OBA which would be useful later in the game.  The North Koreans had 2x82mm mortars, a 45L gun and a 76L gun.  They also had 2 HMGs, 1 MMG and 6 LMGs covering their digs.  The North Koreans win when they take 13 CVPs on KMC personnel or 40 CVP on UN personnel.  

After Action Report (AAR)

There was a group of South Korea Marines (1st Battalion, 1st Regiment) retreating at the start of the turn.  The Marines were all deployed into fireteams and started moving towards the North Koreans. The going was brutal.  Four fire teams and an 8-1 bought the farm early on.  I should have the South Koreans withdraw slower and put their firepower in use a bit more.  As it went, the North Koreans didn’t bother with the KMC at all.   

FT SmR4 Passage of Lines After Action Report (AAR) Advanced Squad Leader scenario

The North Koreans malfunctioned both of their 82 mm mortars!  The Marines kept their heads down and tried to move as quickly as possible through the rice paddies.  Regrettably, they drew a red chit on their first call to Artillery, and then they broke their radio!  Our 1-time OBA hit the 2nd HDF from the left but failed to do much.  

FT SmR4 Passage of Lines After Action Report (AAR) Advanced Squad Leader scenario

During US Turn 3, the Marines on the right were almost at the village.  You could almost hear a collective sigh of relief.  That was of course, if you could ignore the bloody curling scream from one of the fireteam that went berserk!  Folks on the left were in the open and running into 2 murderous HMGs.  Good thing both guns were down and one of the 82mm mortars went dead.  Not getting much cover from the HMGs, the fireteams spread out further to not be in the same CAs.  Anyone carrying an MMG was hit particularly hard.  Fireteams from both flanks were doing massive “amoeba” style Advance Fire groups as they move closer.  The big old US mortar on the hill first went out of WP and then out of action.  

FT SmR4 Passage of Lines After Action Report (AAR) Advanced Squad Leader scenario

US Turn 4 saw the pair of Pershings on.  There being 5 antitank mine factors, the Pershings decided to go down the same path.  The railroad takes 2 MP out of every hex, so the road got the vote.  Marines in the village were bringing their firepower to bear.  The Koreans tried to move forward to interdict them.  Some of the Korean units were moving right, so we hoped we could get the tank machine guns in place to hinder the use of that road.  The Marines on the left continued to get decimated in both our turn and the opponents.  The good news was that they were in fireteams, but the bad news was that they were getting taken out at an alarming speed.  

But hey, the 60mm OBA was back in play. 

FT SmR4 Passage of Lines After Action Report (AAR) Advanced Squad Leader scenario

The 60mm OBA failed to suppress 1 of the 2 HMGs in US Turn 5.  Fireteams on the left desperately tried to move to the houses on the far left corner, from which it might turn the Korean flank.  One of the Pershings malfunctioned its gun on the first shot and was now trying to move as close as it dared to so as the other Pershing could get a better shot.  The Marines on the right decided that it’s better to hit the HDP on the far right and shifted their people over.  The Koreans moved back up their hills.  The Korean mortar came to life and laid a smoke round on the path in front of the right most HDP to cover their retreat.  

FT SmR4 Passage of Lines After Action Report (AAR) Advanced Squad Leader scenario

When we reached North Korean Turn 7, one of the Pershings is already gone because of a broken main gun.  The remaining one popped off round after round and yet failed to make it’s 90L presence felt!  It did, however, cut off the 2 HDPs on the right from the left.  The 60mm OBA managed to bring down WP which helped a lot.  The wind picked up and made things even better!  The survivors on the left finally managed to get to the buildings on the far left and started to put up a more effective firefight.  At least now the Korean HMG fire was halved as one of them was blocked.  The Korean smoke round on the right that was now billowing down the road proved to be quite helpful.  Marines pushed towards the right most HDP, just in time to greet the Korean reinforcements.  

Two more US Movement phases to go.  We might well be out of time.

FT SmR4 Passage of Lines After Action Report (AAR) Advanced Squad Leader scenario

Last US turn!  The Koreans on the HDP on the left were broken but we didn’t have enough time to walk up.  The Koreans on the rightmost HDP were taking a beating but put up a “human wall” that’s going to take a couple more turns to kill.  The US conceded.  My opponent revealed all his mine placements in this last picture.  

FT SmR4 Passage of Lines After Action Report (AAR) Advanced Squad Leader scenario

The Marines needed more smoke rounds (than HE rounds) in order to be successful in this scenario.  I did the right thing by moving everyone in fireteams.  Some of the chaps on the right of course, recombined into squads when they reached the village.  I was hoping the Pershings with the malfunctioned gun could navigate through the road (trail break through the AT mines) and get on the hill where we would promptly turn left and get around the back between the 2 HDPs on the right.  That was not to be when the leading Pershing X’d out its repair.  My opponent is a very tough one but I feel I am finally getting a glimpse into the proper way to play the Marines in this LFT Fight for Seoul package (we already played through all the Fight for Seoul scenarios, and are now doing the Smith’s Ridge ones.) 

FT SmR2 Fenton’s Foe After Action Report (AAR) Advanced Squad Leader scenario

FT SmR2 Fenton’s Foe After Action Report (AAR) Advanced Squad Leader scenario

Victory Conditions

The USMC wins at game end if they control N28, which is right were the Hill 105-S outpost was, together with 2 of the 3 victory locations on the ridge all the way down at the bottom.  The Marines had to plough through a rice paddy and then move through open ground to even have a fight.  The NK sits on Level 5 hills that sees almost anywhere on the map.  The Marines needed to coordinate a few elements to help themselves out: 3 x Turn 1 Prep Fire 81mm attacks, a pre-registered 100mm OBA from Turn 3, a VMF-212 flight that comes either starting Turn 1 or Turn 3, and elements of C company that might show up on Turn 4, 5 or 6 (with each latter turn entering closer down the bottom of the map).  I decided on a WP barrage for my 100mm OBA and made the fatal mistake of pre-registering a Level 2 hex which I wouldn’t see.  So the intended cover for Companies A & B never materialised.  I decided on a VMF-212 starting from Turn 3 because I think at least some Marines would be within 16 hexes of the NK weapons on the ridge.  I picked Group 2 for Company C reinforcements because it had the most bodies.  I expected Company C to had to take the ridge in the 5 MPh’s they had.  Having them come up the flank on Turn 5 should also help Company A & B out as they crossed Level 1 open ground.  

After Action Report (AAR)

Advanced Squad Leader ASL AAR SmR02 Fenton's Foe

The 3x 81mm attacks did nothing apart from kicking up dust.  I deployed about half of the Company A & B into fire teams and relied on the other half for smoke and fire support against Hill 105-S.  I chose to start in the rice paddies behind the the Paddy Berm.  In retrospect, I should have started more towards the left.  The rice paddies ate up too much time here. There were two lines on the map.  The top line marked where, when the Marines crossed, the NK’s at Hill 105-S could withdraw.  The bottom (light blue) line marked where, when the Marines crossed, VMF-212 went home.  The quickest Marines waited a Turn before crossing the top line so the NK couldn’t withdraw until the Marines could cross in force.  The NK 82 MTR and their 45LL AT Gun started shooting right away.  The NK’s had apparently picked Group 1 and so there were one MMG out there aside from the .50 cal they were using.  Some of the NK’s from the ridge came forward to interdict us in the open.

FT SmR1 Fenton's Foe After Action Report (AAR) Advanced Squad Leader scenario

Turn 4 saw the .50 cal taken off Hill 105-S by a commissar and a crew.  We got on Hill 105-S and out heads shot off by the MTR and the AT Gun.  The MMG joined in as well, complete with a -1 leader.  Our radio guy was wounded.  He ended up sitting behind the berm and wouldn’t recover.  We decided to split off into more fire teams and spread our advances out into a wide front.  

FT SmR1 Fenton's Foe After Action Report (AAR) Advanced Squad Leader scenario

We broke out into Level 1 open ground!  We sent another leader to grab the radio from the wounded guy.  VMF-212 got on board but was woefully ineffective.  Here I made another fatal mistake.  I completely forgot to enter Company C during my MPh.  So they entered in the Advance Phase. We lost a turn on these people, that’s going to cost us.  

FT SmR1 Fenton's Foe After Action Report (AAR) Advanced Squad Leader scenario

Company C pushed up the ridge.  Everyone caught a lucky break when both the 82 MTR and the 45LL AT Gun malfunctioned!  A point attack from VMF-212 broke the .50 cal crew as well (but it also made the commissar heroic!).  We continued to spill into open ground after the retreating NK forces.  Hopefully we could keep these folks (esp the .50 cal) from helping out the ridge defenses!

FT SmR1 Fenton's Foe After Action Report (AAR) Advanced Squad Leader scenario

Our 2nd radio guy decided to forgo the pre-registered hex.  He was wounded as well but not before he got a spotting round off.  The AT Gun X’d out but the MTR was back in action, swung to the left and shooting at Company C.  There’s a party at the stone factory looking to interdict Company A & B over the last bit of open ground.  VMF-212 went home since Company C crossed the blue line.  NK’s were shifting over to the left.  

FT SmR1 Fenton's Foe After Action Report (AAR) Advanced Squad Leader scenario

Our gallant radio guy corrected our 100mm HE onto the MTR before he was killed by a sniper.  USMC fire teams were scrambling up the ridge in two directions.  We put 2 bazooka teams outside the stone factory to bug the interdictors a little.  It didn’t appear at this point that the NK HMG team would be able help their comrades on the ridge.  The fact that the NK never used Flak Alley told us there were minefields out there.  Well, I was out of time, there’s only so much you could be scared of.  

FT SmR1 Fenton's Foe After Action Report (AAR) Advanced Squad Leader scenario

After our final prep fire it appeared that whilst the USMC might be able to get 1 VC hex (left) in CC, we didn’t have the time to get the second (middle).  NK’s showed me afterwards that they had real units defending the approach as well.  Had we two more turns (one from entering Company C on time and one from not starting so many in the rice paddies), we would have a better chance.  We also failed to bring the 81mm MTR hits and the pre-registered 100mm OBA to bear as well.  Planes were great at discouraging movement but I never had much luck with them when I wanted to hit something.  This is an intricate scenario and I enjoyed the opportunity to coordinate different elements.  I am not sure it’s as fun playing the NK’s though.  

FT SmR1 Mired – Advanced Squad Leader AAR

FT SmR1 Mired – Advanced Squad Leader AAR

ASL Scenario Setup

The KPA (North Koreans) wins immediately by amassing more than 30 CVP (56% of KMC CVPs / 46CVP ground forces + 8 CVP air support).

The KPA can also win at game end if they can stop the Korean Marine Corps (South Koreans) from

  • Controlling 1 or more of 3 Hilltop Defensive Perimeters (“HDP”), which are the hilltop areas outlined in color. You should see 4 outlined hilltops on the map but the 2 on the left are considered the same area.
  • Exiting over 18 Exit VPs down the bottom edge. The KMC carries 46 CVPs, which means we need to kill, break or delay 28 CVPs or 61% of the KMC OB.
  • Inflict over 30 CVP on the KPA. The KPA has 44 CVP, so 32% has to survive.

The KPA has more long-range weapons than the KMC. They have a small window (probably 3 turns) to inflict as much casualties as possible on the KMC from the start to when the KMC Air Support / OBA comes into play and when the infantry finally comes into range. The KMC has an OBA with an Offboard Observer (auto Radio Contact) at Level 5 and 4 planes with rockets, bombs & 12FP MGs for 4 turns out of 8.5. Any sort of KPA movement won’t be possible for half of the game. We expect to have to fight in place. All Fortifications would be on HDPs.

Given these factors, the KPA’s best bet seemed to be to amass all the range weapons onto the HDP Fortifications. Their goal would be to deplete the KMC numbers as quickly as possible before US Airpower and SW malfunctions wipe out their toys. They would also need to keep the KMC outside of 5 hexes for as long as possible by keeping them off Open Ground (and in Rice Paddies) where they would always be mindful of the Infiltration (HIP’d) units.

If the KMC gets to a position where it can exit 18 VPs down the bottom edge, chances are it will have captured at least one of the HDPs.

They can either hold till Game End or push ahead and exit VPs. Either way, they might continue to lose CVPs (especially if the KPA OBA remains operational). There might be KPA counterattacks, although the KMC will be in Fortifications this time. All considerations seem to point towards a HDP focused setup that puts all the KPA firepower upfront and in Fortifications since it won’t be a fighting withdrawal.

Advanced Squad Leader AAR

FT SmR1 Mired After Action Report (AAR) Advanced Squad Leader scenario

So the KPA put all the range weapons up on HDPs. The easiest HDP to take is the second (2 hex one) from the left. It has the best covered approach, and I didn’t cover that as well as I should. Our Infiltration teams were HIP’d very close to our positions. Given the lack of manpower, to use them as speed bumps would be a waste. At least this way, the KMC would look for HIP units around the rice paddies longer. Most of our Boresights were not on the elevated road/ rail, as we did not expect the KMC to use them. Our Observer was the leader from the Infiltration units so he’s HIP’d on the leftmost HDP with limited LOS to the village and to the “easy” HDP. We put our 45LL ROF 3 Gun on the right flank behind the Sparse Woods, expecting serious Pointblank shots. Unfortunately, I misunderstood Sparse Woods and thought I had LOS to the Open Ground beyond where I put its BS (illusions of ITT CH abound). That was not to be. An Infiltrating unit with an LMG held our left flank.

The KMC moved forward in a mass of HSs, putting most of its weight on the covered approach on my right. I immediately saw the errors in my ways, but there’s no second chance in ASL. Our range weapons started shooting almost immediately. It’s now or our peace would forever be held upon us.

FT SmR1 Mired After Action Report (AAR) Advanced Squad Leader scenario

Turn 3 and “The Death Rattlers” were in the air. Two of them immediately took out our HMG. We were resisting the KMC HSs on the left and in the center. The KMC on the right was unfortunately streaming into the village, mindful only of our HIP units and our pair of mutually supporting but retreating Dummies. Our Observer called in a Harassing Fire mission on the village, which was akin to telling my opponent that there were no HIP units in the area. Our OBA was the 70mm variety, so it’s just 2+2 on the Thatched Roof Wood Buildings.  It made the KMC go around though, the dice gods were not to be tempted.

FT SmR1 Mired After Action Report (AAR) Advanced Squad Leader scenario

The Death Rattlers were on us both in their Prep Fire and in our Movement/ Defensive Final Phase.  Our 9-1 who had a memorable time with the HMG died of lead poisoning from a sniper. The valiant fighters on the middle two hilltops were all broken or dead. An Infiltrator at the second from the left hilltop sprang up and offered some point blank shots after the Dummy units moved (and faded away). The KMC OBA was finishing what the Corsairs started there. Our unfailing Harassing Fire missions protected our (now almost deserted) second from the right HDP. A pair of KMC HS came around from the back, unfortunately. The rightmost HDP tried to keep the wolves off them as much as they could from across the road. Our AT sprung into action, but we weren’t the best against the KMC at close quarters. The lights got dimmer.

FT SmR1 Mired After Action Report (AAR) Advanced Squad Leader scenario

KMC Turn 6 and two of The Death Rattlers had one more attack (the Strafing was worse than the Bombing / Rockets). The hilltops on the flanks were barely holding. We even had a couple of rallies for the last hurrah. The Observer, who boasted that his momma gave him no Red chits, finally lost contact with the battery. The KMC was kicking down the two hilltops in the middle.

FT SmR1 Mired After Action Report (AAR) Advanced Squad Leader scenario

The KMC broke through to our two hilltops in the middle. They broke most of our chaps at this stage and we simply didn’t have the strength to put together a counterattack to take a HDP back. The KPA conceded and the door to Seoul got kicked in at a cost of 18 KMC CVP.

PS If you are playing this as well, note that Foxholes (of which we had 6) actually offer a -1 Rallying Bonus when on HDP’s (Sm2.4). Something we missed.

FT S10 Liberté Call – Advanced Squad Leader AAR

FT S10 Liberté Call – Advanced Squad Leader AAR

ASL Scenario Setup

The USMC/KMC wins at game end if they control the French Embassy (EE32) and can apply more FP/MG FP vs the City Wide Boulevard (that cuts diagonally across the top of the map ie “Uiju Boulevard”) than the KPA.  For both sides, only Good Order units that are on/adjacent to the CWB hexes count.  Double / Triple Pointblank doesn’t come into play. SMC’s count as 1 FP.

To Apply More FP than the KPA on the CWB

  • Kill/ Break/Capture enough KPA units
  • Get units to the CWB Good-Ordered in 6 Movement Phases
  • Stop KPA from reaching the CWB Good-Ordered

To Capture the French Embassy

  • Focus firepower on the French Embassy (stone building)
  • Encircle defenders

It appeared that we need to take control of the Sunken Railroad as fast as we could.  We would also need to capture GG30 which was the only 2 level (plus rooftop) building on the map, so as to interdict KPA troops crossing north.  The left flank would have to do that as well as capture the French Embassy so they would have the majority of the force.  The right side would try to push through to the Sunken Railroad if in case the KPA had less defenders deployed there because of its isolated position.  The right side was also closer to the CWB.  I would use the only range weapon I had (MMG) to isolate the right side.  The USMC/ KMC would be on the watch out for Dense Urban Terrain (“DUT”) buildings so as to position optimally for massive fire groups where possible.  We would also be using a lot of bypasses.  SS2 gave us a NY Time correspondent, Richard Johnston, who knew the back alleys.  The USMC would use him to navigate otherwise un-bypassable DUT hexsides, with the added bonus of a +1 TEM while breezing through.

Advanced Squad Leader AAR

FT S10 Liberté Call After Action Report (AAR) Advanced Squad Leader scenario

We massed up on the left and went straight after the 2 Level GG30 building.  The defenders routed towards the French Embassy and we stationed a squad up on Level 2 to cover a 6 hex perimeter. The team in the middle was thin but we would be fine as long as the KPA don’t call our bluff.  They had 10 dummies, so they might well be thin as well.  We didn’t want to move that MMG but we did because we didn’t want to be too far from the top of the map at game’s end.  Things did not go well with the Korean Marines on the right.  We kept getting jammed in by conscripts.  We needed to be able to reach behind the KPA lines.  No joy yet.

FT S10 Liberté Call After Action Report (AAR) Advanced Squad Leader scenario

We hit Turn 3 (of 5.5) and the KPA were already crossing the Sunken Railroad! The Level 2 USMC squad couldn’t shoot everyone.  Those walls to the north of the French Embassy gave the runners some cover as well.  We knocked defenders inside the French Embassy a bit but they were still holding on.  Meanwhile, our MMG’s going out of position allowed KPA troops on the right to slip out.  The Korean Marines were still stuck.  We couldn’t afford the time we were spending on the French Embassy!  Four Movement Phases left.

FT S10 Liberté Call After Action Report (AAR) Advanced Squad Leader scenario

Like mama always say: shooting don’t work no matter how high up you stand. The KPA reformed their lines to the North of the Sunken Rail Road.  We were now looking at the prospect of crossing that gully under fire.  We finally managed to put a USMC into the Sunken Railway to interdict the last of the stragglers.  With 2 Movement Phases to go, the USMC’s started to shift their forces to the right.  I wish I had the USMC in one big stack so that NY Times could take them through the back alleys like cash through my pockets.  That was not to be.  The (underperformed) overwatch would also need to get going soon.  Meanwhile the Korean Marines on the right made little progress.  However, they were at the Hedge, so the possibility of flanking the defenders loomed.

FT S10 Liberté Call After Action Report (AAR) Advanced Squad Leader scenario

This was towards the end of USMC Turn 5.  The overwatch team was out of the tower but were pinned before it could dive into the Sunken Rail Road.  The Assault Engineer squad crested on the north side to harass the KPA some but got their heads shot off.  The rest of the Marines gathered in one giant stack together with NY Times.  The KPA defence on the right crumbled as well.  The CWB was just within reach on the left.  That’s of course if the very nice KPA would us slide gingerly by on Open Ground.

FT S10 Liberté Call After Action Report (AAR) Advanced Squad Leader scenario

Fire teams after fire teams tried to run the gauntlet.  You can see where most of them broke in one big stack (aside from a couple KIA’d).  The KPA fired til their LMG barrel melted and a couple of them FPF broke in our slow motion awesomeness.  One intrepid fire team broke through and even succeeded in doing an Infantry Overrun on a 8-1 that was standing on the road!  The leader couldn’t be pushed into Open Ground so the 2 available choices were “straight ahead” where we would have to CC him or “to the side” with some brokies.  If we CC him, we would have to win the CC ‘cause we need to be Good Order.  The choice was even less attractive considering the KPA had two units adjacent to the CWB.  So we pushed him to the KPA brokies, which led to other issues.

In the Rout Phase, the slightly ruffled 8-1 was able to move to the CWB with the routing brokies!  Turned out one of the 2 KPA units already at the CWB were dummies, so the 7-0 yielded 1 VP.  The KPA 8-1 scored another 1 VP.  That came up 2:2 against our marauding fire team – which lost us the game (we had to have more VPs than the KPA).

Lost by One.

Link to the NY Times article from 1986 “Richard Johnston is Dead at Age 76″

FT S9 Cowboys and Indians – Advanced Squad Leader AAR

FT S9 Cowboys and Indians – Advanced Squad Leader AAR

Scenario Background

106518783 36b0109f8e w

It was 26 Sep 1950.  The Korean Marine Corps (South Koreans) were mopping up pockets of resistance at and around key thoroughfares.  Chesty Puller thought they were best suited “to tell the cowboys from the Indians”.  The North Korean occupation had not been well received by the city’s inhabitants.  So the locals proved to be excellent sources of intelligence amidst neighbourhoods where North Koreans dressed up as civilians.  (Crudely excerpted from the scenario card..)

(Photo Credit: Don O’Brien, View from atop the Hanto Hotel, Seoul Korea, Nov 1945)

Victory Conditions & Tactical Considerations

The North Koreans had 2 squads & 9 half squads of various quality plus 2 LMGs.  They had self rallying ability as per SSR and no leaders were present.  They were to setup, one squad or less per hex, HIP’d largely on the top half of the map pass the horizontal street and suffered Ammo Shortage (so Fire Lanes are out of the question).  The Korean Marines (‘KMC’) win if they could amass more VPs than the North Koreans (‘KPA’).  For both sides, VP = CVP + Exit VP, and the KPA gets 1 VP each for each Good Order concealed or HIP’d units that survives till game end.  Plus the KPA starts with 3 VP.  So unless it looked like a good kill, the KPA would stay put.  A ‘mole hunt’ then you say?  Yes – but this scenario is how a FUN mole hunt can be done.  Now the KMC could enter on the left or the bottom of the map apart from setting up below the horizontal road.  They started with 7 squads + 1 fire team and 3 leaders, 2 LMGs.  Note that “Steep Hills” were in play, so those brown hexes were concealment terrain as well.  All those Orchards were sparse, while they were concealment terrain, Partial Orchards were not.

My top priority was to prevent the KMC from cutting off my lines of retreat up through the top side of the map.  Secondarily it’s to have a screen so civilian/ prisoner interrogation wouldn’t uncover important KPA ghettos.  The KMC could enter from the left but while I didn’t want him sliding into the top behind us, I couldn’t see KMC’s entering onto the Citywide Boulevard (-1) hexes (‘CWB’) with no where to rout.  I think the KMC expected the KPA to stay as far away as possible, which means the top right of the map was likely to be searched first.  Places the KMC might overlook were rooftops and CWB hexes with Orchards, although my opponent is well known for being meticulous and detail oriented, I have never known him to miss things.

I put the 2 elite 248 HS’s over on the right.  Their mission was to ‘confirm’ my opponent’s suspicions, to draw attention and to survive longer than most.  I had a few units on the top left and at the Dense Urban Terrain (DUT) choke point on the top of the map.  Note that DUT worked like Dense Jungle, stacking limit was two and you couldn’t firegroup with units in other DUT hexes.  I had a HS on the first level of one of those stone rowhouses on the left (not that I really think my opponent would miss them) and another one slightly forward (down towards the horizontal road) to see if we could catch any impatient bypassing KMC units coming down the road.

(Photo credit: Time-Life, Street Fighting in Seoul by Hank Walker, 9 Sep 1950)

Advanced Squad Leader AAR

FT S9 Cowboys and Indians After Action Report (AAR) Advanced Squad Leader scenario

South Korean Turn 3: We had a rather big KMC force hitting the right of the map.  The 2 248’s put out some shots on the road, one was demolished by Turn 3.  The other had a choice of going up next to that massive 8-1 stack or down to the bottom side of the street to mess with the KMC further.  If a unit could survive til the end of the game concealed or HIP’d, they score 1 VP for the team, so they would have to come after it.  Unfortunately the remaining 248 didn’t last long after this but the duo did burn up some time.  The SK rolled civilian interrogation though and a HIP unit on the 1st floor on the left got ratted out (and killed).  So there goes my hope of the SK’s passing him by or it being able to ambush the Korean Marines somehow.  We wondered if the SK’s on the left will wheel counter clockwise and sweep up to the top of the map!  I also started to realize that having conscripts as screeners posed a liability.  They could be easily captured and interrogated!

FT S9 Cowboys and Indians After Action Report (AAR) Advanced Squad Leader scenario

South Korean Turn 4.  We had three Movement Phases left.  The main body of Korean Marines on the left started to wander past our HIP’d crowd apart from one squad with an LMG.  We took that shot at point blank with a HS (and a -1 CWB TEM) but bullets rolled off the Korea Marines.  We decided to back off into the DUT and get reconcealed instead of pressing on, hoping that the SK squad would come in pursuit instead of walking into the other HIP’d units.  Meanwhile on the right, the Korean Marines swept through the hexes in the area.  That single hex two story house on the far right did look tempting but I didn’t want to be (immediately) encircled in it.

FT S9 Cowboys and Indians After Action Report (AAR) Advanced Squad Leader scenario

Using conscripts as screeners was indeed a liability.  One of the captured HS gave into a copy of Doom Battalions v3 and ratted out another HIP’d unit! A HS and a 527 were surrounded.  The 527 was encircled and CC’d but it look out the KMC 8-1.  The other HS who got CC’d rolled infiltration and left off the map (I forgot whether it went with a new leader)!  Over on the left, our sniper took out the guards earlier and a KPA HS was freed for a sweet moment!!  It could try for the board edge but SK units would get to it first.  It decided to go upstairs and it drew some units off the encircled lot.

FT S9 Cowboys and Indians After Action Report (AAR) Advanced Squad Leader scenario

Prisoners were recaptured and the scores were even going into the last (NK) player turn.  The NK 527 had to die!  The Korean Marines stood around and discussed it a bit and decided to ride on the higher Marine morale level and shoot into the Melee.  All the fun triggered the NK sniper again who nailed another Marine unit but worse, the shooting laid an MC on the Melee stack.  The NK 527 pinned but all the Korean Marines in the melee broke.  The NK’s won, glory to the dice (the surviving but unconcealed NK 527 was not credited with VP’s but it’s incumbent on the SK to break the prevailing VP tie)!

(Photo credit: Time-Life, Street Fighting in Seoul, Hank Walker, 9 Sep 1950)

How’s this scenario interesting?

Normally you wouldn’t imagine bug hunt scenarios to be fun.  However, this one’s small and quick enough to not be tedious for the South Koreans and to be nail-bitingly exciting at some points for the North Koreans.  The North Korean player had to keep a pokerface while the Korean Marines swept through the streets.  However it’s not a huge challenge while on VASL as long as you can keep your voice level.  There are definitely multiple ways to play this.  I wonder if any NK players decided to not play possum but actively looked to kill SK units?  I wonder how that worked out.  The use of interrogation kept life interesting and it reflected the historical situation quite well.  The beauty of the Dense Urban Terrain (‘DUT’) rule came to the fore here.  I wondered if more designers will do the same in the PTO with a mix of Dense & Light Jungle?  This is an interesting scenario offering a good bit of fun in the evening, give it a try!

(Photo credit: Time-Life, Street Fighting in Seoul, Hank Walker, 9 Sep 1950)

FT S4 Dilemma at Ma Po Boulevard – Advanced Squad Leader AAR

FT S4 Dilemma at Ma Po Boulevard – Advanced Squad Leader AAR

Scenario Background

It’s September 26 1950, Captain Stanford’s Marine’s fought to clear Ma Po Boulevard.  Upon meeting a North Korean roadblock at a junction, he had to decide on whether to run straight up and clear the way to Deoksu Palace or to take the right fork and clear that road instead.  

“M26 number B32 in action on a street in Seoul.” Mike’s Research

Victory Conditions & Tactical Considerations

We have three North Korean (Fanatic) Roadblocks in 3 specified locations.  The main one is located at the fork of the road, where a 45LL AT Gun gets matched up with 2 medium machine guns and a Pillbox with an ultra wide CA.  The North Korean player gets a choice between a second 45LL AT Gun or a 76L ART.  There are 15 NK squad equivalents of various descriptions, managed by 2 commissars and 2 other leaders.  They have an ATR, 6 Minefield factors and 2 Fortified Locations.  

Against this the Marines have a forward team of 3 squad equivalents (one being an Assault Engineer with a Smoke Factor of 5).  This is followed by 10+ squads, a M26A1 Pershing, a M4A3 Tank Dozer and a POA-CWS-H5 Flamethrower tank that I was last playing with in Okinawa scenarios!

The Americans have 7.5 turns to take one Roadblock and exit 12 VP (4 squads) or take two Roadblocks and exit 9 VP (3 squads) or take three Roadblocks.  The North Koreans can stop the game when they kill or immobilise two out of three AFVs.  To do that, the NKs have the aforementioned guns, as well as an ATR and 6 Suicide Heros (read: THH) that can setup HIP somewhere or bust out of a squad when the mood strikes.  The confining terrain in this scenario definitely doesn’t make it tank country. The NK’s can also stop an USMC victory by taking out 19 CVP, which in this case is 6 squads + 1 fire team.  

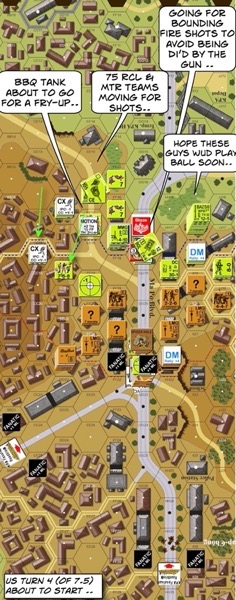
Having said all that, the BBQ tank doesn’t have to stop moving.  The tankdozer has a blade that adds a +2 on a Hull Hit.  The Pershing is impervious to most shots on the battlefield but can still be DI’d.  

Advanced Squad Leader AAR

FT S4 Dilemma at Ma Po Boulevard After Action Report (AAR) Advanced Squad Leader scenarioFrom the left of the map, F Company immediately started to setup their MMG and got their fire teams to probe NK concealments.  The E Company came up from behind and a bit more than half went for the right of the map.  The AFVs rolled down the road but the higher level Burning Wreck that’s there on setup made it a little hazardous to roll up in front of a ROF3 AT gun.  Plus it’s impossible to be on the boulevard without being in DI’able range.  I thought the right of the map would be a more straightforward travel but it’s confining nature made it easier for the NK defenders and didn’t facilitate armour support.  By Turn 4 it’s evident that the NK’s were very effective there.  A large number of broken fireteams routed towards the rear.  The BBQ tank and the tank dozer lend their support on the left and found they could safely sneak shots into the boulevard.  The left side met some initial set backs but were able make better progress.  The AFV’s were making Bounding Fire shots where possible but they couldn’t bring it up close in most cases because of the chance of meeting Suicide Heros in Street Fighting.  The strategy was to try to flank the NK’s down both sides while putting AFV fire to defenders down along the boulevard.
Continue reading

FT S3 Last Stand on An-San – Advanced Squad Leader AAR

FT S3 Last Stand on An-San – Advanced Squad Leader AAR

Scenario Background

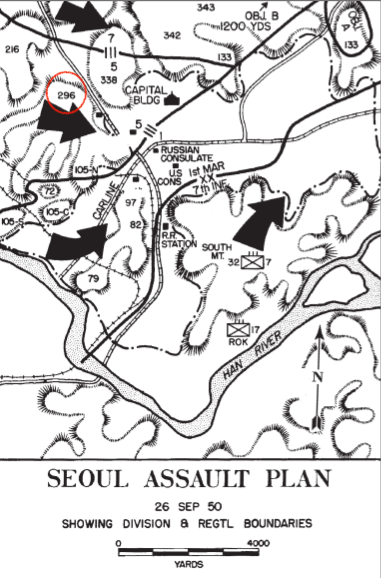
This is 26 September 1950.  Lt Col. Taplett’s (gent in the pic below) 3rd Battalion, 5th Marines fought southeastwards down the slopes of An-San/ Hill 296 towards the city (see the red circle on the map below, credit “Battle of the Barricades” by Col Alexander).  The North Korean 78th Independent Infantry Regiment and the 25th Infantry lead by Colonel Pak Han Lin put up a stout defence.

Battle of the Barricades Colonel Joseph H Alexander

Victory Conditions & Tactical Considerations

The KPA (North Koreans) started on Level 3 or above.  The Marines entered from the left of the map at or above Level 2.  In about 6 turns, the Marines should fight their way to Level 1, the KPA should fight to stay on Level 3 or above.  The KPA started with 2×447, 4×426 (conscripts), an LMG and a 8+1 Commissar.  The KPA counterattack force, comprising of 2.5×458, 2×527, 2×447, 3xLMG and 2 leaders enter from the right side of the map on Turn 3.  The Marines started strong with 4×768 3×248, 2xMMG, 1xBaz and 2 leaders.  They had a reserve platoon coming from the left on Level 5 on Turn 3 as well.  All units counted “Exit Point” style (“Good Order”) toward the Victory Condition, prisoners excluded. USMC wins on ties.

So the KPA had 31 VP vs USMC 22 VP in their OB’s.  The USMC would need to reduce the KPA force.  Soon it would mean tough decisions between putting your squads on your level to score vs going to your opponent’s level to prevent them from scoring.  The KPA had the last turn so we would have a chance to “Advance” back on Level 3.

Advanced Squad Leader AAR

BoF2 Polish Requiem After Action Report (AAR) Advanced Squad Leader scenario

The KPA was weak.  They were also forced to spread out in their setup.  The USMC could go anywhere and shoot anything.  The KPA had their Concealments easily blown, broke up by Assault Fire and Captured in CC.  Very quickly they pushed the KPA off Level 3 and took more than a few prisoners.  The area on the bottom of the map offered more cover for the counterattack, so naturally the USMC focused their forces there.

BoF2 Polish Requiem After Action Report (AAR) Advanced Squad Leader scenario

The original KPA defenders were no longer coherent as a force.  The way to Level 1 was wide open for the USMC on the top and the KPA  had only scattered remnants on the bottom.  However, the Marines weren’t on Level 1 on the bottom of the map yet.  I decided to send the stronger of my Turn 3 reinforcements to the top of the map and the weaker (and more short ranged) to the bottom of the map, just to keep the Marines off Level 1.  The boulevard’s gotta be where the Marines would make their stand with an additional -1, so we needed to cross before the Marines assemble in place.  So hopped along the river edge we did, to a point by the boulevard where there were orchard cover.  The KPA forces at the bottom of the map arrived in time to catch the defenders sent reeling by the USMC.  That (bottom, vertical) road’s where we would make our stand.

BoF2 Polish Requiem After Action Report (AAR) Advanced Squad Leader scenario

At the top of the map, we made it across the boulevard okay when the lone American squad cowered.  We decided to split into two groups and go around the USMC forces, to places where we could Advance up to Level 3.  We simply couldn’t do close range firefights with the Marines on Level 1.  The USMC would have to decide whether they would get off Level 1 where they needed to be to score in order to fight us.  At the bottom of the map we got in a few lucky shots that set some Marines back.  That probably got them more worried about the KPA making a rush for Level 3 rather than them trying to make Level 1.  Nonetheless, we would keep the line at the street.

BoF2 Polish Requiem After Action Report (AAR) Advanced Squad Leader scenario

At the top of the map, the USMC decided to keep their forces and hence their gains on Level 1.  No one’s coming after our eventual Advance onto Level 3.  We made a critical PREP at the middle of the map and broke one of the defending Fire Teams in the Woods.  That would allow at least 2 of our MMC’s to Advance up.  At the bottom of the map, our line of KPA conscripts held and so my opponent conceded.

How’s this scenario interesting?

This scenario represents an interesting problem for both sides and it really highlights the terrain in Seoul.  This is a multi-level fight amongst the Dense Urban Terrain.  If a unit’s CX’d, it won’t Advance up a level, so you have to time it right.  A KPA conscript unit has especially limited mobility in this terrain and you don’t want to be CX’d when you are Lax as a conscript (+2 Ambush).  I think USMC Fire Teams would be very useful here.  Fire Teams could block more venues up the hill and it’s not easy to break Morale 8 units in +2 TEM.  Plus each Squad, when broken into Fire Teams is worth 3 VP when it’s worth only 2 VP as a unit.  If every USMC squad’s deployed, the USMC OB is worth 28 VP (vs 22 VP undeployed) against the KPA’s 31.  Both players have to find the balance between pushing through and scoring points versus fighting the opponent on a different level to stop him from scoring.  While the KPA player has to fight uphill, there are more of them that can swamp up to Level 3.  This is a tight little puzzle of a scenario!

(Credits: Wikipedia)

205 Super Bazooka – Advanced Squad Leader AAR

205 Super Bazooka – Advanced Squad Leader AAR

Scenario Background

M20 3.5 Rocket Launcher

An encounter west of Taegon (Daejeon) at the Nonsan-Kongju (Gongju) road junction on 20 July 1950 witnessed the debut of the US M20 3.5 inch “super bazooka”.  According to the scenario card “[the] brief dominance of North Korean armor had come to an end.”

Victory Conditions and Tactical Considerations

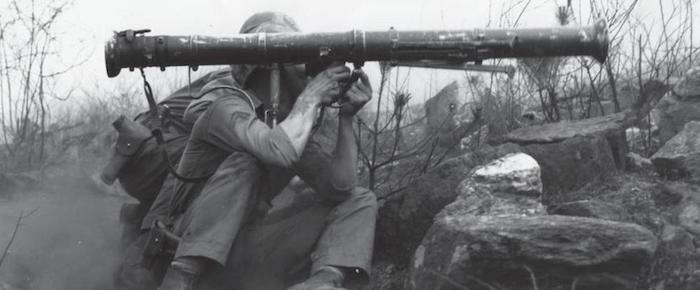
So legend had it that the Americans got their bazookas to hit out to 5 hexes with a TK of 32 instead of 16.  Three of them were on the board with one HIP’d.  We had a map with dirt roads between irrigated Paddy Fields that bogs tanks at a +3 (net +4 with normal pressure).  One way to win is to weave 2 out of 4 tanks through for an exit.  The other way is to get more CVP points (+ Exit VP) than the Americans.  Each T-34/85 is worth 6VPs.  There were 9VP of US MMCs and 6VP of US Leaders.  So if the Americans kill half of my tanks I would have to wipe 80% of them out, or exit at least 1 tank.  I had no doubts that the Americans would stay concealed until they get a good shot.  The Koreans were pretty much forced to run the gauntlet because 5 turns doesn’t give too much time to just sit and shoot.

(Source : MilitaryImages.net)

After Action Report

205 Super Bazooka After Action Report (AAR) Advanced Squad Leader scenario

We decided to put a trail break in the Light Woods and round the left flank to avoid a baz at the entrance putting a wreck on dirt road and plugging up traffic.  We then put some acquisitions on the board just to shake the trees up a little.  We broke the team in the paddies and we thought the HIP’d baz team might be in the orchards on the right (middle of the board).

205 Super Bazooka After Action Report (AAR) Advanced Squad Leader scenario

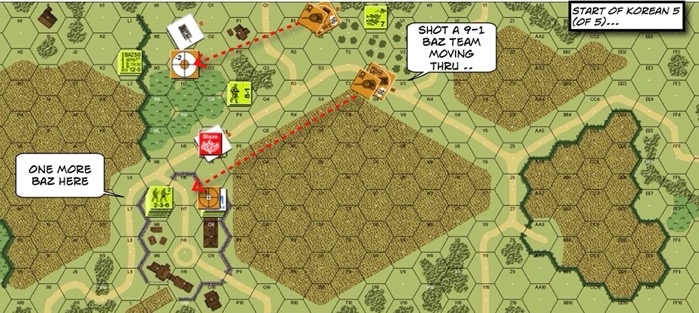
One team covered and the other team moved. There’s nobody in the suspected orchards but when the lead tank round the woods on the right (top left), the HIP’d baz team sprung from the brush!  First shot missed.  The US team tried again in the following Prep Fire and missed as well!  We got the lead tank turned around for a fast escape in the following turn.

205 Super Bazooka After Action Report (AAR) Advanced Squad Leader scenario

Unfortunately, temporary insanity convinced us those baz has a TK of 16 (instead of 32).  Instead of speeding safely out of sight, the lead tank turned BACK around and bored straight down towards the (SUPER) baz team!  The team held fire until it was a hex away and took the shot.  The world went quiet when the turret did a graceful flip through the air.  Its partner decided to run straight down the road to see what’s what with the remaining 3 concealed stacks and promptly got lit up as well.  Team 2 came up and got a lucky Adv Fire CH on the offending baz team and killed it.  Two tanks down and one more MPh to go.  We would have to make a run for it!

205 Super Bazooka After Action Report (AAR) Advanced Squad Leader scenario

As luck would have it, one of their 9-1 baz team broke cover and tried to run across the dirt road.  A CMG shot broke the squad no matter what their 9-1 said.  The other baz team went to the far side of the paddies (top left) for a rear shot on exiting tanks.

205 Super Bazooka After Action Report (AAR) Advanced Squad Leader scenario

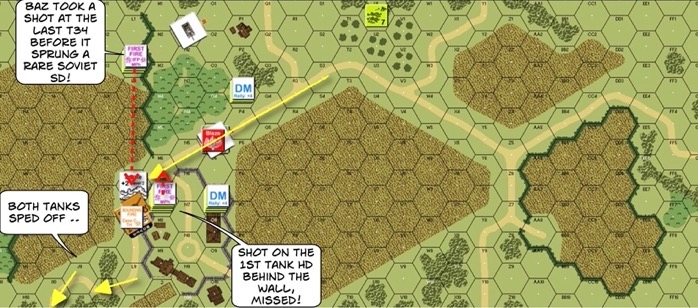
First tank fired up and went straight to the wall and got Wall Advantage since the defenders stayed in the house.  The first shot missed and the tank exited.  It tried to lay some motion fire on the defenders but declined to use its sD for fear of increasing MP spend for the second tank.  As it sped off, the second tank came rolling down the road.  It fired and got a PTC on the defenders in the house anyway but didn’t matter now.  It rounded the turn and could feel a baz running up behind it.  Sure enough, before it could pop smoke the baz round went sailing pass.  We SURVIVED!!!  We absolutely can NOT believe we got 2 tanks through!!!

How’s this Scenario Interesting?

This scenario felt like an arcade game.  There’s a certain amount of strategy but a lot of it depended on the dice.  “The dice giveth and the dice taketh away” like my buddy said.  I wonder if anyone risked the paddies and had things work out for him?  Hey, this scenario is good for a nice and exciting evening though!

Sources