A55 The Cat Has Jumped – AAR on Seaborne Assault!!

This scenario reflects the seaborne assault by the IJA on a relatively lightly held beach in the Philippines. The landing took place on Dec 22 1941, shortly after the attack on Pearl Harbour. Conditions were not ideal on this beach – the wind’s heavy and so’s the surf. The Japanese launched their attack on these “shohatsu’s” (or “LCs” for landing crafts) which were really big steel boats.

Shohatsu

As such, neither the crew nor the passengers get to button up.  They were therefore subjected to a +2 CE DRM (Crew Exposed DR modifier) at all times.  The Filipino defenders had problems of their own as well : they were using MGs that were stored since the 1920’s.  The defenders’ machine guns were therefore a lot less reliable than usual (X11 instead of B12).

The IJA wins immediately if they manage to exit 25 or more VPs (“victory points”) off the right edge of the map and/or gain that number in CVPs (“casualty victory points).  The entire IJA force had 22 squads, 3 crews and 5 leaders – a total of 58 VPs which meant they needed to exit half.  The entire Philippines force was 29 CVPs should the IJA decides to focus on CVPs instead.

A55 Start-proc

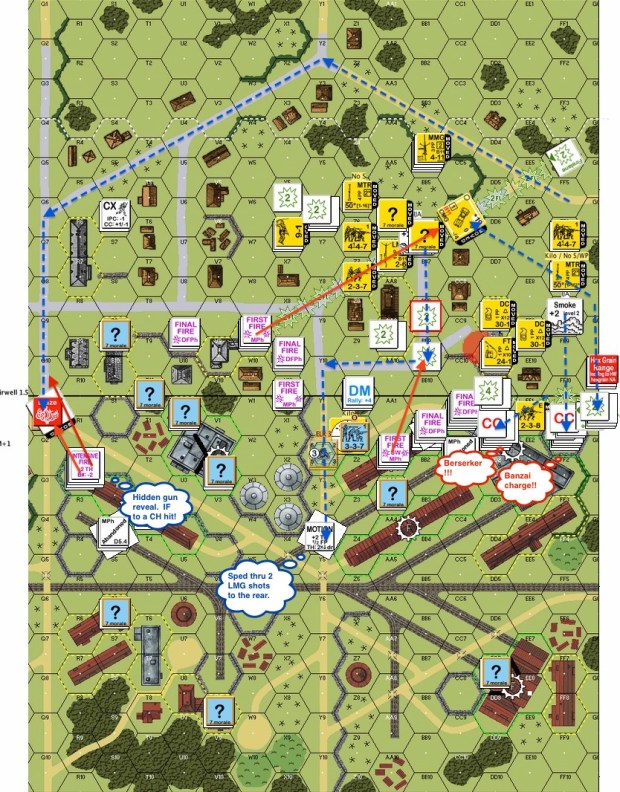
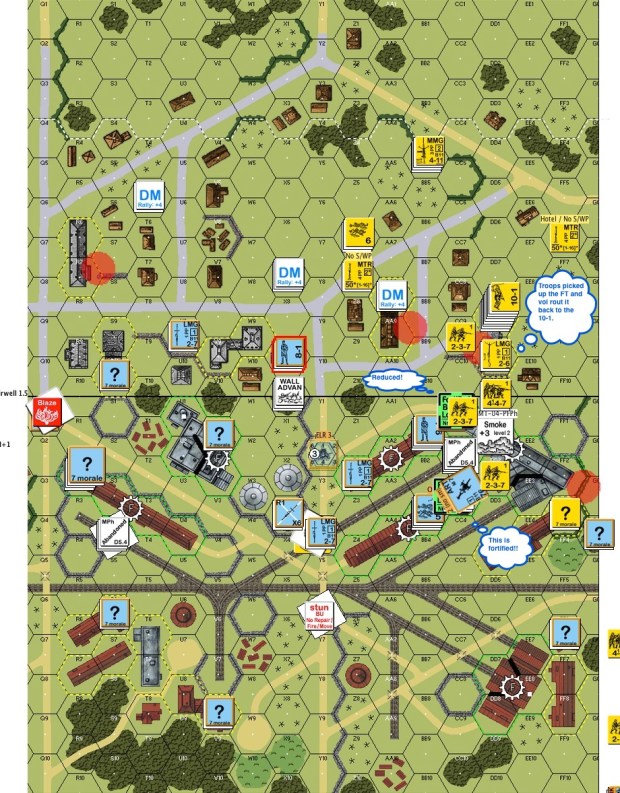
IJA Turn 1 : This was a humid day at a peaceful beach.  I could almost see people frolicking in the shallow waters (almost).

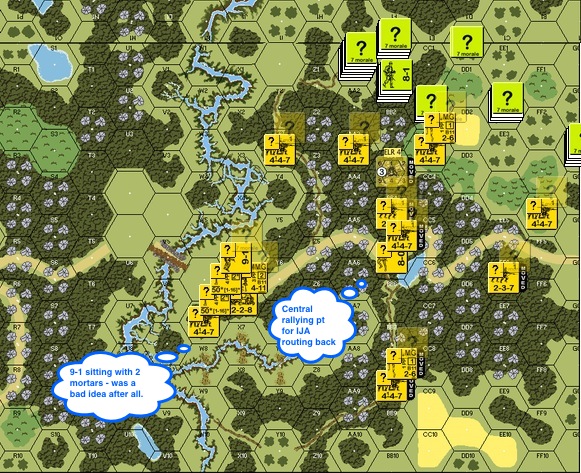
The terrain on the top of the map was very restrictive, especially compared to the bottom of the map.  It would be difficult for the IJA to exit the map via there.  The terrain was more ideal on the bottom half of the map.  The orchards provided a degree of hindrance whilst requiring only 1 MF per hex to move through.  Defence looks pretty sparse on the bottom of the map and I suspect that’s because the Filipinos stationed their 4 squad equivalents there.  The way this was setup, the bottom of the map looked too inviting for me.  I therefore aim the IJA landing forces towards the top part of the map.  My opponent had gracefully given me the balance, so there were 2 MMGs and 1 HMG instead of 3 MMGs and 1 HMG, but those MGs still encouraged me to head for the jungle. Jungles are ideal banzai terrain after all.

A55 PT2 Prep - Lose both MMGs-proc

Philippines Turn 2 : The 9 IJA boats were still coming in okay.  None of the boats were lost in the heavy surf yet.  The Filipinos started shooting at the incoming LCs.  Stunning the LC crew would cause the boats to flounder and throw the IJA off their landing schedule.  Unfortunately both MMG clogged up and random selection designated both for the junk heap (and there was much cursing).

A55 JT3 MPh - Broached No Survivors-proc

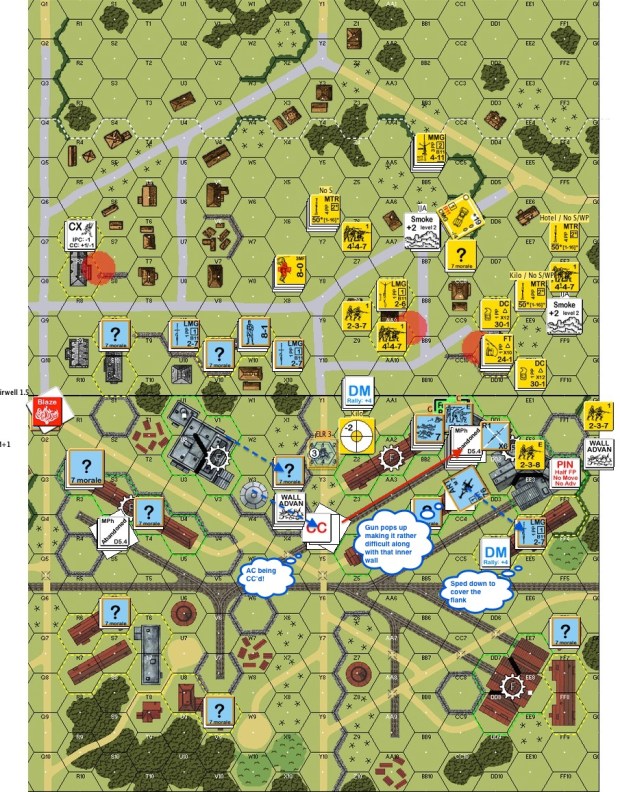
IJA Turn 3 : It was difficult to beach the LCs properly in the heavy surf.  One LC was swamped and ran aground.  One LC’s crew struggled hard with the waves and wasn’t able to do much.  One LC broached against the swells and was destroyed, no survivors.  One LC got shot up bad and was floundering in the shadow seas.  The 5 that beached okay, started to unload its passengers.  Infantry on the beach are fanatic.  However, if they fail morale checks they casualty reduce.

The 5 LCs that beached, started to unload.  However being a first time seaborne assaulter I was concerned about pushing entire stacks out on the beach risking -2 shots on everyone.  So I decided to offload the heavy weapons first, those chaps would need to assemble their toys on the beach away.  This decision would cost the IJA a few more platoons as more LCs got broached in the heavy surf.

I asked my mentor Witchbottles about it afterwards, and he said to get off the boat absolutely as fast as we can!

A55 PT4 End - P moving into blocking positions-proc

Philippines Turn 4 : The IJA got inland on the left flank.  It’s great news apart from the fact that they could get boxed in with a few Filipino squads against the board edge especially with this terrain.  The remaining  Filipino MG, the heavy machine gun expired as well.  The defenders were caught with a beach full of fanatic IJAs and no high rate of fire weapon to do anything about it.  However, they had moved inland methodically to key locations.  The IJA got a bad feeling about what was to come as they couldn’t stop the Filipinos from slipping away.

A55 JT5 Another boat broached 11 squads 10-2 10-1 9-0-proc

IJA Turn 5 : The IJA got another LCs broached!!  The IJA had lost a total of 11 squads and the best 3 of the 5 leaders.  Considering that the IJA started with 22 squads 5 leaders ad 3 crews, that was almost half of the force!

A55 JT6 Banzai 02-proc

IJA Turn 6 : This is Turn 6 and the IJA just got off the beach.  Witchbottles’ advice to always read the scenario victory conditions at the start of every turn definitely helped here.  The IJAs couldn’t move fast enough to get 25 VPs off the board, especially not with the Filipinos shooting at their backs.  The IJAs decided to change tack and to round them up in the jungle instead.

BAAAAANNNZZZAAAAAAAAIIIIIIIIIIIII!!!!!!!!

This was the second banzai attack of the game.  The first one was almost exploratory.  The aim ws to catch and kill the blocking force in front.

A55 JT6 Banzai 03-proc

IJA Turn 6 (contd.) : This is the third banzai to catch the bulk of the Filipinos in the woods.  The jungle was just perfect banzai country!

A55 JT6 End CVP16 IJA 13 sqs 4 ldrs-proc

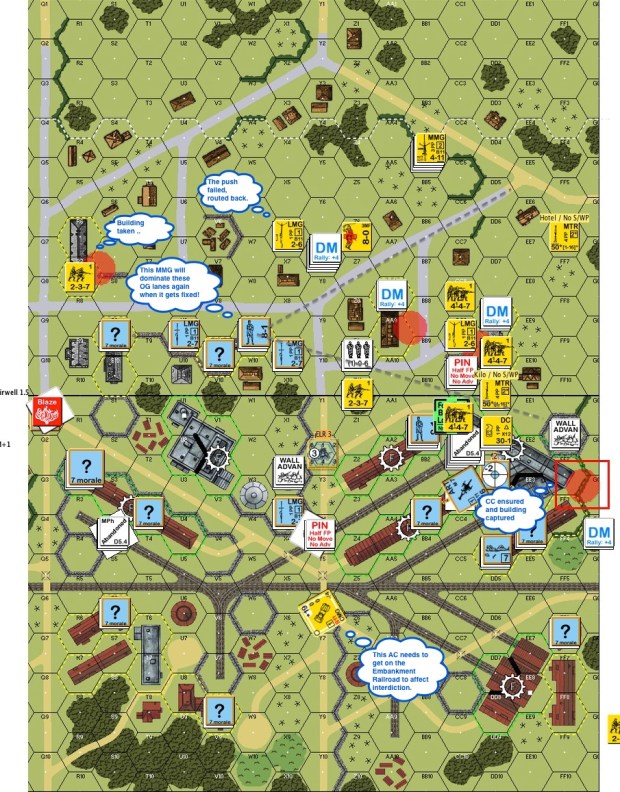
IJA Turn 6 : This was the aftermath of Turn 6.  The IJA lost a total of 13 squads and 4 leaders but have scored 16 CVPs in total.  They needed 9 more to win the game.  The Filipinos were wiped off the top of the map.  However, there were still enough Filipino troops retreating into blocking positions.

A55 PT6 Using FLs to stop the P from retreating-proc

Philippines Turn 6 : The IJAs used fire lanes to delay the Filipino retreat.  Meanwhile, the left flank looked to be clear all the way to the goal line!

A55 JT7  Banzai 04 IJA 13 Ldr 4 CVP 18-proc

IJA Turn 7 : The IJA sprung their 4th banzai.  It was a big decision considering they had only 1 leader (8+1) left.  However the way he was positioned he definitely didn’t need to get too intimately involved.  You can see by the red arrow, how the IJA looked to catch the rest of the defenders.  The IJA now had 18 CVPs.

A55 PT7 Firelane Hero-proc

Philippines Turn 7 : The Filipinos got themselves a hero!  The hero, when coupled with the remaining 8-1 produced a fairly respectable stack with a HS and an IJA LMG.  Either way, the IJA moved into positions where they could lay down fire lanes to delay the Filipino retreat.  My opponent had already seen the bottleneck on the top right of the map where there was a lake.  To get to the board edge, the IJAs on the left flank had to run through the one hex that was 4 hexes from the top and 2 hexes from the right.

A55 JT9  Banzai 05 Need 5 more CVPs stop FL-proc

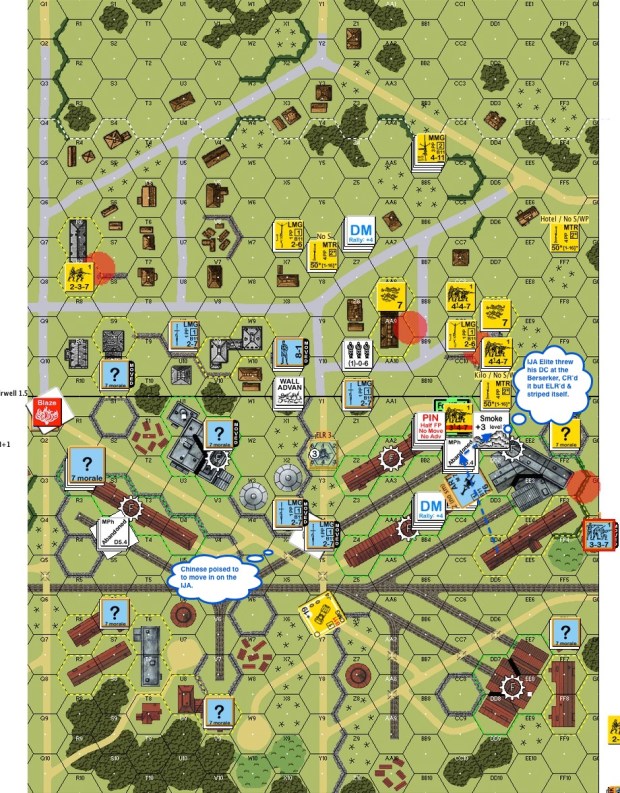
IJA Turn 9 : The Filipino leader / hero / HS / LMG stack got into a position to lay a fire lane down on the IJA exit.  The first fire striped the lead IJA squad.  The IJA had about 7 VPs worth of squads who could exit off in this very turn and we needed only 5. We had to get rid of that fire lane and one good way was to force the enemy squad into Final Protective Fire.  The Filipino leader-hero stack’s collective hearts must had skipped a beat when they looked away from their gleefully laid fire lane and saw the bunch of IJAs looking menacingly at them from their left.

Uh oh.

The fifth banzai attack had no problems crashing through the open  and into the fire lane stack.  There was nothing the Filipinos could do.   The fire lane stopped after a quick struggle and the 7 VPs worth of IJA squads exited at their leisure.

A55 JT9 Ends-proc

IJA Turn 9 : This was the end of the game as the IJA killed and exited more than 25 VPs.

As my opponent warned me, seaborne assaults are not for the faint of heart.  The attackers should expect to lose more than half the force to the elements and to casualty reduction until his troops hit the hinterland.  For the IJAs, only 4 LCs managed to head back to the ships.  4 others were wrecked and 1 went aground.  Half the force was dead at turn 6, mostly to broaching LCs.

I got to remember to get EVERYONE off the LCs immediately next time.


AP90 Smashing The Hook (an AP9 “To The Bridge!” scenario)

I was chatting online about Gary Fortenberry’s new Advanced Squad Leader Action Pack “ASL Action Pack 9: To The Bridge!” when Sam Tyson offered to play.  The next thing I knew, I was experiencing a truly action packed scenario, well designed and well “interpreted” by Sam. This was February 1942 in Burma.  Patrols from the King’s Own Yorkshire Light Infantry discovered IJA roadblocks around Danyingon.  So elements from the King’s Own Yorkshire Light Infantry and the 1/7th Gurkha Rifles set out to evict the IJA from the area.

There were 2 roadblocks in predestinated positions on the map.  The British goes from the bottom of the map to the top.  They get an instant win when they clear both roadblocks or if there are no good order IJA troops around either roadblock after five and a half turns.  The British got a mix of armoured cars and (scary) Gurkha ladened carriers.  The IJA got to hide (always good) plus a Mountain Gun. 001 AP90 BT1 Start-proc

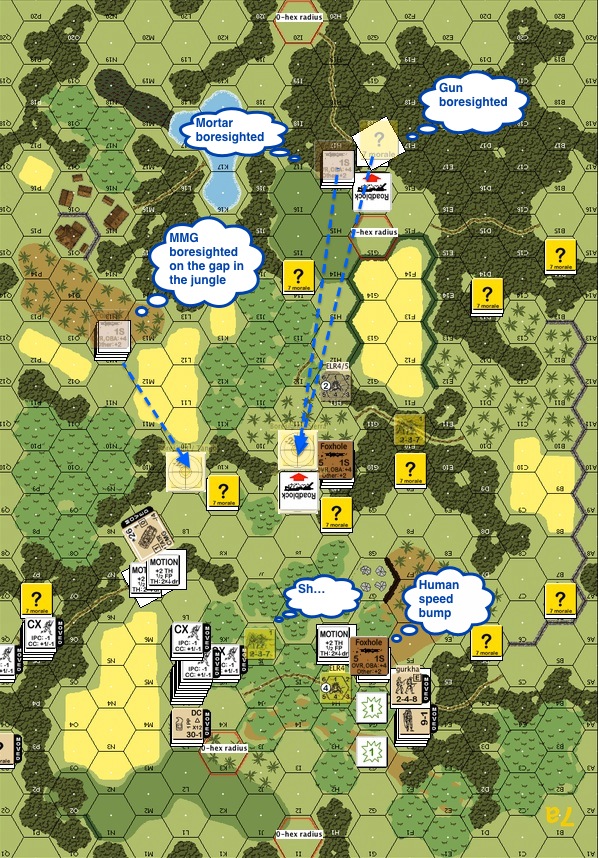
British Turn 1 : You can see where the IJA gun was hidden and where it was bore-sighted.  There was an MMG on the hill to the top left bore-sighted to a path through the jungle.  There was an IJA half squad hidden in the brush hoping that the British would pass him by and another IJA half squad near the first roadblock in the middle of the map.  There’s a scenario special rule that requires all hidden IJA to reveal themselves via Banzai attacks in Turn 4.  I figured that might be where the British would be by then.  The British were very aggressive in their first move given the short time frame.  My foxhole on the hill on the bottom of the map was immediately overran.  Nothing but a human speed bump!  The carrier hooked around the foxhole and made sure there was no escape for the IJA half squad therein. 003 AP90 BT2 AFPh Start-proc

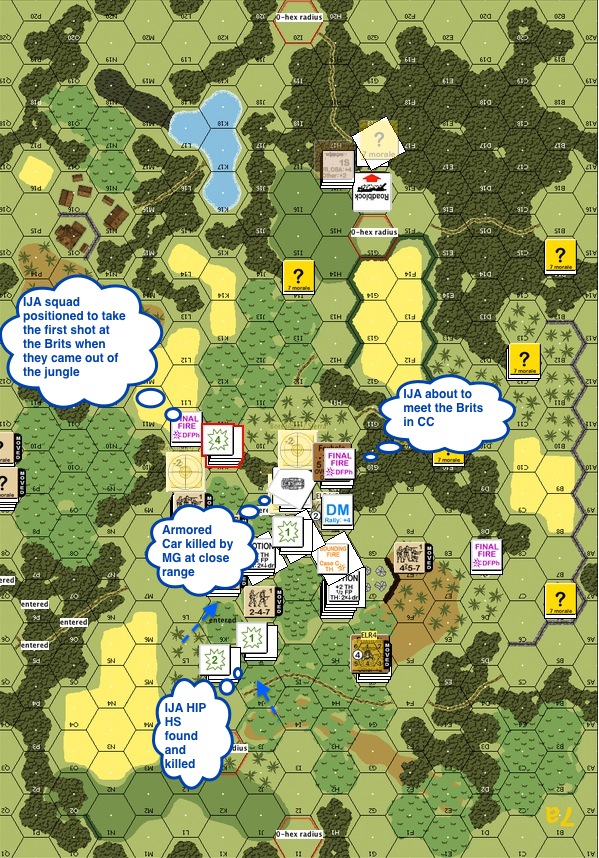
British Turn 2 : The British methodically beat down the brush and found our first hidden IJA half squad.  A British armoured car headed straight for the defending IJA at the roadblock.  IJA’s LMG scored a hit and a lucky kill.  The IJA started backing off. 004 AP90 BT2 RtPh Vol Break-proc

British Turn 2 Rout Phase : The IJA started melting away before the British could engage them in close combat.  The IJA looked to delay and to collapse into the last roadblock gradually.  They formed a line right before the tree line where the hidden IJA half squad was. 005 AP90 JT3 DFPh Cleared Roadblock-proc

IJA Turn 3 : The end of the turn saw the IJA melting away again, collapsing towards the last roadblock.  Before the MMG team on the hill on the middle of the map did, they vaporized a British half squad coming down the jungle path.  The Brits then decided to use a carrier to create a trail break in the jungle nearby.

006 AP90 JT3 CCPh Jumped the Brits-proc IJA Turn 3 : The IJA MMG team from the middle of the map repositioned to around the last roadblock, MG trained onto the road.  A big stack of British troops successfully removed the first road block.  A British 9-1 and a Gurkha squad walked into the hidden IJA half squad in the last turn.  The half squad should have popped up in the earlier British Turn when this happened.  Hand to hand fighting nonetheless ensured immediately and they were all killed. 007 AP90 BT4 Gun appears carrier immo-proc

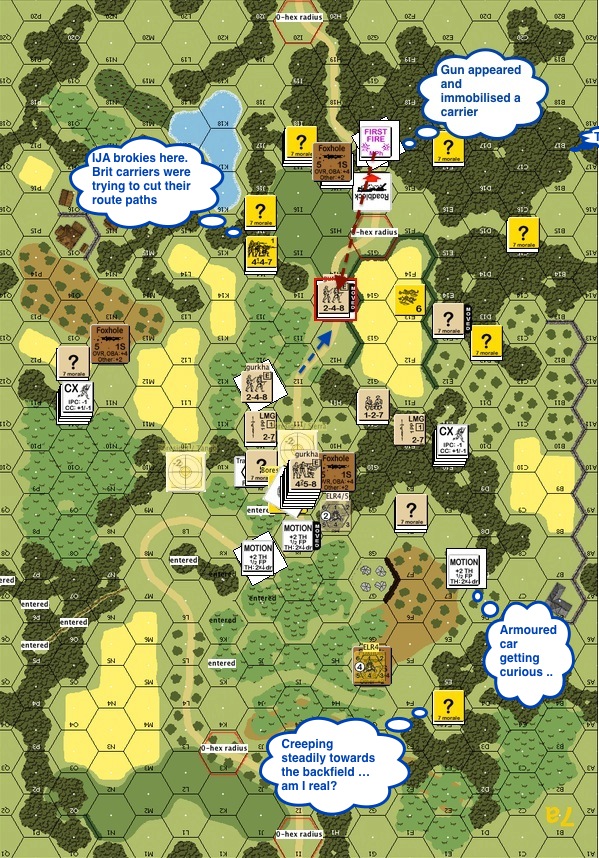
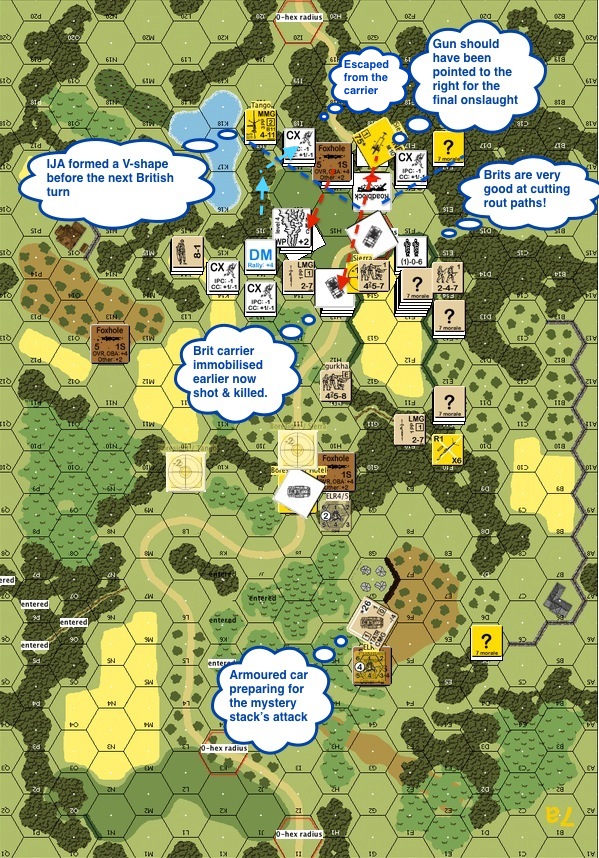
British Turn 4 : The Brits were out to chase down the routing IJA squads.  The first carrier sped down the road and the IJA gun roared from behind the second roadblock.  The carrier was hit and immobilized.  Meanwhile the hidden stack on the bottom of the map tried to get the British armoured car’s attention by slowly creeping towards the British backfield. 008 AP90 BT4 MG hit but bounced Int Gun kill carrier-proc

British Turn 4 still : The action heated up as the second carrier comes running down the path.  The MMG managed to score a hit but the bullets bounced off.  This carrier managed to hook around and cut off the IJA brokies’ rout path.  The third carrier went straight for the roadblock!  The gun crew intensive fired  and killed that one too.  The rest of the British troops moved in quickly.  This was Turn 4, the British had 2 more Movement Phases to go.

009 AP90 JT4 WP and formed a line-proc IJA  Turn 4 : The IJA mortar crew laid a white phosphorous (WP) round on the carrier but the Gurkhas were too tough for it.  The WP round did allow the IJA troops to slip by and escaped back to around the second roadblock.  The IJA gun killed the immobilised carrier, taking more of an interest in its Gurkha crew.   However, I should have left the gun pointing towards the right for the next British round. The British were consistently great at cutting rout paths and taking prisoners.  The IJA realised they need to stop the British from getting behind them if they were to survive – hence the line. 010 AP90 BT5 IJA Vol Break-proc

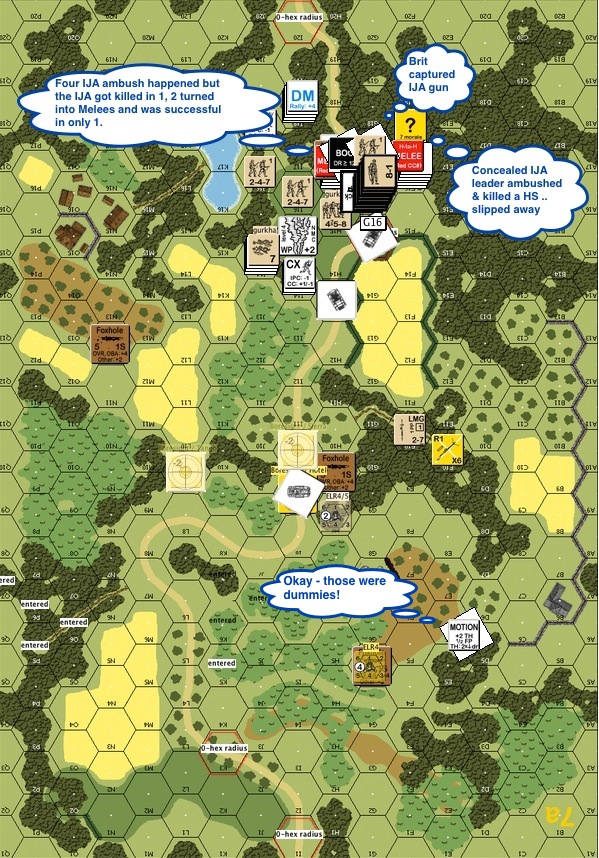
British Turn 5 : While their comrades held the line, the IJA on the left melted away so they could counter attack against the British troops at the roadblock.  The armoured car on the bottom of the map finally verified that we had a moving stack of dummies.  It was a miracle that the IJA kept this armoured car out of the battle for so long! 011 AP90 BT5 CC 2 Melees Big stack on Roadblock-proc

British Turn 5 still : The British were unlucky in that all four close combats started with IJA ambushes.  However the IJAs were killed around the gun and 2 of the fights resulted in melees.  Only on the right did we see a solitary but concealed leader slaughtered a British half squad and slipped deeper into the jungle. 012 AP90 JT5 Counter Attack!!-proc

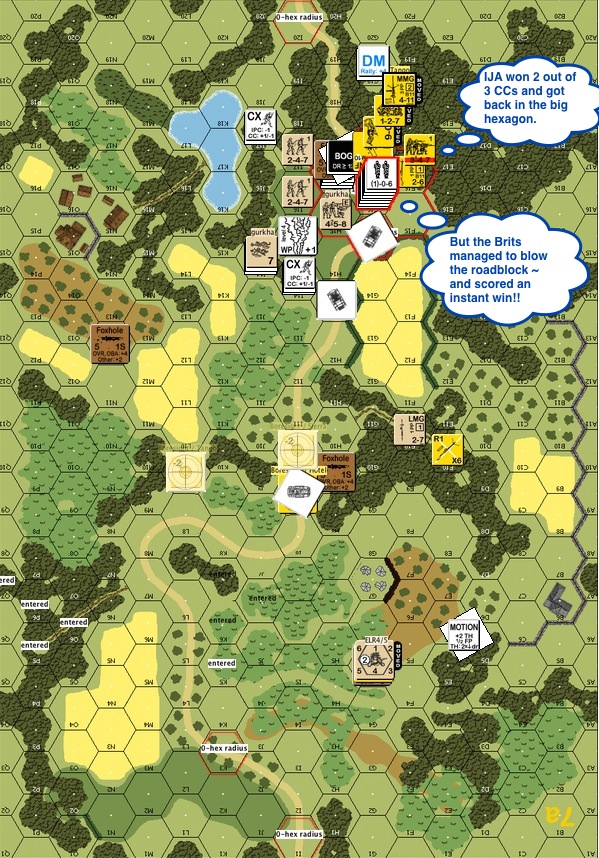
IJA Turn 5 : The routed IJA again rallied and attacked towards the roadblock.  The British were assembling around the roadblock at this stage.  If they manage to clear the roadblock, they get an instant win but if not, they would need to makes sure there were no good order IJA troops around the area marked with a big red hexagon. 013 AP90 JT5 -9 Roadblock Clear mod-proc IJA Turn 5 – Game End : The close combat phase was a good one for the IJA, they reclaimed two of the hexes around the last road block.  However, the British were able clear the roadblock by rolling less than 10.  (You need to roll 2 or less on a pair of dice, but the Brits had enough people to get a -7 modifier.)

Mr. Sam Tyson won!!

FE27 The Bravest Thing I Ever Saw

This scenario from Fanatic Enterprises describes a situation in Bataan in January 6 1942.  The Americans fought a delaying action that saw the gunners from both sides exchange shells for shells.  Carl Nogueira played the defending American and I the attacking IJA in this after action report (AAR).  We actually exchanged sides and played this twice, with me getting my teeth kicked in both times.  This is already the less ugly version, rated PG-13.

The side that gained the most Victory Points (VP) wins.  You can gain Casualty Victory Points normally and you gain 1 VP for controlling each Level 2 hill hexes on your opponent’s side.  The Americans set up on the bottom of the map and the IJA on the top.  We get 5 and a half turns.

01 FE27 JT2 02 CC Kill-proc

IJA Turn 2 : You can see where the IJA guns were.  Line of sight (LOS) to the American hill tops were limited due to jungle terrain.  You can also see two hidden 2nd liners to slow down any sort of American counterattack.  The big stack in the middle of the top map were two IJA medium machine gun (MMGs), but their leader, a 9-1 who’s also the best leader in the IJA order of battle (OB) was killed by a sniper early in the game.  You can see the 3 lines of IJA advance on the American side.  The left most IJA rush would have been the most threatening but I failed to capitalise on the situation properly before they got wiped out.  The middle advance would be stuck for a while and in retrospect I should have strike out through the swamp towards the right to put the squeeze on the Americans on the hill on the right of the American positions.  On the right, the IJA caught and took an American 8-0 and a squad together with it in a flurry of hand-to-hand action.  At this point I expected the American guns to be towards the bottom of the map.

02 FE27 AT3 01 Start-proc

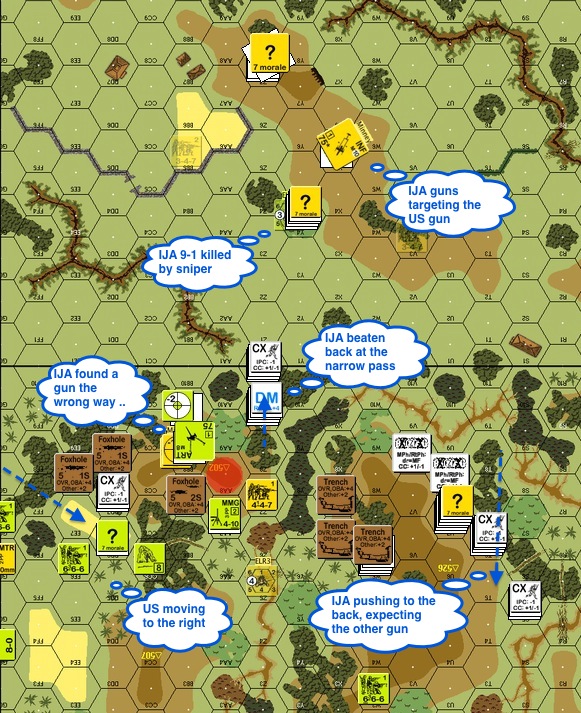
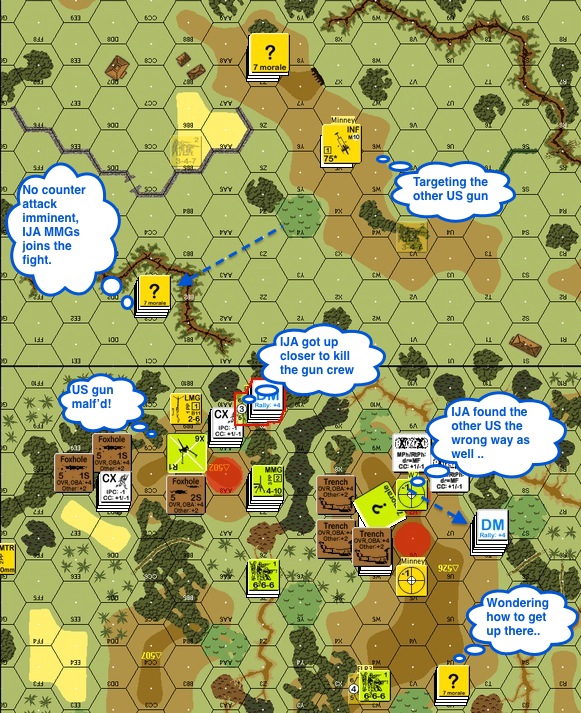
American Turn 3 : The IJA found the first American gun on the left by walking straight into it.  There was nothing left of the squad.  The attack on the left was also wiped out and the Americans started moving towards the right.  The attack in the middle was floundering as well.  The IJA on the right kept pushing towards the bottom of the map, fully expecting to find the second American gun there.

03 FE27 AT4 01 Start-proc

American Turn 4 : The American gun on the left malfunctioned!  The IJA forced their way through the bamboo to kill the gun crew before they had a chance to fix the infernal contraption.  You can see a blotch of red on the hilltop to the right where once again, the IJA found the other American gun the wrong way.  You can also see the pair of IJA MMGs moving in during the last turn as it didn’t look like the Americans were going to make a push to the north.

04 FE27 JT5 02 CC IJA dead US CR-proc

IJA Turn 5 : The IJA troops surrounded an American 8-0 and a 2nd liner in a 3 point stance.  The IJA were of course, feeling very pleased with themselves.  There was an IJA demolition charge laying on the ground in the middle.  That was the aftermath of an IJA half squad’s attempt to blow up the American MMG stack.  On the right, the IJA made another attempt up the hill and caught more Americans in close combat.  Unfortunately this IJA half squad could only take half of the American squad with it.  On the bottom right of the map you can see the Americans on a reverse slope defence configuration, looking to get the first shot in if any IJA pop over the crest line.  The probing stack of IJA troops however decided to move back up to their leader for a last push as time was running out.

05 FE27 AT5 01 Ring of Fire-proc

American Turn 5 : The “ring of fire” on the left broke the American squad but they failed to encircle the Americans properly.  Apparently you need to fire at the target sequentially for encirclement to happen (A7.7, note to self).

06 FE27 AT5 02 Ops-proc

American Turn 5 (still) : On the left, the broken American squad surrendered and the IJA picked the weakest (a 1-2-7) amongst the trio to be the guard.  That was the last mistake they would ever make.  The American 8-0 promptly jumped on the otherwise occupied IJA half squad in close combat …

07 FE27 AT5 02 Counter Capture-proc

American Turn 5 (aftermath) : The American 8-0 singlehandedly killed the IJA guards, rescued his men and found enough weapons to rearm half of his squad.  (Note to self : encircle properly & be mindful about who’s to play guards).

08 FE27 JT6 02 Banzai DC Hero-proc

Final IJA Turn : The IJA decided that they wouldn’t go down without a proper Banzai charge.  Therefore they targeted the gun crew who ventured out to retake a hill hex.  Just to be professional about it, they even short-strawed a poor chap to be a DC hero as well!  He was well perforated, his DC satchel went flying but he drew enough fire from his “friends” for them to jump on the American gun crew.

09 FE27 JT6 03 Wounded Leader-proc

Final IJA Turn (still) : An IJA leader in the middle rushed in and tried to grab the DC pack.  He got shot and was wounded as he picked it up and he never managed to place it.

10 FE27 JT6 04 CC again-proc

Final IJA Turn (almost done) : An MMG crew from the original “Ring of Fire” caught up with the American leader and squad on the left, knives drawn …

11 FE27 JT6 05 End-proc

Final : The banzai’ing IJA came victoriously out of the close combat on the right.  The folks on the left however would be locked in perpetual mêlée.  You would know I lost the game a long time ago if you can see the huge stack of IJA casualties.  Carl was nice enough to play this through to the bitter end!!

Lessons learned:

  • When playing against the Americans, the IJA needs to make good use of the Advance Phase.  Try to move into American Line Of Sight only in the Advance Phase, and if you can stay concealed, even better.  This way the IJA don’t have to take high American firepower with “First Fire Movement in Open Ground” (FFMO) and “First Fire Non Assault Move” (FFNAM) modifiers.  If the Americans fire in the following Prep Fire, they don’t get to move away and the IJA will have a chance to fire against their low morale (US Marines excepted).
  • Don’t give prisoners to someone who might not fare well in (close) combat.
  • Encirclement : remember to fire on the target sequentially.
  • Use 7 as a gauge, if you can get a result on a 7, it’s a good choice.  Alternatively, try to move in routes that stack so much DRMs on your opponent’s shot that he/she can’t get results on a 7.
  • Don’t spread your forces too thin.  There should be reserves behind an attack to exploit results.

Other thoughts?

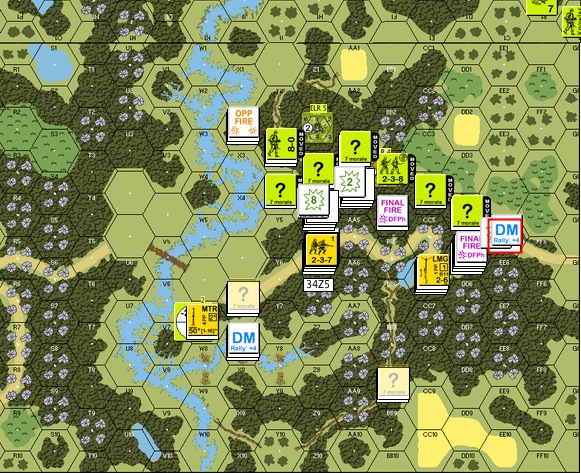
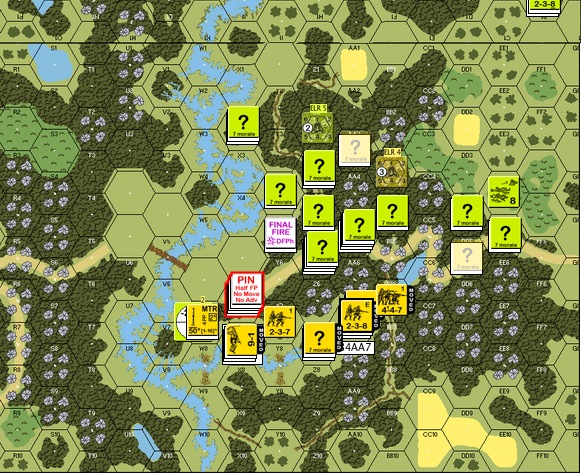
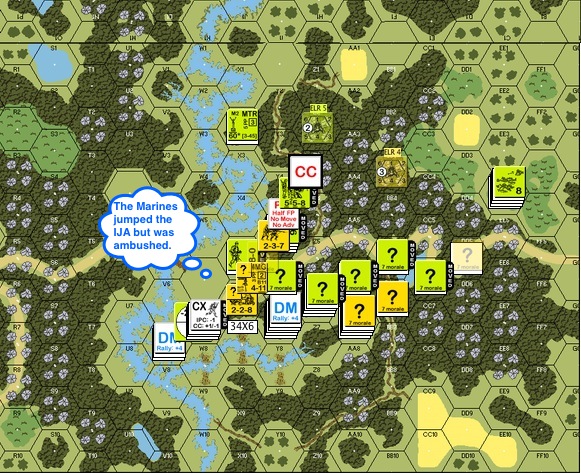
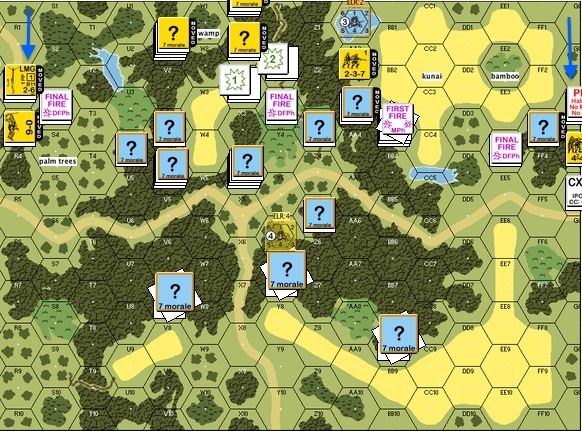
HS8 Bailey’s Demise AAR – fighting the Marines in the jungle

JT1a-proc

Learning jungle terrain in ASL153 Totsugeki is one thing.  Learning about Marine Raiders in the dense jungles of Guadalcanal is another matter entirely.

This is HS8 Bailey’s Demise, from MMP’s Operational Watchtower Historical Study.  The date is September 26 1943.  This scenario as with the whole History Study, is centered around Guadalcanal.  The river depicted on the map represents the Matanikau river.  The Marine Raiders were looking to cross the river to the west bank to complete an encirclement.  Unbeknownst to the Marines, the IJA had crossed the river and was on the east bank when the engagement occurred.

The Marine Raiders came in from the top left into a wholly hidden (HIP) deployment of IJA troops.  The Marine Raiders, like the IJA 1st-liners, were also stealthy.   They were to cross at least 6 CVP (3 squads or other combinations) to the west bank of the river in 7.5 turns.

All interior jungle hexes are dense jungle.  All jungle hexes next to non jungle hexes are light jungles.  The difference being while light jungle are similar to woods, dense jungle has a terrain effect modifier (TEM) of 2, does not permit fire groups and allows a stacking limit of only two.  This map’s marked with “crags” (4 point stone formations) merely to remind ourselves that the marked hexes were dense jungles.

The map above was my IJA setup, units unhidden for your perusal.  The mortar team down on the bottom left was largely ineffectual against American counter-battery fire.  I should have spread them out.

AT2b-proc


This was the Marine Turn 2.  The Marine made contact with the defenders and withstood IJA fire rather well.  Taking the risk to move in stacks (given the +2 cover of the dense jungle) their Advance Fire was devastating round after round for the IJA.  The IJA looked to block the Marines as much as possible, rout back (squads breaking “automatically” into half squads in the process) when in doubt and take advantage of their leader’s “Commissar-like” ability to rally them without (DM) penalty.

As I expected, the Marines avoided the bamboo patches on the right and came in from the top down.

Please keep in mind that IJA counters in faded yellow were hidden units that the Marine player couldn’t see.

JT2b - After MPh-proc

This is the IJA Turn 2.  Some of the frontline IJA routed back.  The IJA mortar team on the left was completely shot up.

AT3c After MPh-proc

American Turn 3.  The rallied IJA put up a fight in face of the advancing Raiders.

JT3c After MPh-proc

IJA Turn 3.  The IJA rallied and reconstructed a respectable line of defence.  In retrospect this approach didn’t work well.  The IJA, even concealed, could hardly withstand the withering Marine gunfire.  Perhaps a better strategy is to pair up the half squads.  One half squad would go aggressive, knocking off US concealment counters and drawing fire.  The other concealed half squad will close and either hope for an ambush in close combat.

JT3c HIP CC-proc

Talking about close combat, the Marines with their overwhelming firepower are deadly in normal CC (plus the IJA has no favorable modifiers).  Here you have a HIP squad that sprung out in the hopes of assassinating the Marine 8-0, they were promptly killed in CC.

I should have avoided normal CC with Marines to start with.  Hand to Hand (HtH) combat, when done with sufficiently lopsided odds (IJA half squad vs one or two Marines squads) offer a good trade for the IJA since the results of most are mutual annihilation!  Other than that, I should have ran!

AT4a Ambush by IJA-proc

Marine Turn 4 : here you can see how the Marines were already crowding the last passage way towards the river.  A Raider squad jumped a concealed IJA half squad and was ambushed and killed.  That was unfortunately the only time when close combat went happily for the IJA in this game!

JT4b Am Vol Rout-proc

IJA Turn 4 : The situation doesn’t look good for the IJA but they were still fighting hard.  Here you can see a Marine stack breaking voluntarily and routing away from possible IJA close combat.  Here’s a thought : had I not used the hidden IJA units in close combat, they could have sprung up now and kill the whole stack!

AT5a MG-proc

Marine Turn 5: the Marines started to cross the river!!  A repositioned IJA machine gun put the west end of the bridge squarely in its sights but it couldn’t stop the flow.

JT6a End-proc

IJA Turn 6: This was how it ended for the IJA, decimated and encircled.

The next time I play as the IJA against Marines, I will try :

  • Using my HIP units largely for cutting rout paths.
  • Pair up units (half squads), keep one concealed and use one for knocking off enemy concealment, with the hope of trading half squads for bigger stacks of Marines in hand-to-hand combat.
  • Rush IJA squads through openings created by successful hand-to-hand combat and go for encirclement
  • I thought of stacking IJA units to give them heavier fire power since I can’t create fire groups in dense jungles but I think that will just create bigger targets for blistering Marine firepower.
  • While retreating and blocking as the IJA might be a good idea at times, I should keep at least a 1 hex distance from the Marines.  That way the Marines would need to use advancing fire against my concealed units.
  • What happened to Banzai charges?

What’s your experience with fighting cardboard Marines in the jungles?  What are your thoughts?


My First Foray into PTO terrain : ASL153 Totsugeki! AAR

I played ASL153 Totsugeki! a while ago with Brian Y.  I played a few PTO (Pacific Theatre of Operations) scenarios before but this is my first foray into full-blown jungle terrain.

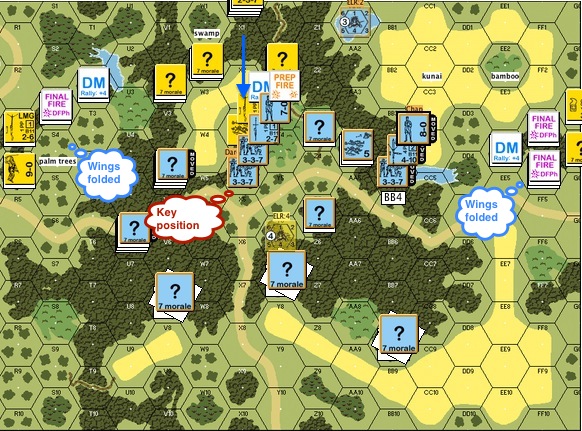
The usual Chinese vs Japanese (IJA) or Canadian vs Japanese scenarios occurred in China or Hong Kong, both of which are not in PTO terrain.  ASL153 Totsugeki! however, took place in northern Burma.  “Totsugeki” is Japanese for “Charge”.  Chinese gunners, working with the Americans, were cut off in the jungle with fields of fire still uncleared.  The IJA 55th Regiment pushed in and everyone in the 6th Field Artillery Battery found themselves fighting for their lives.


A60-JT1a-proc

IJA pushed in from the top of the map.  There are three Chinese guns in specified hexes.  The Victory Conditions for the IJA is to eliminate or to capture all three Chinese guns and to occupy their hexes with good order crew/half squads/squads (“MMC” in ASL parlance) in 6.5 turns.  The Chinese has 14 first liners vs the IJA’s 11 but they were understandably shaky (ELR 2).

This is Japanese turn 1.  The IJA wasted no time in rushing both flanks.  They showed that the IJA squad will almost always get to where it wants to go.  The jungle hindrance of course helped a great deal.

A60-CT1 AFPh-proc

End of Chinese Turn 1 : you can see the IJA was successful in turning both flanks.  The Chinese 2 squads stack with the leader posed an issue though since it occupied a key position in the center of the map.   Approaching IJA units invariably got shot up.

A60-JT2 MPh CANDYGRAM!-proc

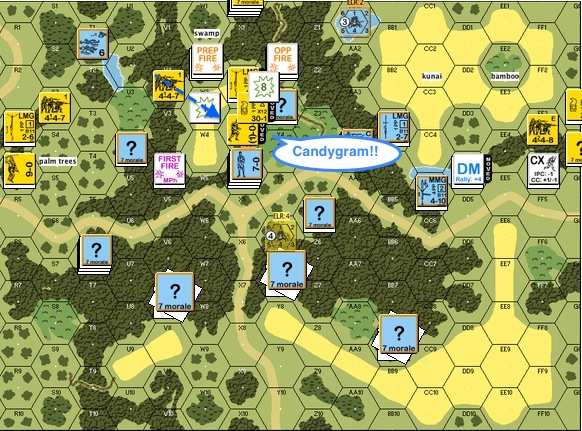
Japanese Turn 2: The IJA decide to get the party going with a DC Hero (“CANDYGRAM!!!”, a phrase favoured by one of my ASL mentors, Witchbottles).  Unfortunately the Chinese weren’t ready to go wild yet and promptly shot the messenger.

A60-JT2 CC Ambush Kill-proc

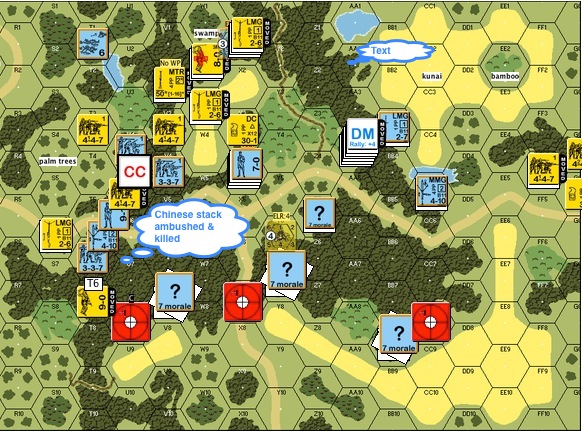
Japanese Turn 2 still : IJA forces slid down the left flanks, ambushed and killed the Chinese medium machine gun (MMG) team.  This flank looked shaky but the Chinese held firm in the middle.  That double squad Chinese stack in the middle were still chuckling over their DC hero kill.

A60-JT3 Banzai-proc


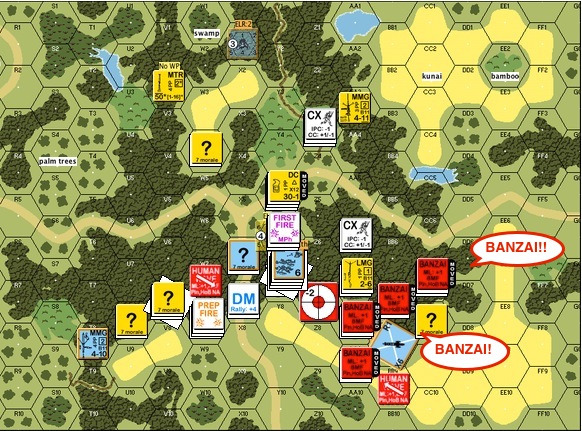
Japanese Turn 3 : The IJA was getting frustrated about not being to make much inroads in the centre and on the right flanks.  On top of it, trotting through the jungle was a very slow going affair.  So they decided to do a banzai attack!


A60-JT3 End-proc

This is my first banzai attack in jungle terrain and I started to appreciate how well banzai attacks go together with jungles.  It is got to be terrifying to have IJA troopers crashing out of the trees and falling into the ranks with bayonets and swords waving!  This charge allowed the IJA forces in the centre to link up with the right flank.

A60-JT5 End DFPh - both Chinese guns malf-proc

Japanese Turn 5 : The IJA spent turn 4 bringing the troops together for the final assault on the guns.  The IJA mass assault moved through the jungle.  The two guns on the flanks fired pointblank at the incoming IJA and they both malfunctioned!

A60-JT6 MPh Banzai Charge-proc

Japanese Turn 6: The IJA came into contact with the Chinese troops around the gun and one last banzai ensured!

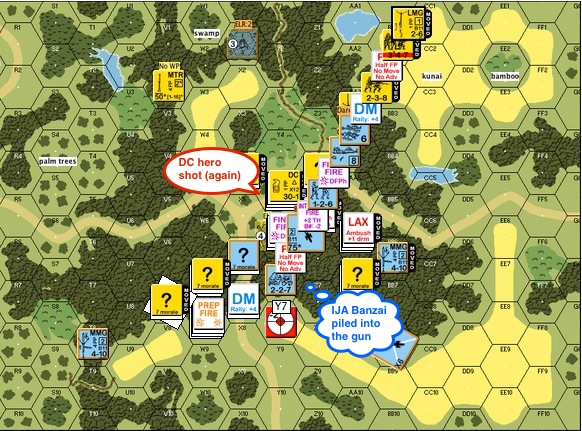
A60-JT6 AFPh .. DC Hero shot-proc

Sensing that the game was almost over, a DC hero decided to gave it another go.  He too was shot before he could deliver the payload.  On the other hand the last banzai piled a few IJAs into the last gun hex.

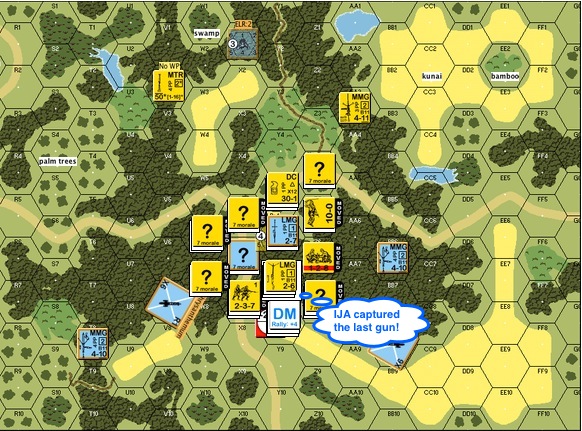
A60-JT6 End-proc

The IJA captured the last Chinese gun and surrounded the defenders.

Totsugeki is a great introduction for me to the PTO terrain.  Going toward I’d very much like to explore the best ways for DC Heros  to play together with Banzai’ers.

I’d also like to commend Brian Y as a terrific ASL player.  Thanks for a great game Brian!

Please see also my friend Joss Attridge’s experience with Totsugeki : “Totsugeki (ASL 153)”

Banzai


Journey to a Tourney, Part 2: The Battles

Round 1: AP8 A Bloody Harvest

Maik Brinkmann

Maik Brinkmann

Maik Brinkmann

Maik Brinkmann is a methodological player with a great personality.  He stores his counters in boxes of little white envelopes which hints at an equally efficient and practical mind.  We decided on playing  A Bloody Harvest through email correspondence before I arrived at Singapore.

Bloody Harvest - old VASL setup for illustration only.

Bloody Harvest – old VASL setup for illustration only.

Germans started from the top of the board and their goal was to clear the area I got marked at the bottom of the board clear of “good order” Poles.

I played the Poles.  I decided to place my medium machine gun on the 1st level of the stone building that faced the grain field.  From the Pole’s angle there were three possible approaches.

There was the right side that is heavily lined with trees where the German could very well approach.  I placed 2 trenches within those woods to delay the Germans.  I made sure that the two trenches upfront can support each other (and not be able to shoot at each other).

There was the grain field in the middle that my medium machine gun (MMG) covered from the first level of the stone building.  I also had a squad in a trench that covered the road leading up to the grain field.

There’s also the left side that’s less wooded and was the longer way around.  I had a trench with a squad on the immediate left of the village, plus another squad in a stone building on the left covering that approach.  If needed, they could move back to the village to help.

Maik divided up the Germans and attacked down both flanks.  He was bogged down on my right as the Poles withdrew into the village.  He made better progress on my left but couldn’t converge onto the village in time.

The funny part was a stubborn Polish half squad that kept running retreating through the grain fields while harassing the Germans on the left.  It absolutely refused to be broken.

It was a great game that introduced me to a new friend.

Round 2: J103 Lenin’s Sons

Mark Humphries

Mark Humphries

Mark Humphries

Mark Humphries need no introduction in Asia or globally in the ASL world.  He runs the ASL Ladder from the Philippines.  We decided on Lenin’s Sons and he gratefully allowed me to play the defending Russians.

Lenin's Sons - old VASL setup for illustration only.

Lenin’s Sons – old VASL setup for illustration only.

The Germans attacked down the length of the board looking to capture most the buildings on the bottom of the board.  From the Russian point of view, the left side of the board is open ground.  The German had a big wooden building at their jump off point.  The Russians had a hedge and an orchard in front of the buildings they are to defend.  On the right side were the woods.

From Mark I could see how ASL is really a game of movement.  The Germans would always move forward in every turn.  I failed to create a cross fire on the left and the SS was able to process across the open ground without breaking much until their rifles came into range.
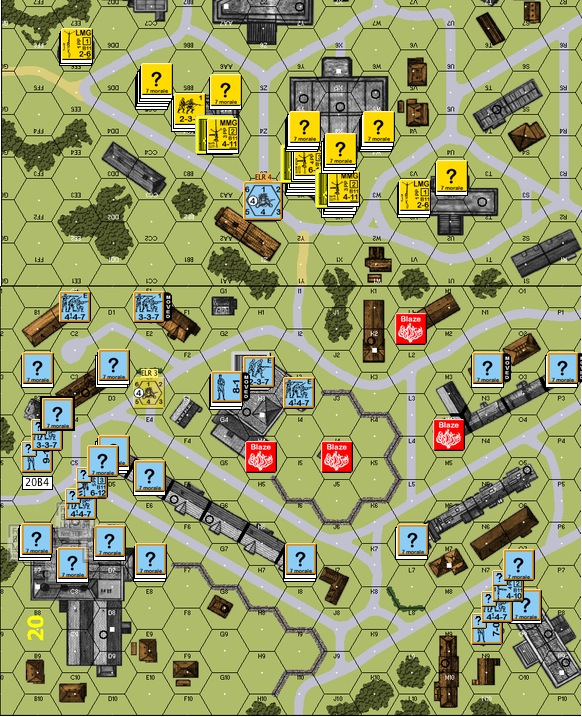
In the woods on the right side Mark was constantly looking to encircle the retreating Russian troops.  The Russian had a demolition squad hidden in the woods and were able to channel a leader and a squad towards them but my timing was wrong.  The demolition squad sprung out, got shot,  and the demolition pack went flying harmlessly through the air.

It was a slow game but Mark made progress in every turn.  By mid game he was already in the orchards  in front of my buildings.

Another great game!  Mark showed me how it’s done : attacking in open ground and in the woods alike.

(PS : if I play this scenario again, the 10-0 commissar will go into the woods and the Russians will do a fighting retreat like IJA in the jungles.)

Round 3: ASL145 Shanghai in Flames

Jamie Lee

Jamie Lee

Jamie Lee

Jamie Lee is an experienced war gamer who is a newbie with ASL rules but is very well versed tactically.  The Singapore ASL’rs warned me about him.  On the other hand, he’s very unassuming and can easily disarm the unwary.

The scenario was Shanghai in Flames and I played the Chinese.  I played this a while back with Erwin Langlois before and I enjoyed it immensely.

Shanghai in Flames - old VASL setup for illustration only.

Shanghai in Flames – old VASL setup for illustration only.

The large building on the bottom left of the map was the Sihang Warehouse (factory).  The IJA were to clear the factory of all “good order” Chinese squads.  Squads in the factory were fanatic (a point I forgot at the tourney).

From the Chinese point of view, the likely angle of Japanese attack would be down the left side of the board along the line of buildings.  The big stone building in the middle of the board was a good jump off point for the final attack as well.

The row house along the right of the factory was an important landmark.  As long as it stayed in Chinese hands, it allowed them skulk and to rout safely.  Once it fell into Japanese hands it became a beautiful fire base for the IJA

The Chinese got 3 fortified hexes and instead of fortifying the 3 top hexes of the factory to prevent the Japanese from charging directly in, I only fortified the middle hex the hex to it’s right.  With the risk I took from not fortifying the left, I exchanged that for a tunnel that linked the building on the left to the row house on the right in front of the building.

My plan was to fight a delaying retreat down the left side while a leader and a squad start a fire on the building to the left in front of the factory.  They could use the tunnel and go to the row house on the right and start fires there too, thereby denying the IJA of jump off points.

There was also a Chinese MMG team together with a protective squad and a 7-0 leader all the way down the street on the right side of the board.  Given there were two long streets, I plan to cover the first with a long fire lane, and move to the street closer to the factory when the IJA broke through.  Guess what?  The 7-0 overseeing the operation was none other than “Corporal Kwan” recently designed by the talented Sava Toufexis.

photo

Chinese GMT 7-0, “Cpl Kwan”

As it turned out Jamie was a lot faster than I expected in fighting through my retreating squads on left flank.  A dare death half squad made its début by playing dead for a while and finally snapping off its concealment and delivering point-blank fire into a stack of passing IJA squads and a 10-0 leader.  The shot wounded the 10-0 and decimated the IJA squads.  Another volley from a squad between building killed the 10-0 and further amplified the misery.  The Chinese managed to set fires to the building and woods on their left flank and routed to the row house on the right.  By that time the IJA forces had already arrived to prevent further acts of vandalism.

By mid game the IJA was in the row house along the right of the factory.  I lucked out in that the building to the left of the factory was on fire, denying its use to the IJA and making my unfortified left factory hex less of an issue.  After a few turns the IJA broke through into the factory from the right but the Chinese squads had spread themselves out on the factory floor, promising another 2 to 3 turns of close combat.  The IJA simply ran out of time.

Jamie is very strong tactically.  He’s also very fluid in his thinking, making him a very tenacious opponent.  This scenario went for 7 hours before we called it.
Round 4: J116 Brigade Hill

Vladimir See

Vlad has been ASL’r for a while.  He was one of the first guys I came into contact with when I got into ASL.  I remember one of my first chats with him was about how he felt about his Kampfgruppe Scherer purchase.

We agreed to Brigade Hill with me being the IJA.

I adopted Chris Doary’s setup.  (Erwin: Spoiler Alert .. we still got a game going, if you look you will ruin our game!  🙂 )

There were four hill tops on the map.  The Australians started the scenario owning the hill-top on the top left of the map (approached by concealed IJA at the time of the photo).  They were to control, three or more hill tops out of the possible four.

Brigade Hill

Brigade Hill

Starting from the general direction from the foxhole on the top left of the map, the Australians probed both sides of the big hill before moving onto the first hill top.  That might have burned more time than the Australians could afford.  While I had the hill top bore sighted, I forgot to use the die roll modifier in the excitement.  However when an Australian half squad, a squad, a leader and a machine gun moved into a nice clump of woods to set up a fire base on the hill-top, I remembered to spring forth a hidden IJA squad!  The IJA initial triple point-blank fire on the stack didn’t have any effect but the Australian advance fire striped the IJA.  They reduced the Australians in the mêlée and ultimately killed them all in the next close combat phase.

The Australians made a bit of headway chasing a mop of IJA half squad rabble through the woods on the right flank beyond the first big hill.  They cornered and killed off a half squad and the 9-0 IJA leader and one of the Aussie half squads went fanatic.  When the Aussie reinforcements appeared from the bottom right encircling the “bottom right hill” it looked bleak for the IJA.  The Australians who killed the IJA leader jumped another IJA half squad in close combat and got ambushed instead.  The Aussie half squad got slaughtered and I was going to infiltrate the victorious IJA half squad back closer to the “bottom right hill” but suddenly I had a thought.

I moved the IJA half squad behind the pursuing Australians.

That IJA half squad then eliminated a stack of routing Aussies!!  When the leader and a squad among the incoming Australian reinforcement broke, I double-timed a squad of IJA through the orchard behind them as well, a lone surviving Aussie squad defensive fired through the orchards but IJA squads had ever been stopped from going wherever they wanted to go.  The IJA squad was in a position to eliminate the routing Aussies against the board edge in the following turn.

The small IJA reinforcement found the Aussie foxhole on the top left guarded by a lonely squad.  They advanced up the hill and did a one hex banzai charge into the foxhole.  The “score” between the IJA and the Australians went back to 3 hill tops to 1.  The Australians had two more turns left and decided to concede.

Vlad is a meticulous and a very fair player.  Throughout the game he kept reminding me of repairs, missed negative die roll modifiers (on my shots) and (my) SAN etc.  It is an honor to play him.

(PS Vlad reminded me that I can’t boresight if the attacker didn’t start offboard.)

Later at Singapore Changi’s Airport

I wrote Don Lazov and Witchbottles, my two ASL mentors from the airport.  Don wrote back and said:

“I sincerely hope you not only had a lot of fun, learned a bunch of new things, ideas and concepts, but most important (beside/or next to having fun) made some new friends, and many memories. To me that is what ASL is really all about. Playing a great game but playing that game with great friends and making memories.”

I had seen a lot of new tactics.  Whether I had truly internalized them remains to be seen:

  • Jamie Lee’s aggressive and effective use of half squads
  • Mark Humphries’s constantly flowing half squad amoeba attack through the woods
  • Vladimir See’s tactical planning and creative movements that made great use of available cover
  • Ian Percy’s comment I overheard about him not “doing things” to his opponents but “constantly presenting tough choices to the opponent” and “making HIM do all the work”.  Given enough choices his opponent is bound to make the wrong choice and choke.
  • The power of IJA behind the enemy and the horrific efficiencies of eliminating the stacks of enemy squads for failure to route.

Quick Note to Fellow Newbies

"The Malaya Madmen" - Perry Cocke

“The Malaya Madmen” – Perry Cocke

I wasn’t going to pay for a plane ticket to go to Singapore for the Malaya Madness.  The thought of putting up the time and the expense to go to Singapore to play ASL when I can play games with anyone over VASL was simply too crazy to consider.  However, my two mentors : Don & Witchbottles both advised me to go see for myself.  My family, surprisingly was easier to convince than I myself.

My initial thoughts were :

  • I don’t know anyone there but a lot of the ASL’rs must know each other already.  They are just going to talk and to play with each other.
    NEVER HAPPENED.
  • I am just a newbie.  What’s the fun in losing all my games?
    The Tourney Director matched players based on their skill levels.  Besides, everyone I  met are a total pleasure to play with or without the competition.  
  • I played quite a few people around the world too on VASL.  I can lose games equally well on VASL without having to travel, thankyou.
    Face to Face games carries a dynamic that just doesn’t exist via other mediums.  The chatter, the shrieks, the comments, the groans and screams of delight over die rolls, make FtF experiences second to none.  Besides, it’s even more fun to play people over VASL (afterwards) when you know who they are.  

There are a lot of ASL tourneys every year.  If it’s within your realm of possibility to go, go.  Go at least once.  

And tell me how you feel.  It might just change your ASL life too.

(Journal to a Tourney, Part 1 : Decisions)

Cpl Kwan 7-0

A Moment in ASL: Imperial Japanese Army in Hand-to-Hand Combat

Dead Japanese personnel lie where they fell on...

Dead Japanese personnel lie where they fell on Attu Island after a final “banzai” charge against American forces on May 29, 1943 during the Battle of Attu. (Photo credit: Wikipedia)

So here we were, right at the opening of DB99 The Gin Drinker’s Line. Indian troops were sitting in trenches on a windy mountain pass, staring down advancing IJA troops bent on breaking through the last defence line between them and the capture of the entire Kowloon peninsula (Hong Kong).

At a particular trench, defensive fire broke and routed two Indian squads from the trenches. A squad nearby advanced into the trench hex. IJA troops kept moving in and it was too late to get into the trench. One IJA squad broke through the grain fields straight up front, our squad pinned it down with First Fire. Good. Another IJA half squad raced by to the right and Subsequent First Fire failed to bring them down. The Indian squad was now out of guns and wishing for the enemy Movement Phase to end.

From the swirling mist to the left, an IJA 8-0 leader at the tree line thrust his sword into the air and screamed : BAAAANNNNZZZZZZZAAAAAAAAAIIII!!!

Two IJA squads pour out of the forest with the 8-0, running straight for our Indian squad.  Staring Death in the eye, the Indians invoked Final Protective Fire, survived the Morale Check but failed to knock back the IJA horde.

The Indians were locked in Close Combat with two IJA squads and a 8-0. With 2-1 Hand-to-Hand odds and the IJA -1 DRM, a DR of 10 would wipe the Indians out (92% probability). Sure enough, IJA rolled a 7.

With death being a certainty, the Indians decided to take on all comers. Hand-to-Hand combat at 1-2 odds calls for a dice roll of 6. Since they were fighting the IJA, they needed a 5.

Our squad rolled 1 & 3. 

They took the 2 IJA squads and the 8-0 leader down with them.

Brian Youse pointed out the dangers of Hand-to-Hand (HtH) combat in his article “The Case for Infiltration” (ASL Journal 3).

It is not a good idea to commit too many IJA troops to a HtH combat because of the high chance of mutual destruction. In our case H-t-H allowed the “dying” Indian squad to take out 1 IJA squad with a die roll of 6 (42% probability) vs 4 in normal close combat (17%), or 2 IJA squads with a die roll of 5 (28%) vs 3 in normal close combat (8%).

This is an important note to self.

jaL80