Painting depicting Greek soldiers on bayonet charge. (Photo credit: Wikipedia)
- RPT1 (Part 1) Ferenc Jozef Barracks
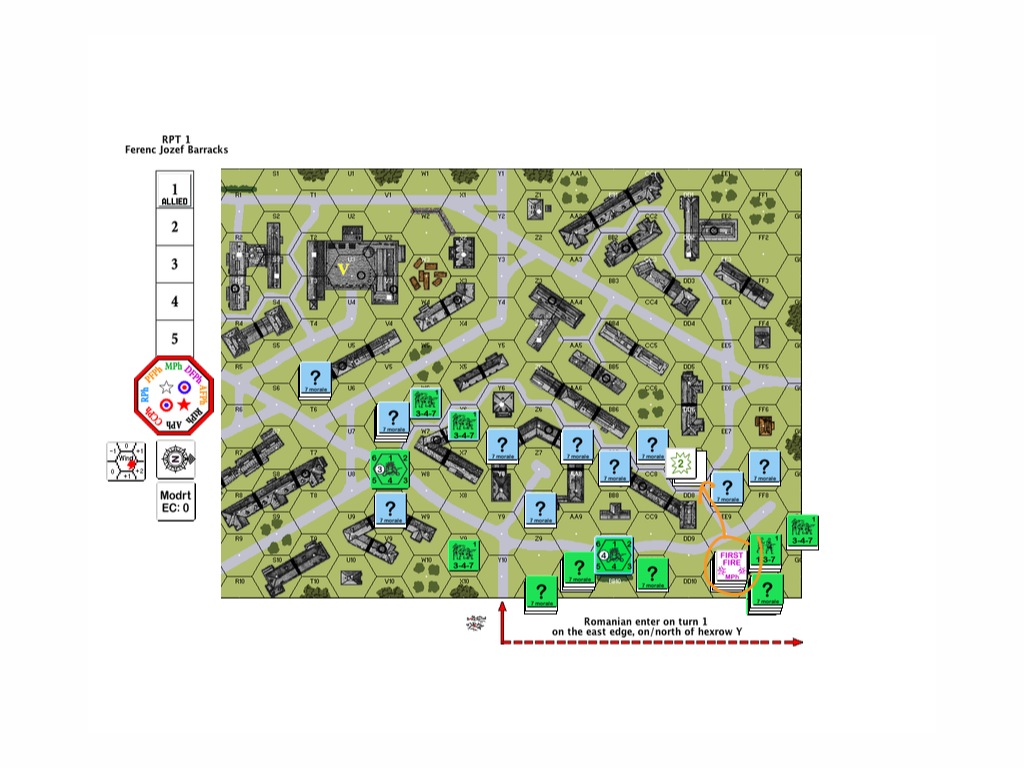
- RPT1 (Part 2) Ferenc Jozef Barracks
- RPT1 (Part 3) Ferenc Jozef Barracks

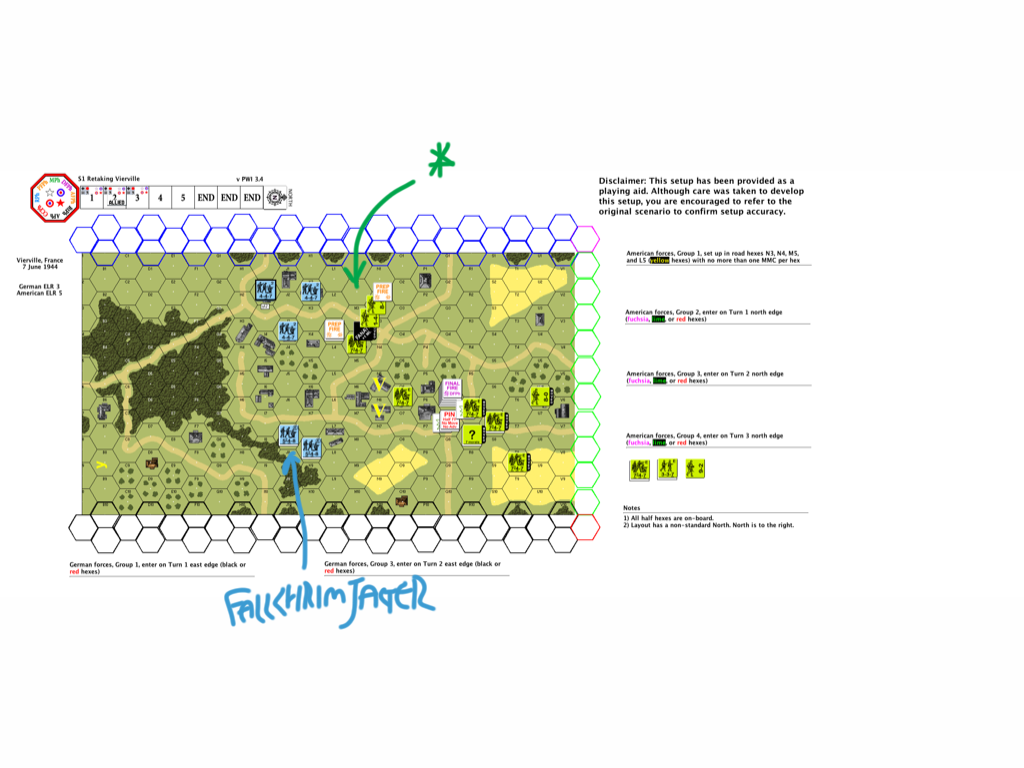
We picked the game back up at the start of the Hungarian Turn 3. For those readers who just picked this up: the Hungarians are the ones with the pretty blue rim and the Romanians are the ones without. The Hungarians were doing a fighting retreat from the bottom right of the map to the upper left. The Romanians were hot in pursuit, racing the Hungarians through the city blocks and tried to stop them from ever reaching the barracks.
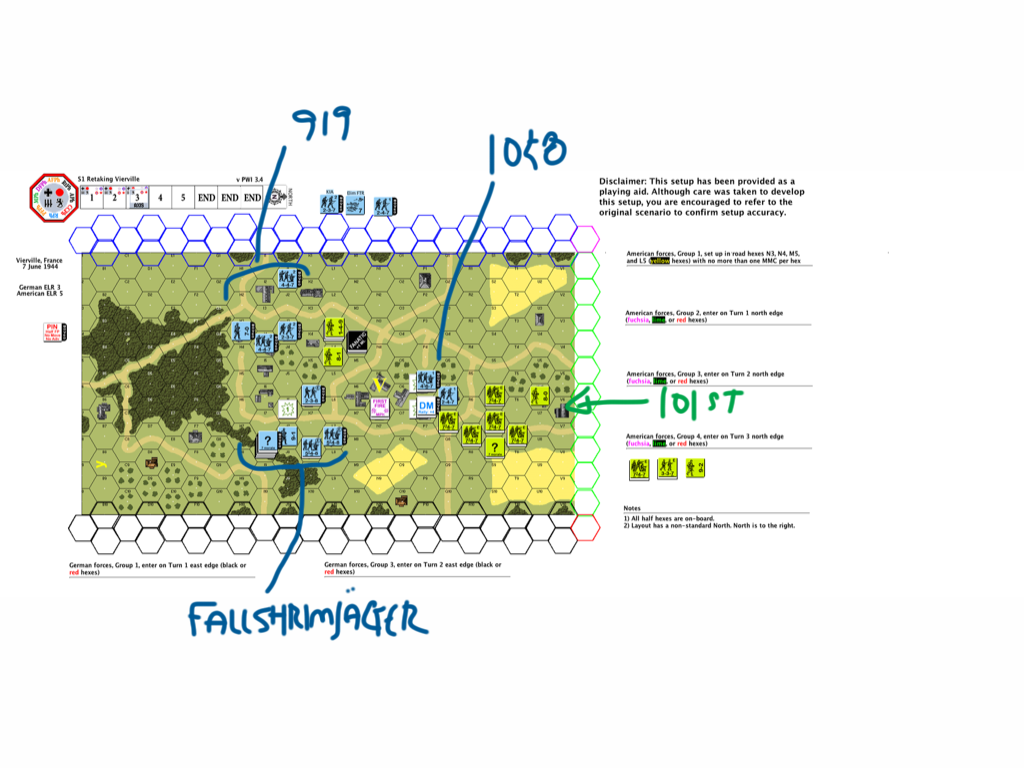
Two of the pursuing Romanian squads were ambushed by the retreating Hungarians. Luckily the Hungarians weren’t looking for a fight but took the chance to slip away instead. One of the escaping Hungarian squad even ran through a semicircle of gunfire to pull off their Houdini like escape!

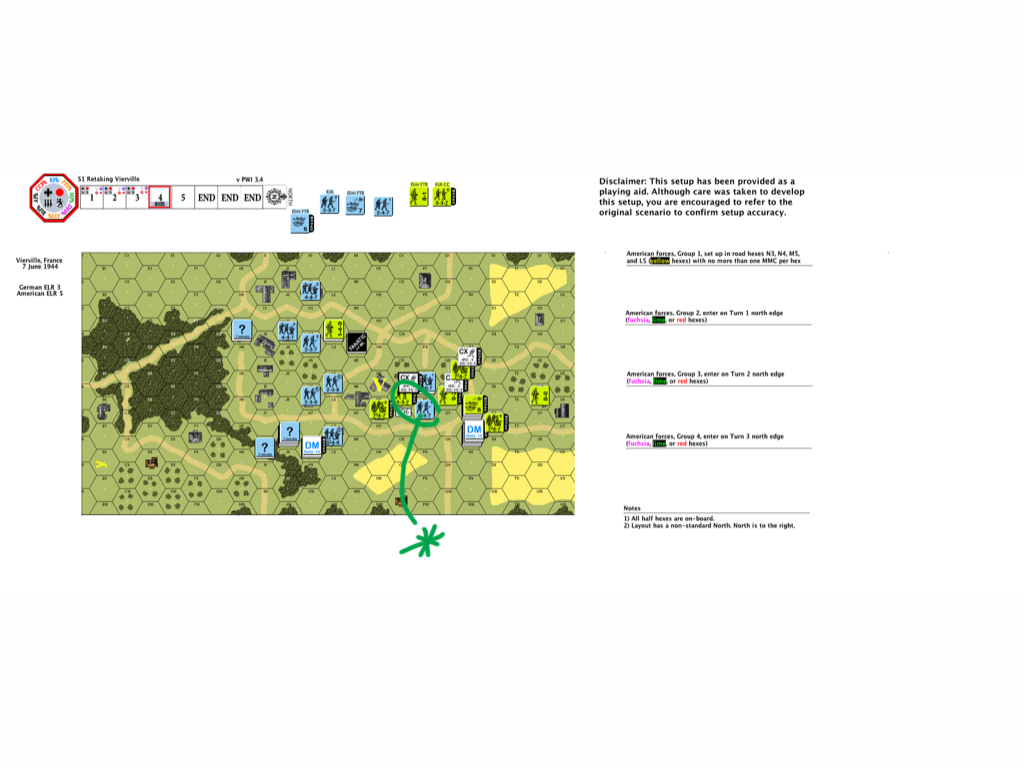
Towards the end of the Romanian Turn 4, the Romanians caught up with a few Hungarian squads again but the preference was to position themselves to cut off the Hungarians from crossing the street back into the barracks. Two of the Romanian half squads managed to slip through the Hungarians and took up a position on the side of street. The other Romanian squad locked a Hungarian squad in melee, stopping them from running back in time.

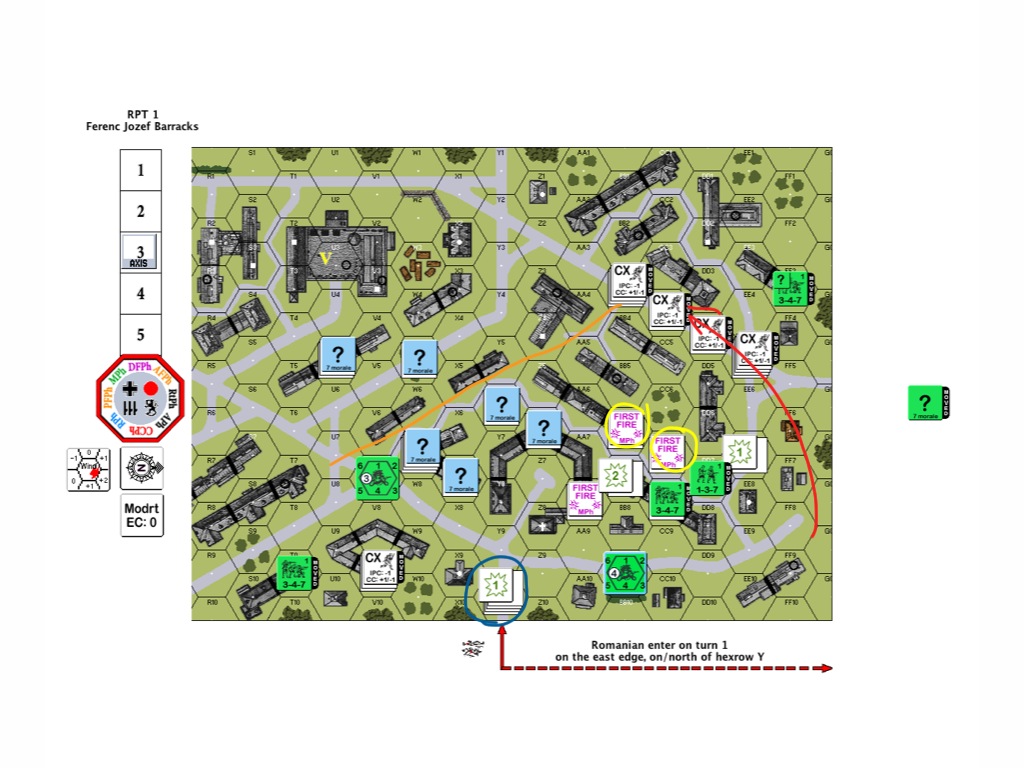
This is the start of the last Romanian turn, the last chance for the Romanians to get into, to clear and to hold onto the barracks. Some of the Hungarian troops were held back, but some managed to cross back into the barracks in spite of Romanian gunfire in the open streets. There was some pretty vicious hand to hand combat going on towards the top right of the map (“Melee”), strangers joint by an encounter by Chance and locked in perpetuity by Fate.

The Romanian 9th Cavalry poured into the streets amidst a wave of bloodcurdling screams. The heavy machine gun (under the “9-1” leader counter) was a primary concern. Some men ran to draw fire, others raced towards the barracks from all sides. A Romanian 9-2 leader and a pair of half squads managed to run six hexes through the open streets and gun fire, jumped into the barracks and killed the defenders!!

Unfortunately their sacrifices were for nought as too many of their brothers had fallen. The Hungarians folded back into the barracks in the last turn and negated the Romanian victory conditions of having to clear the structure of good order Hungarian troops. Below is the Hungarian endgame.

A couple of thoughts for the Romanian player:
- Your FP (of 3) is useless in cities. If you don’t have support weapons (most of mine malfunctioned), engage the Hungarians in CC.
- Manage your schedule, if you can’t hold the Hungarians before the barracks you need to run up there quick and have at least 2 turns to battle through the barracks. Take a count of the hexes and you will realize the Romanians truly does not have time.
- I suppose there are two approaches to this –
- Move fast and try to make the retreating Hungarian units run through streets of fire
- Go full contact and engage the Hungarians before they can break off towards the barracks.
If you happen to play this scenario as well, I’d appreciate it if you drop me a note to let me know how it went for you, especially if you played Romanian and you won!!