Learning jungle terrain in ASL153 Totsugeki is one thing. Learning about Marine Raiders in the dense jungles of Guadalcanal is another matter entirely.
This is HS8 Bailey’s Demise, from MMP’s Operational Watchtower Historical Study. The date is September 26 1943. This scenario as with the whole History Study, is centered around Guadalcanal. The river depicted on the map represents the Matanikau river. The Marine Raiders were looking to cross the river to the west bank to complete an encirclement. Unbeknownst to the Marines, the IJA had crossed the river and was on the east bank when the engagement occurred.
The Marine Raiders came in from the top left into a wholly hidden (HIP) deployment of IJA troops. The Marine Raiders, like the IJA 1st-liners, were also stealthy. They were to cross at least 6 CVP (3 squads or other combinations) to the west bank of the river in 7.5 turns.
All interior jungle hexes are dense jungle. All jungle hexes next to non jungle hexes are light jungles. The difference being while light jungle are similar to woods, dense jungle has a terrain effect modifier (TEM) of 2, does not permit fire groups and allows a stacking limit of only two. This map’s marked with “crags” (4 point stone formations) merely to remind ourselves that the marked hexes were dense jungles.
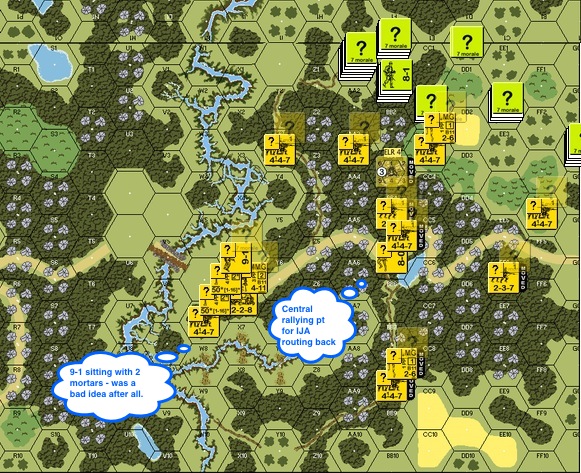
The map above was my IJA setup, units unhidden for your perusal. The mortar team down on the bottom left was largely ineffectual against American counter-battery fire. I should have spread them out.

This was the Marine Turn 2. The Marine made contact with the defenders and withstood IJA fire rather well. Taking the risk to move in stacks (given the +2 cover of the dense jungle) their Advance Fire was devastating round after round for the IJA. The IJA looked to block the Marines as much as possible, rout back (squads breaking “automatically” into half squads in the process) when in doubt and take advantage of their leader’s “Commissar-like” ability to rally them without (DM) penalty.
As I expected, the Marines avoided the bamboo patches on the right and came in from the top down.
Please keep in mind that IJA counters in faded yellow were hidden units that the Marine player couldn’t see.

This is the IJA Turn 2. Some of the frontline IJA routed back. The IJA mortar team on the left was completely shot up.
American Turn 3. The rallied IJA put up a fight in face of the advancing Raiders.
IJA Turn 3. The IJA rallied and reconstructed a respectable line of defence. In retrospect this approach didn’t work well. The IJA, even concealed, could hardly withstand the withering Marine gunfire. Perhaps a better strategy is to pair up the half squads. One half squad would go aggressive, knocking off US concealment counters and drawing fire. The other concealed half squad will close and either hope for an ambush in close combat.

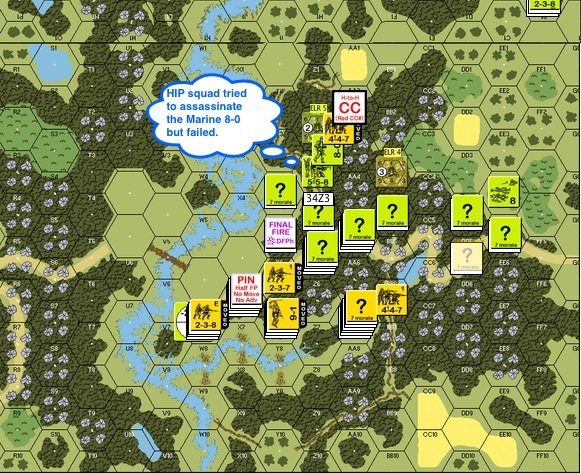
Talking about close combat, the Marines with their overwhelming firepower are deadly in normal CC (plus the IJA has no favorable modifiers). Here you have a HIP squad that sprung out in the hopes of assassinating the Marine 8-0, they were promptly killed in CC.
I should have avoided normal CC with Marines to start with. Hand to Hand (HtH) combat, when done with sufficiently lopsided odds (IJA half squad vs one or two Marines squads) offer a good trade for the IJA since the results of most are mutual annihilation! Other than that, I should have ran!
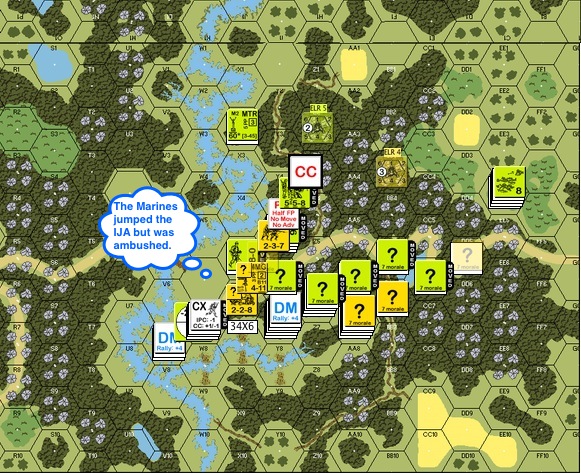
Marine Turn 4 : here you can see how the Marines were already crowding the last passage way towards the river. A Raider squad jumped a concealed IJA half squad and was ambushed and killed. That was unfortunately the only time when close combat went happily for the IJA in this game!

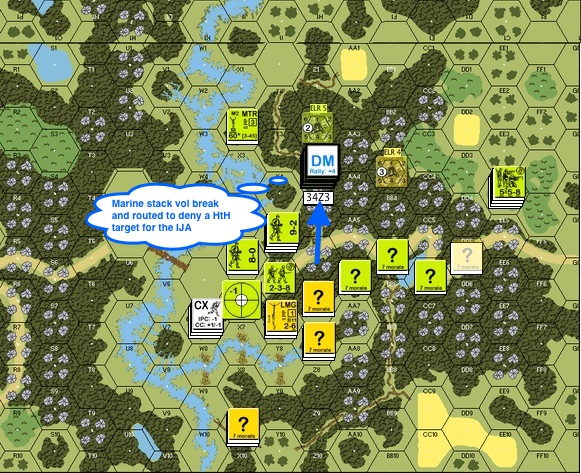
IJA Turn 4 : The situation doesn’t look good for the IJA but they were still fighting hard. Here you can see a Marine stack breaking voluntarily and routing away from possible IJA close combat. Here’s a thought : had I not used the hidden IJA units in close combat, they could have sprung up now and kill the whole stack!

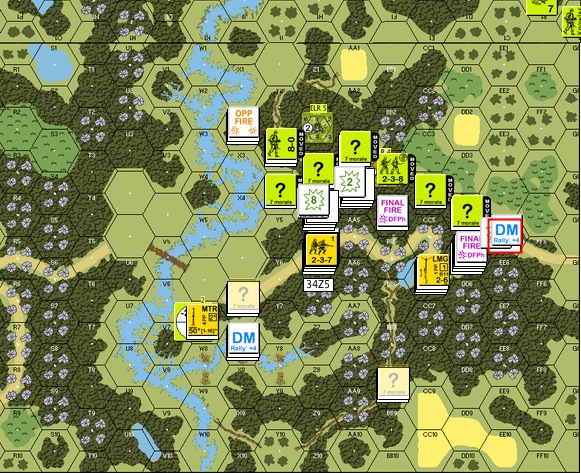
Marine Turn 5: the Marines started to cross the river!! A repositioned IJA machine gun put the west end of the bridge squarely in its sights but it couldn’t stop the flow.

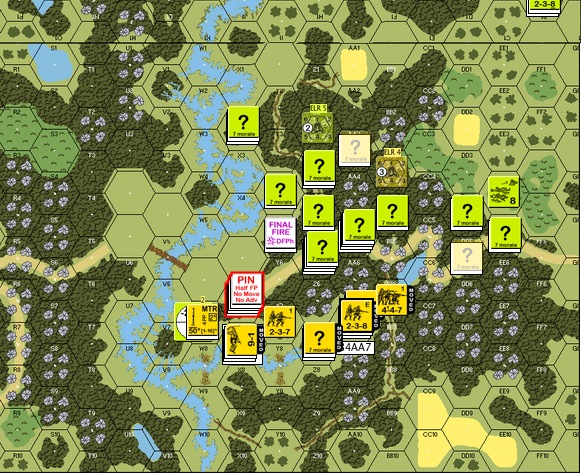
IJA Turn 6: This was how it ended for the IJA, decimated and encircled.
The next time I play as the IJA against Marines, I will try :
- Using my HIP units largely for cutting rout paths.
- Pair up units (half squads), keep one concealed and use one for knocking off enemy concealment, with the hope of trading half squads for bigger stacks of Marines in hand-to-hand combat.
- Rush IJA squads through openings created by successful hand-to-hand combat and go for encirclement
- I thought of stacking IJA units to give them heavier fire power since I can’t create fire groups in dense jungles but I think that will just create bigger targets for blistering Marine firepower.
- While retreating and blocking as the IJA might be a good idea at times, I should keep at least a 1 hex distance from the Marines. That way the Marines would need to use advancing fire against my concealed units.
- What happened to Banzai charges?
What’s your experience with fighting cardboard Marines in the jungles? What are your thoughts?
 I finished 14 scenarios this year and won 5 of them. I also finished the BFP Objective: Schmidt CG, done the first CG “day” in Suicide Creek and the 2nd CG Assault Period (Night) in Gavutu-Tanambogo.
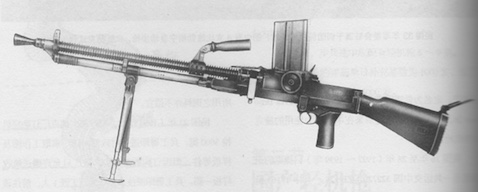
 The LMG counter artwork is for the ZB-26, probably the most common weapon.